


Outdoor Fix-Ups: Tidying Up Paving and Pathways
Looking for a weekend job that will have your home looking the goods? Try re-pointing or re-laying uneven pathways and tidying the surrounds
Kerryn Ramsey
21 May 2016
Houzz Australia Contributor. Freelance lifestyle journalist and serial renovator, reporting for print and digital articles on architecture, design, travel and business.
Houzz Australia Contributor. Freelance lifestyle journalist and serial renovator,... More
Beautifully maintained pathways give your home a sense of elegance and care. They define the outdoor area with neat, clean lines and even surfaces. If your pathways are looking a little untidy and unloved, there are a few quick tricks to make them look like new again.
Remove weeds
WHAT YOU’LL NEED: Weed killer, protective gloves and glasses
HOW TO: Weeds are tenacious plants that will take root at the slightest opportunity, particularly in cracks between paving stones. They make an area look uncared for and untidy so need to be removed permanently.
There are two options:
1. Get down on your knees and pull them out by hand, ensuring the entire root system is removed.
2. Use a weed killer (containing glyphosate) and spray liberally on all weeds. Make sure to wear protective gloves and glasses. Apply when there’s no rain forecast and no animals or children scheduled to play outside. The weed killer will destroy the entire plant – roots and all.
AVERAGE TIME: 30 mins for an average-sized area
See more garden paths
Quick clean-up
WHAT YOU’LL NEED: Broom, hose, liquid pool chlorine, water pressure gun
HOW TO: Sweep pavers and paths with a stiff-bristled broom to get all the loose debris off the surface. Use a hose to moisten the entire area. Fill a bucket with five parts water to one part liquid pool chlorine. Use the broom to scrub down the entire area, ensuring the chlorinated water does NOT run into the garden. Use a hose to rinse with fresh water.
If pavers are still looking a little dirty or mouldy, use a low-pressure water jet to clean the pavers. Start at the highest part of the slope so the water runs away from the cleaned area.
AVERAGE TIME: A couple of hours for the full cleaning process

Get the level right
WHAT YOU’LL NEED: Coarse sand, fine sand, pry bar, tamper tool, rubber mallet, hose
HOW TO: When one or more pavers have settled below the line of the others, it’s a fairly easy job to even things up. Use a pry bar to gently lift the paver and remove it completely. Sprinkle coarse sand into the hole until it’s level with the bottom of the surrounding bricks. Tamp (pack) down the sand and add more if necessary. Drop the paver into position. If it’s a little high, use a rubber mallet to tamp it down. Sprinkle fine sand around the paver and use a broom to brush it into the surrounding spaces. Water lightly with a hose.
AVERAGE TIME: 30 minutes per paver
Replace pavers
WHAT YOU’LL NEED: Pry bar, tamper tool, rubber mallet, trowel, coarse sand, replacement paver
HOW TO: When a paver is broken, chipped or permanently stained it should be replaced. Hopefully, you have a few extra pavers put aside from when the path or area was first laid. If not, contact the supplier about matching a replacement piece. Remove the broken paver with a pry bar and sprinkle coarse sand into the hole. Tamp it down until level and slide in the replacement paver. Use a rubber mallet to firmly bed the paver.
If the paver has a random shape (usually positioned in a pathway), a trowel can be used to make the hole a perfect fit.
AVERAGE TIME: 30 minutes
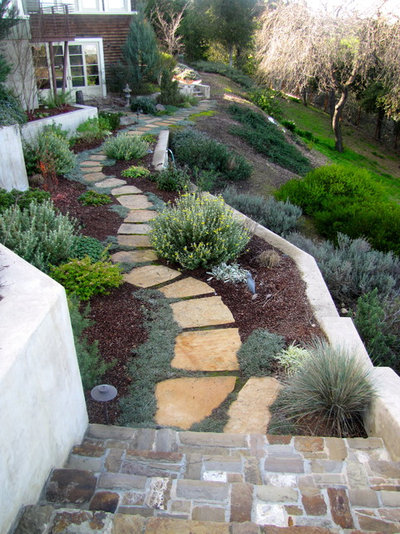
Laying stepping stones
WHAT YOU’LL NEED: Pry bar, tamper tool, rubber mallet, trowel, coarse sand, replacement paver
HOW TO: When a paver is broken, chipped or permanently stained it should be replaced. Hopefully, you have a few extra pavers put aside from when the path or area was first laid. If not, contact the supplier about matching a replacement piece. Remove the broken paver with a pry bar and sprinkle coarse sand into the hole. Tamp it down until level and slide in the replacement paver. Use a rubber mallet to firmly bed the paver.
If the paver has a random shape (usually positioned in a pathway), a trowel can be used to make the hole a perfect fit.
AVERAGE TIME: 30 minutes
Laying stepping stones
Freshen up the zone
WHAT YOU’LL NEED: Leaf blower, water pressure gun, rake, a few bags of replacement material
HOW TO: If your pathway consists of crushed gravel or pebbles, it can start looking a little discoloured and thin in places over time. A leaf blower will remove leaves and debris and a pressure-jet washer will eliminate mildew and most stains.
To really make your pathway look good, refresh the area with a few bags of matching pebbles or gravel. Simply pour them onto the pathways and spread around with an old rake.
AVERAGE TIME: 1 hour

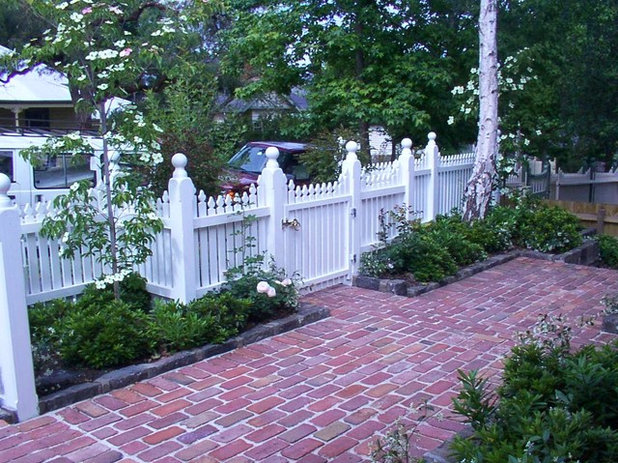
Define the edges
WHAT YOU’LL NEED: Edging stones, shovel
HOW TO: A great way to update the look of a pebble or gravel pathway is to define the edges. The placement of large rocks, bricks or paving stones along the path creates an attractive edge and stops the pathway material from being spread around the garden. Use a small shovel to dig a shallow trench along the edge of the pathway. Position the edging stones in the trench and build up the area on the garden side of the edging material with the excavated soil.
AVERAGE TIME: Half a day to a full weekend
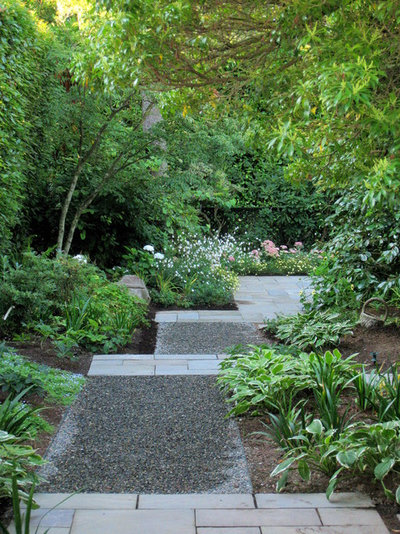
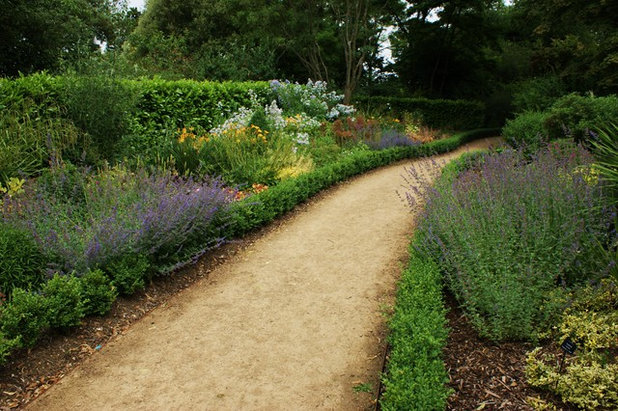
Improve the planting
WHAT YOU’LL NEED: Pot plants, shovel, hose, mulch
HOW TO: Bringing plants right up to the edge of a pathway softens the edges and integrates the path into the garden. Small ferns and succulents work well in this position. Take a trip to the nursery and load up on your favourite potted plants. Each plant needs a hole in the garden that is the same depth as the pot but twice as wide. Remove the plant from the pot and place in the hole. Use your hands to tamp in the soil previously removed from the hole. Water well and add a layer of mulch around the base of the plant.
AVERAGE TIME: 20-30 minutes per plant
What to plant along pathways
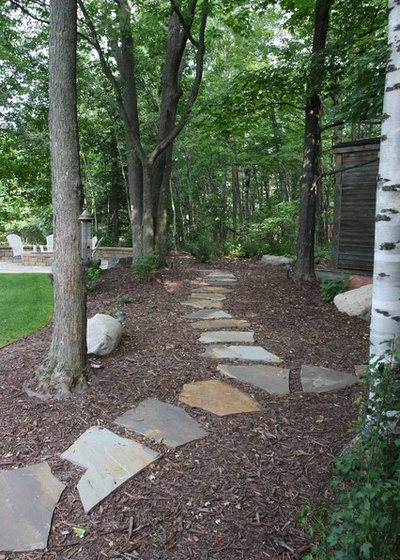
Don’t forget the mulch
WHAT YOU’LL NEED: Mulch, wheelbarrow, buckets, rake
HOW TO: Mulching along a pathway allows the shapes of the stones to come to the fore. If there are plants beside the pathway, mulching assists them in retaining water while suppressing weeds. Ensure the area about to be mulched is weed free and use a wheelbarrow or buckets to position the mulch along the sides of the pathway. Evenly spread the mulch using a rake so that it is at least three centimetres thick.
AVERAGE TIME: A couple of hours
TELL US
Have you recently fixed up a garden path? Upload a photo of your handiwork in the Comments section below.
MORE
How to Choose the Right Garden Edging for Your Outdoor Space
Let Houzz Lead You Up the Garden Path
Outdoor Surfacing Ideas With a Difference

Related Stories
How Do I...
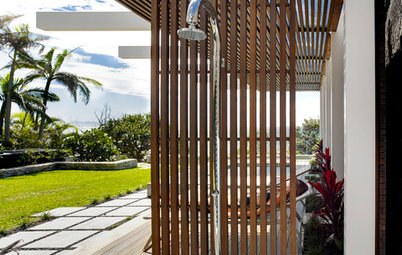
How Do I... Set Up an Outdoor Shower?
An outdoor shower is not only practical, but a pleasure to use – read on for tips about creating the perfect design
Full Story
Outdoors
Summer Lovin': Declutter Your Outdoors in Time for Party Season
By Amy Revell
It's time to prepare your backyard and garden for a great summer of parties, relaxing and family fun
Full Story

Outdoor Areas
12 Great Ideas for Outdoors From Best of Houzz Award Winners
By Houzz AU
Parquet-style flooring, hammock-inspired nets and creative planting pockets: these outdoor spaces have us hooked!
Full Story
Picture Perfect
30 Tranquil Water Features to Soak Up
Our coffee-break escape offers you five minutes' worth of images to inspire and delight. Jump right in...
Full Story

Outdoor Projects
How to Clean Outdoor Furniture and Soft Furnishings
Wondering how to clean different types of outdoor furniture, cushions, rugs and umbrellas? Read on for all the answers
Full Story
Picture Perfect
20 Subtle and Sophisticated Designs for Garden Sheds
Our coffee-break escape offers you five minutes' worth of images to inspire and delight. Jump right in...
Full Story
Balconies
10 Beautiful Balconies and Terraces From Around the World
By Houzz AU
Get inspired by some of last year's most enviable balconies, decks and patios for cosy winters or summer daydreams
Full Story
Outdoor Areas
Winning Balcony Gardens: Small Spaces, Big Impact
Be inspired by these two award-winning balcony gardens from the 2022 Melbourne International Flower and Garden Show
Full Story
Houzz Around The World
USA Before & After: A Covered Deck Becomes a Glassed-In Retreat
By Becky Harris
A building designer blocks wind gusts with a sleek new design to extend porch time for these Seattle homeowners
Full Story
Most Popular
12 Ways to Design a Low-Maintenance Garden
See 12 ways to design and plan your garden to spend less time working on it and more time enjoying it
Full Story
I have paths that are loose fine stones and that, over time, have become mixed with mulch, leaves and twigs as bits fall from trees and birds dig through it. Does anyone have a suggestion for a fix?
Thanks for this article - very informative and very timely.
A big Thank You from Miller Creek Lawn and Landscape to Houzz for featuring one of our pathways!