
11 Christmas Advent Calendars to Craft at Home
'Tis the season to get crafty with these easy-to-make decorative projects

Advent calendars are a Christmas staple in many households, but as the store-bought variety can often leave much to be desired, why not create your own? Easily adaptable to your preferred colour schemes, these projects will bring a splendidly personal element to your Christmas decor.
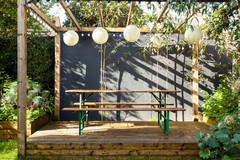
You’ll need: 24 envelopes, a large sheet of sturdy card or mount board, numbered sticker labels or sticky dots and a nice marker, greeting or index cards to fit envelopes (if using), glue or double-sided tape and a small selection of ornaments (or make your own with origami paper).
How to make: Start by evenly laying out your envelopes on the card or mount board. Once happy with your arrangement, secure in place with glue or double-sided tape. When dry, fill your envelopes with your chosen treats or cards, and secure closed with numbered stickers. Complete your project by adorning the envelopes with a few select decorations – consider a festive bell or a sparkly bow. For an ultra-elegant look, keep your calendar white, as seen here, or go glam with metallic envelopes and baubles.
How to make: Start by evenly laying out your envelopes on the card or mount board. Once happy with your arrangement, secure in place with glue or double-sided tape. When dry, fill your envelopes with your chosen treats or cards, and secure closed with numbered stickers. Complete your project by adorning the envelopes with a few select decorations – consider a festive bell or a sparkly bow. For an ultra-elegant look, keep your calendar white, as seen here, or go glam with metallic envelopes and baubles.
2. Charming and whimsical
This project takes the calendar off the wall, creating a table-top centrepiece or mantle landscape, an adorable finishing touch for a traditional Christmas.
You’ll need: Sturdy cardboard, a cutting mat, craft knife, tape, glue, decorative paper, adhesive numbers, stickers, glitter paint and small tabletop ornaments.
How to make: Using the sturdy cardboard, cutting mat, knife and glue or tape, construct 24 cubes and house-like boxes. Search for free, printable craft templates to help. Once constructed, decorate each box with stickers, glittery paint and different decorative papers, and mark each box with a small adhesive number. Make sure you slip a treat inside each box before sealing completely. Arrange the boxes into a miniature Christmas village on a mantle, sideboard or as a table centrepiece. Don’t forget to add some extra Christmas cheer with a few ornaments, such as reindeer and elves.
3. Quick and quirky
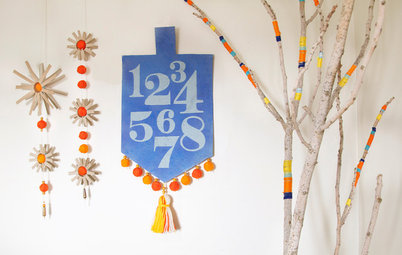
This project can be a last-minute addition to your yuletide mantle. It is quick and easy to make without the need for any sticky glues.
You’ll need: A large stick or length of dowel, paint or ribbons to decorate the stick (if desired), ribbons cut to various lengths, small gift bags, squares of decorative paper, a hole punch, number stencils and markers.
What’s your Christmas decorating style?
How to make: Decorate the stick as desired, by painting or wrapping with an array of ribbons, as seen here. Place advent goodies inside the gift bags and tie shut using ribbons.
Stencil numbers onto the decorative papers and hole punch a single hole in each square. Thread the numbered paper squares onto the ribbons attached to the bags. Tie the gift bags to the stick before hanging from your mantle. For a more pared-back aesthetic, try brown paper gift bags and brown string instead of ribbon.
Stencil numbers onto the decorative papers and hole punch a single hole in each square. Thread the numbered paper squares onto the ribbons attached to the bags. Tie the gift bags to the stick before hanging from your mantle. For a more pared-back aesthetic, try brown paper gift bags and brown string instead of ribbon.
4. Rustic and recycled
This calendar is has a rustic feel that makes use of recycled materials, which is perfectly suited to an informal Christmas affair.
You’ll need: 24 different tin cans (washed and with labels soaked off), a selection of washi tape or decorative paper, spray adhesive, sticky numbers, wood offcuts, wood glue, small nails, hammer, hot glue gun, scissors, and tissue paper.
Brighten a holiday home, Scandinavian style
How to make: Start by beautifying the tins with washi tape or decorative paper secured with adhesive spray, or try a combination of both. Washi tape in particular is easy to apply and a great way for kids to get involved. Finish the tins by attaching the sticky numbers.
Assemble the wood offcuts into a tree formation and attach using wood glue and nails for extra strength and longevity. Once the tins are dry and the wood formation is secure, attach the tins to the tree using a hot glue gun. Wrap your chosen treats in tissue paper and place inside the tins. If you don’t have wood offcuts handy, most large hardware suppliers will cut timber to size. Try using pine with a wood stain or polish to achieve a similar, rustic look.
Assemble the wood offcuts into a tree formation and attach using wood glue and nails for extra strength and longevity. Once the tins are dry and the wood formation is secure, attach the tins to the tree using a hot glue gun. Wrap your chosen treats in tissue paper and place inside the tins. If you don’t have wood offcuts handy, most large hardware suppliers will cut timber to size. Try using pine with a wood stain or polish to achieve a similar, rustic look.
5. Cute and crafty
For a small-space alternative to a Christmas tree, try this tree and calendar in one. It’s easy to assemble and a great project for little elves to help with, with lots of paddlepop sticks to be painted and glued.
You’ll need: Gather about 30 paddlepop sticks, green and silver spray paint (or use acrylic paints and brushes if kids are helping), sticky-backed gems, 24 small gift boxes, twine and ribbon (red or whatever suits your colour scheme), glue (preferably a hot glue gun or strong craft glue), and a calligraphy marker to number boxes.
How to make: To start, paint four of your paddlepop sticks silver for the calendar’s star and at least 26 sticks green for the body of the tree, or more if you’re making a larger-scale calendar. Allow the paint to dry completely.
While the paddlepop sticks are drying, start assembling the miniature gift boxes. Write numbers on the front of the boxes using a calligraphy marker or use a stencil if you prefer. Fill the boxes with your desired treats before closing and secure by tying a bow around each box with ribbon.
Once the paint on the paddlepop sticks is dry, lay out the star and tree and glue together. Allow the glue to dry completely before hanging the miniature gifts from the tree. Finish by adding gems to the star.
This calendar is as cute as can be in traditional Christmas hues, but don’t be afraid to experiment with a variety of gift-box colours and different twines for a technicolor take on your advent project.
6. Handsome and handmade
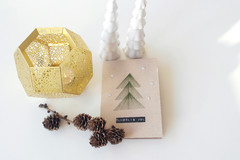
This creative approach to an advent calendar has a pleasantly handmade feel and is perfect for those averse to conventional Christmas decor. This is a decidedly minimal DIY effort for maximum impact.
You’ll need: Sturdy decorative paper, number cutouts or gold paper and stencils, glue or double-sided tape, scissors and pins or tacks.
How to make: Cut the decorative paper into 24 rectangles approximately 15 x 30 centimetres. Fold each rectangle leaving a slight overhang along the short edge, and secure the sides using glue or double-sided tape to form envelopes. Adhere numbers to the front (longer side) of your ‘envelopes’.
Slip lightweight treats into the paper parcels and attach them all to a noticeboard or lightly tack to the wall. Alternatively, the envelopes could be pinned or stapled to a sheet of foam board or mount board. This advent calendar would work well with inspirational quotes for each day, or small treats like individually wrapped after-dinner mints.
Slip lightweight treats into the paper parcels and attach them all to a noticeboard or lightly tack to the wall. Alternatively, the envelopes could be pinned or stapled to a sheet of foam board or mount board. This advent calendar would work well with inspirational quotes for each day, or small treats like individually wrapped after-dinner mints.
7. Cheery and colourful
An excellent DIY option for kids, this project is worth investing a little extra time in as it will surely become a favourite for many festive seasons to come. It is simply adorable in a children’s room, but would just as easily add playful accent to the family or dining room.
You’ll need: Felt or sturdy printed cotton in different colours, thick ribbon, needle and thread or a sewing machine, embroidery thread, paper and pencil.
How to make: Using the paper and pencil, draw out a few different-sized stocking-shaped templates. Use these templates to cut the felt into 24 pairs of stocking shapes. Using either a sewing machine or needle and thread, sew the paired stocking shapes together, leaving the top end of each stocking opened. Stitch numbers onto one side of each stocking using the embroidery thread. Attach a short length of ribbon to each stocking with a few strong stitches.
Lay out the stockings along the length of ribbon and once you’re happy with the arrangement, tack the short ribbons onto the lengthier ribbon. Hang for display, as you would bunting, before tucking treats inside the stockings.
Lay out the stockings along the length of ribbon and once you’re happy with the arrangement, tack the short ribbons onto the lengthier ribbon. Hang for display, as you would bunting, before tucking treats inside the stockings.
8. Sweet and sparkly
A sophisticated, understated variant of the colourful felt stockings above, this calendar could provide a delightful, twinkly background to night-time Christmas occasions.
You’ll need: Calico, a string of fairy lights, needle and thread or a sewing machine, paper and pencil, and a permanent marker.
How to make: Follow the same directions as the felt stockings, adding numbers to each calico stocking using a permanent marker. Instead of attaching the stockings to ribbon, loosely stick the calico stockings to the fairy lights. Be sure to loop thread around the wire; do not stick through the lighting cord. For extra portability and flexibility, use a battery-powered string of lights.
9. Big and bold
Another quick and easy option, this calendar is excellent for larger families as the bags can easily hold enough treats for everyone. With very few steps, this calendar will be up on the wall in no time.
You’ll need: 24 medium-sized, drawstring calico bags, different coloured adhesive letters or fabric paint and stencils, cord or strong ribbon and removable wall hooks.
How to make: Adhere numbers to the bags or use stencils and paint each bag. Fix hooks to the wall and suspend the cord or ribbon between them. Fill each bag with enough treats for each family member and draw closed before tying them along the suspended cord. For some extra Christmas cheer, hang decorations along the cord between each bag.
10. Fresh and funky
This minimalist version of an advent calendar will be right at home in a contemporary interior. It is a wonderful option for renters as it needn’t be fixed to the wall. And while this calendar is effortlessly chic in all white, you could try painting the canvas in a bright shade (think candy pink or lavender) to make a feature in a minimalist interior.
You’ll need: Large canvas, paint, number stencils, a pencil, 24 paper bags, decorative twine, pegs or clips, 24 clear hooks and a hot glue gun.
How to make: Start by spacing out the numbers on the canvas. You can use very light pencil outlines to do this or judge by eye. Follow by stencilling numbers onto the canvas using paint.
While the paint dries, construct the advent parcels. Place treats inside the bags before folding over and securing with the decorative twine so they resemble small presents. Peg or clip the top of each. Using a hot glue gun, attach clear hooks to the canvas just above each number. Allow the glue to dry for a minute before hanging each paper parcel off the hook either by its peg or the open end of the clip.
While the paint dries, construct the advent parcels. Place treats inside the bags before folding over and securing with the decorative twine so they resemble small presents. Peg or clip the top of each. Using a hot glue gun, attach clear hooks to the canvas just above each number. Allow the glue to dry for a minute before hanging each paper parcel off the hook either by its peg or the open end of the clip.
11. Fun and easy
A great alternative for those without the space or inclination for a tree, this calendar offers somewhere to hang decorations without the hassle of sap and pine needles.
You’ll need: Green gardening wire, thinner pliable wire, wire cutters, small S hooks or large paper clips, 24 small gift boxes of varying sizes, wrapping paper, decorative twine, ribbon, ornaments, tape, and a mount board if you are concerned about attaching this directly to the wall.
How to make: Start by placing your advent treats in small gift boxes and wrapping them in paper. Finish by tying bows under the wrapped boxes with the decorative twine.
Shape the green gardening wire into a long triangle, loosely resembling the outline of a tree, as seen here. Twist the ends to secure and tape down if concerned about any sharp edges. To complete the tree structure, use the pliable wire to create horizontal lengths across the triangle. Fix the pliable wire to the green gardening wire, taping again where necessary.
Gently loop the S hooks or paper clips through the twine on your tiny advent presents and hang them from the horizontal wires. Follow with your decorations and finish with a flourish of festive bows around the green gardening wire. For an extra sparkly touch, try a string of battery-powered fairy lights woven through the wires. You could also consider buying fun-sized boxed chocolates and wrapping these, rather than placing treats inside gift boxes.
TELL US
Which is your favourite advent calendar? If you make one, what kind of treats will you fill it with? Share your ideas in the Comments below.
MORE
Try your hand at one these many DIY projects


This advent calendar is a restrained, modern take on the festive standard. Endlessly customisable, you can match or contrast your Christmas colour palette with different-coloured envelopes, mount board and decorations. Instead of cheeky treats, fill your envelopes with suggestions for enjoyable tasks or family activities, such as walking the dog or playing a board game.