Decorating
11 Top-Shelf Ways to Dress Up Your Bookcase
See how to turn a boring old bookcase into a standout display with these simple styling ideas

Beautifully decorated bookshelves can be one of the best ways to show your personal values, memories and individual style. However, dressing so many individual shelves can easily start to feel overwhelming. To help you tackle even the tallest bookcase, here are 11 tips on how to decorate a bookshelf.
2. Break it up
For variety, the next step is to add some objects that aren’t books. This really can be anything, but since they’ll be on display, they should be attractive and not just any old items you need to store. Boxes, jars and the like can play multiple roles by adding visual interest, acting as bookends and creating practical storage.
Mastering the art of the shelfie
In the kitchen, break up your cookbooks with items like serving or mixing bowls, jugs and decanters, or even stacks of plates or glasses – any attractive items that are also useful to have on hand. Just don’t lean books on them if you often need to pull those items out, as you’ll be dealing with a landslide of books every time you reach for that bowl or pot.
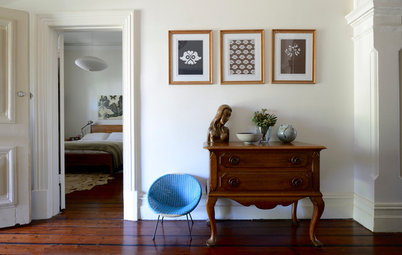
3. Rotate another way
Besides having some items sitting upright and some on their side, it also helps to create interest by having some pieces facing out towards the viewer. This is where framed photos and art come in. You can stack smaller frames on top of a book, or let a frame take up a large area of a shelf by itself.
Besides having some items sitting upright and some on their side, it also helps to create interest by having some pieces facing out towards the viewer. This is where framed photos and art come in. You can stack smaller frames on top of a book, or let a frame take up a large area of a shelf by itself.
You can also create this effect by simply leaning some of your more attractive books against the back wall of a bookshelf, facing forward. A shelf with a front lip will keep them in place, or you can add tiny pushpins in front of a book if you don’t want to risk having an item slide out.
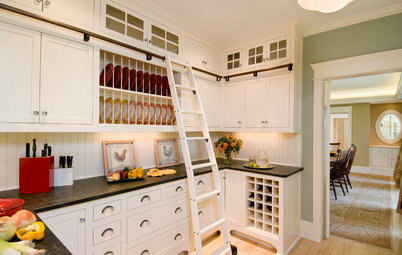
4. Raise and lower
To create variety in the shelves themselves, try including shelves of different heights. This is especially easy with adjustable shelves, where you can make each shelf a little shorter or taller than the others. Use an especially deep shelf at the bottom as a visual anchor, and another one near the middle to display large feature items.
To create variety in the shelves themselves, try including shelves of different heights. This is especially easy with adjustable shelves, where you can make each shelf a little shorter or taller than the others. Use an especially deep shelf at the bottom as a visual anchor, and another one near the middle to display large feature items.
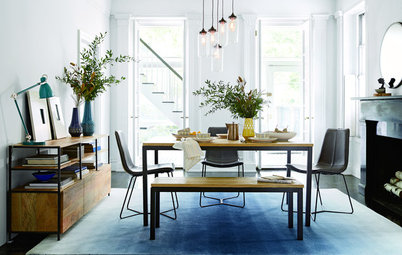
5. Repeat and spread out
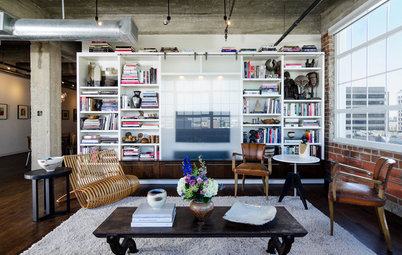
The more items you have on your shelves (and the more shelves you have), the more you should try to repeat some similar groupings and elements. Notice how in this arrangement some shelves have mostly books, and others have several vases. These different groupings, as well as the colours in them, are echoed in different places so nothing feels totally out of place or lopsided.
The more items you have on your shelves (and the more shelves you have), the more you should try to repeat some similar groupings and elements. Notice how in this arrangement some shelves have mostly books, and others have several vases. These different groupings, as well as the colours in them, are echoed in different places so nothing feels totally out of place or lopsided.
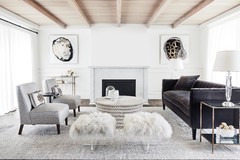
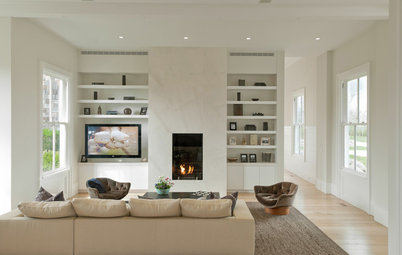
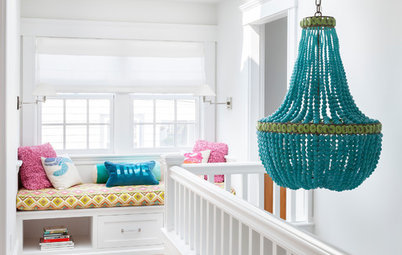
6. Embrace negative space
Of course, the fact that you may have many shelves available does not mean that you have to pack them all full. Including fewer items, even leaving some shelves totally empty, will make the pieces that are there feel more special, and will result in an airier look.
Of course, the fact that you may have many shelves available does not mean that you have to pack them all full. Including fewer items, even leaving some shelves totally empty, will make the pieces that are there feel more special, and will result in an airier look.
This can be quite a relief when you have some very high shelves that aren’t easy to reach or don’t fit much. You can leave them totally empty, especially if you leave some negative space below as well. The overall look will feel tidy and breezy, and you won’t be stuck grabbing a ladder to pull down a book you need. Adding texture or colour to the back wall of your bookcase, such as with timber panelling or a patterned wallpaper, will help make this negative approach even more impactful.
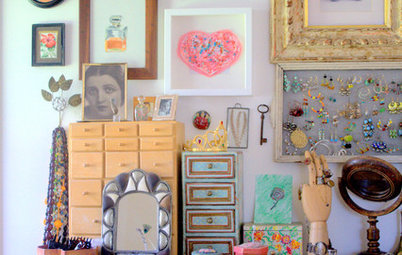
7. Create squares
To spread out groupings of items and create orderly negative space, it can help to imagine sets of squares as boxes, whether they physically exist or not.
Notice how in the space seen here, the shelves on the right form squares. The top wide shelf is not divided into squares, but the items on it still have breathing room, as though vertical dividers are between them. Spacing items out this way creates a sense of rhythm and structure even for wide-open shelves.
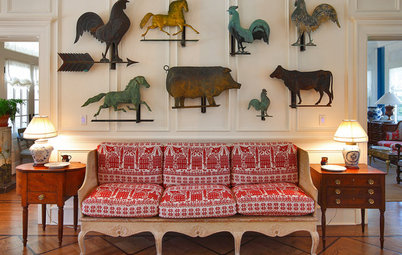
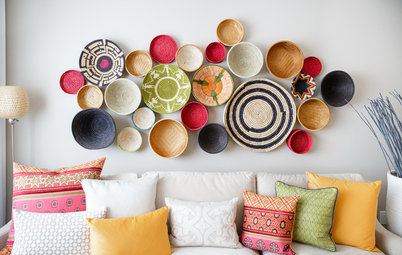
14 weird (but wonderful) wall displays
To spread out groupings of items and create orderly negative space, it can help to imagine sets of squares as boxes, whether they physically exist or not.
Notice how in the space seen here, the shelves on the right form squares. The top wide shelf is not divided into squares, but the items on it still have breathing room, as though vertical dividers are between them. Spacing items out this way creates a sense of rhythm and structure even for wide-open shelves.
14 weird (but wonderful) wall displays
These smaller shelves also show this idea in action. The eight shelves are visually broken into roughly 16 squares. You can see that on the bottom right, the wide dish and small vase break this rule, but then sometimes breaking the rules creates the most interest. Spread items out in an orderly fashion first, and then play with the look to get it just right for you.
8. Drape or stack items in front of shelves
By letting a few items drape over the shelf, you turn them into focal points and make the whole display feel less rigid. If you look back at the previous image, you may notice that the bottom left candlesticks reach up in front of the shelf above, which creates a similar wall-defying effect.
By letting a few items drape over the shelf, you turn them into focal points and make the whole display feel less rigid. If you look back at the previous image, you may notice that the bottom left candlesticks reach up in front of the shelf above, which creates a similar wall-defying effect.
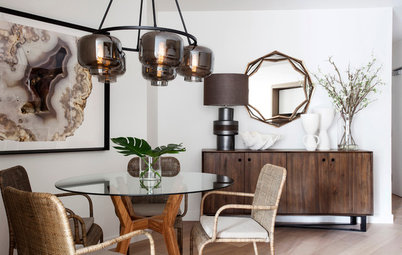
9. Paint the back
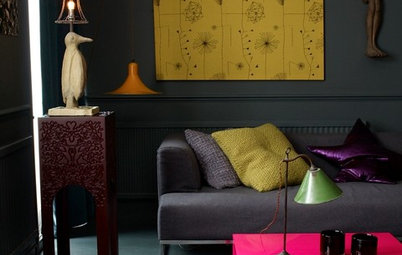
To get more drama from your shelves even without a worldly art collection, a simple coat of paint on the back will turn the entire unit into a feature wall. A dark, neutral grey is an excellent choice to work with any sort of items you might want to display now or later, and it will especially make photos in simple white frames pop.
To get more drama from your shelves even without a worldly art collection, a simple coat of paint on the back will turn the entire unit into a feature wall. A dark, neutral grey is an excellent choice to work with any sort of items you might want to display now or later, and it will especially make photos in simple white frames pop.
You can also try painting the backs various fun colours. Paint all of them or just the occasional accent shelf (which you can then leave mostly empty to show off its new hue).
10. Add wallpaper
Another way to add interest is to wallpaper the back of a bookshelf. This is usually easiest when you have removable shelves, but you can also cut the paper into individual rectangles. Apply it like normal wallpaper, or simply use double-sided tape in the corners for a temporary and easy installation.
See some great examples of whimsical wallpaper
11. Try an art ledge
Instead of installing a bookshelf, you can consider using art ledges or rails, which take up less space (great for compact rooms) while still allowing for creative displays. You can lean art on them and include books facing forward, and you can add other slim items, like LED candles or statuettes.
Instead of installing a bookshelf, you can consider using art ledges or rails, which take up less space (great for compact rooms) while still allowing for creative displays. You can lean art on them and include books facing forward, and you can add other slim items, like LED candles or statuettes.
In a kids’ room, art ledges create an easy-to-see, accessible library for favourite books. Mix in drawings and crafts to personalise the effect even more.
Now that you know the secrets to styling your bookshelves, trust your instincts and don’t feel walled in by any rules. After all, it’s your space to get creative, and nobody has to love your display but you. Put in a few items, take a few out and step back for a day or two to really take in the look. Soon enough the perfect bookshelf style will reveal itself.
TELL US
How have you styled your bookshelves at home? Show us your favourite displays by uploading photos in the Comments below.
MORE
See spaces designed for book-lovers
TELL US
How have you styled your bookshelves at home? Show us your favourite displays by uploading photos in the Comments below.
MORE
See spaces designed for book-lovers


One of the easiest ways to add some interest to a bookshelf is to rotate some of the books to create little stacks rather than having all the books sit vertically. By separating the books into stacks and sets of two to five books, you can also fill a bit more space with fewer books.
Spread out the largest books first and then add smaller books so the visual weight is evenly distributed, but don’t fuss about getting things perfect or symmetrical.