

Sweet and Simple DIYs for Your Sleep Space
Looking for something to do this coming weekend? Why not spruce up your bedroom with these fun and easy weekend projects

Bedrooms are great spaces to spruce up regularly. Not only do they often give a good reflection of your personal style, they’re out of the way of the general thoroughfare of the house. This means you can experiment with different styles away from prying eyes, and you can afford to disrupt the space a little and move things around for a fresh perspective. These simple, finish-in-a-weekend projects are fun ways to do just that, plus you get to flex your creative muscles.
String up a reading nook
This quick, temporary idea makes a magical hideaway for kids, and I won’t tell anyone if you fancy making one for yourself too.
Simply grab a sheet, light blanket or an old curtain, plus a length of strong twine or string. Find two points to hang your string from in your room – picture hooks will do the job if you wrap it around them a few times. Then fold your sheet over the string and plump up lots and lots of cosy cushions inside.
The best kids’ book nooks
Create some cameos
This can be a fun, personalised project for the whole family.
Take profile photos of your loved ones and print them out or photocopy them to your desired size. Trace around the face onto soft card and cut it out with scissors.
Use the face as a template and draw around it on thicker card, before cutting it out using a craft knife on a self-healing mat, available from craft shops.
Finally, mount your shapes onto contrasting card using spray adhesive or double-sided tape, and frame them.
Oval frames, as shown here, bring an authentic look to this modern take on the traditional cameo.
Cart back a bedside table
Available in interiors boutiques, junk shops and online, old apple carts and trays are a versatile addition to your home.
Once cleaned up, you can mount them on a wall as a book shelf, place them flat on the floor for your yarn, potted plants or other bits and pieces, or up-end them as quirky bedside tables, as shown here.
To clean unfinished and dusty old wood, use a mixture of trisodium phosphate and water. Be careful not to saturate the wood, but do give it a good scrub with a rag. Next, fill a spray bottle with distilled white vinegar and liberally cover it. Leave for a few minutes, then wipe off with a rag and water, and leave the wood to dry in a sunny spot.
Hang up homemade bunting
This child’s bedroom is crammed with colourful banners and pendants, but you don’t have to leave all the fun to kids’ rooms. Any colourful ephemera you’ve been hoarding can also be strung up as bunting, like these rosettes.
Native American dreamcatchers have found a new audience recently, and both faithful and modern versions make beautiful additions to bedrooms.
Create your own dreamcatcher using colourful yarns or embroidery threads wrapped around a wooden embroidery hoop, or keep it natural with un-dyed string and real feathers. It’ll look great in a boho style room.
Hang your heart on bunting
Have a go at hand-dying
The ombre trend is still going strong and I love this dip-dyed idea for a bedhead. Or you could make some simple yet stylish curtains instead.
You’ll need one shade of fabric dye, a bucket, water, salt and two identical, hemmed lengths of white fabric. If you’re going for the bedhead option, you could use plain table runners, but curtains will probably need to be a little wider.
Mix your dye according to the pack’s instructions and dip your fabric into it, as far as you’d like the colour to go. At intervals (you may need to experiment to get the timings right, depending on your fabric), raise the fabric out of the solution a little. You’ll be left with a smooth gradient as the dye bleeds a little up the material.
Once you’re happy with the results, remove the sheet and rinse it with cold water until it runs clear. Leave it to dry, then iron, and wrap it around your curtain pole or a ladder-style structure behind your bed.
Paint a blackboard wall
What did we do before blackboard paint was available? A kitchen stalwart these days, it also works in the bedroom. This mathematical example takes it right back to its roots and reminds us of all that’s possible once it’s dry.
This is a bedroom DIY hack you can keep on hacking – jot down your dreams, scribble out your to-do list or write your packing needs for your next holiday…
Houzz’s best chalkboard wall art
Take a paintbrush to the floor
Revamping your floor is often easier to do in a bedroom than a living room, as you can completely empty the space. It also tends to disrupt life less because you can probably sleep in another room while you get to work on the floor.
This is a whole-weekend job, but what a different look you can achieve simply by giving your floorboards a lick of paint!
Put up a shelf or two
Add a couple of shelves to your bedroom – the off-kilter look in this example makes a wonderful feature – and spend the rest of the weekend artfully arranging your curios.
TELL US
What are your quickest, most effective DIY projects for the bedroom? Let us know in the Comments below.
MORE
Why DIY is Good for Your Soul, Not Just Your Home
Bedroom Styling Tricks Anyone Can Do
10 Steps to a Happier Weekend


Sponsored

Sponsored
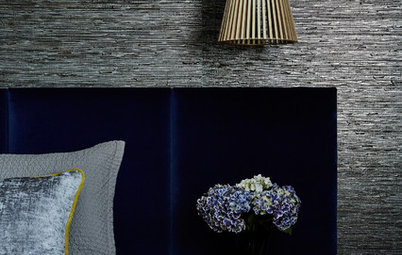
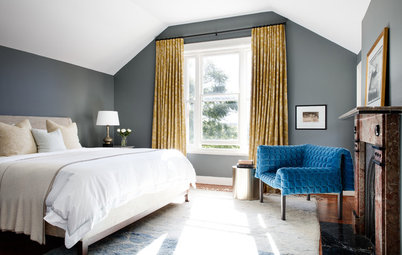
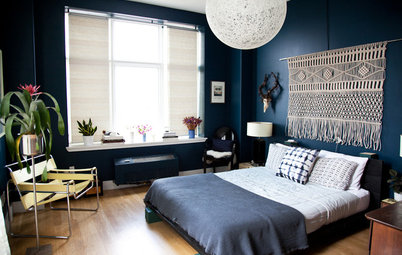
A homemade bedhead can look impressive, but is surprisingly easy to make.
First, get a piece of plywood from your local DIY store that’s about the same width as your bed; the height and depth is entirely up to you. Next, buy some cut foam – there are plenty of stockists online – and adhere it to the board using spray adhesive.
Fold the excess foam over the plywood and staple it to the back. Plywood is perfect for this as it’s not too hard for your staples to go through. Then it’s all about your chosen fabric – wrap it over the front and fix it in place at the back, again using staples.
Create a unified look by linking your bedhead to other fabric details in the room, like the matching cushion seen here.