Decorating

The Power of Paint: How to Turn Trash Into Treasure
Don't send drab and ageing pieces to the tip – amp up your painting skills and give old furniture a new lease on life

Never underestimate the transformative power of paint – with a bit of time and know-how it can turn even the ugliest of ducklings into a thing of beauty. But like everything, success comes down to knowing what you’re doing. Follow our expert guide to choosing and applying paint to old furniture, and you’ll discover a fun (and inexpensive) way to add charm and personality to your home in the process.
Preparation: A Step-by-Step Guide
As with any painting project, preparation of painted or varnished surfaces is essential for good results. Here’s how:
1. Separate the pieces
Remove any drawer-pulls, handles or knobs. If you plan to re-use them, number and store together with their screws in a ziplock bag. Take out any drawers and removable shelves. Number the back of each drawer with a pencil so it’s easy to return to its correct spot.
2. Wash with sugar soap
Sugar soap will dissolve decades of grease, grime and mildew on furniture. Mix ½ cup sugar soap and 5 litres of water, dampen an old cloth, and scrub the piece of furniture. Then, use a cloth dampened in clean water to rinse the sugar soap away. If the piece you’re cleaning is cane, use a dish brush to get into the nooks and crannies.
Tip: Sugar soap can irritate your skin. Wear gloves to protect your hands.
3. Scrape and fill
Once the piece is clean and dry, remove any loose, flaking or peeling paint or varnish with a paint scraper. For timber or timber veneer pieces, fill any holes or scratches and leave to dry. If you’re going to fit new knobs or drawer-pulls, fill the old screw-holes with filler as well.
4. Sanding
Sanding is a crucial step in the preparation process and should never be skipped. It roughens up the surface of the piece, giving new paint a texture or ‘tooth’ to grip onto.
First sand back the filler until it’s smooth and level with the timber. Then give the whole piece a light sand. Wrap a fine-grit sandpaper (180 to 220 grit) around a sanding block and work with a relatively firm pressure. You don’t need to sand the existing finish away, just dull it a little. If the surface is lumpy or chipped, smooth it over with a small electric sander fitted with a 120- or 150-grit sandpaper. Remember to sand along the grain of the timber so you get a smooth, scratch-free finish. When you’ve finished, wipe down with a damp cloth again to remove all dust.
Tip: The higher the grit, the less abrasive the sandpaper is.
5. Primer, sealer or undercoat
The specialist primers and sealers on the market now have taken much of the hard work out of repainting furniture. One of my favourite primers is Zinsser Bulls Eye 1-2-3. It smooths and seals the surface of the piece, helps paint adhere properly, and gives you a longer-lasting finish.
Apply primer with a brush or a small foam roller. Once dry, check the surface and, if necessary, give it another light sand with a fine-grit sandpaper. Wipe down with a damp cloth.
14 things you never thought to paint but should
Tip: If you’re painting cane or rattan, use a spray primer. If you’re painting wrought iron, choose a primer specially formulated for metals that will prevent rust.
Choose the Right Paint
Different paint formulations will give you different looks. Here’s a quick overview:
Acrylic paint: This is water-based paint so you can mix it with water and clean brushes and spills with water too. Acrylic paint is easy to work with; it comes in all finishes from matt to gloss, and can be applied with a brush, roller or spray gun.
Oil-based enamel paint: Traditionally used on timber joinery such as window frames and skirting boards, oil-based enamel paint provides a durable, glossy finish that’s easy to wipe clean. Applied properly, enamel paint gives a brush-free, professional look, but you do need to know what you’re doing, plus you’ll need good-quality brushes to achieve a superior result. It’s slow to dry, has a strong smell, and you’ll need turpentine to clean up brushes and spills.
Acrylic enamel paint: Often called aqua enamel, it’s a hybrid of sorts. It offers the glossy, easy-clean finish of an oil-based enamel paint, but with the ease of application and quick water clean-up of an acrylic. It dries in a couple of hours and is less smelly than regular enamel. However, it’s possibly more prone to chipping than oil-based enamel after a couple of years.
Tip: If you’re painting a piece of furniture with lots of blemishes, choose a matt-finish paint, which will disguise imperfections. A glossy finish will highlight every lump and bump.
Chalk paint: A specialist paint formulation designed to adhere to just about any substrate – timber, glass, metal, you name it. It dries fast to a soft, chalky patina that is perfect for a Hamptons, French provincial or shabby-chic look. While chalk paint is versatile and easy to apply, it does need to be sealed with wax to give it its unique depth and lustre. If you’ve got some time on your hands and want to give your piece a unique finish, waxed chalk paint is hard to beat.
Spray paint: Spray paint is best-suited to cane furniture, but be aware that quality and durability does vary between brands.
Always begin with a purpose-designed spray primer. Once this has dried, apply colour in several light coats using a broad, sweeping motion. Spray paint is fun to work with but produces a lot of fumes and mess. Work outdoors and wear a painter’s mask. Carefully read the directions regarding re-coating times.
Which paints for which walls?
How to Achieve a Perfect Finish
Applying the paint
Apply two to three light coats of paint, letting it dry between coats. Check the surface and if it’s gritty or bumpy, sand lightly with very fine sandpaper (240 grit or higher), then wipe dust away with a damp cloth before applying your next coat. Apply paint in long, smooth strokes along the grain of the wood, never across. This will create a smoother finish.
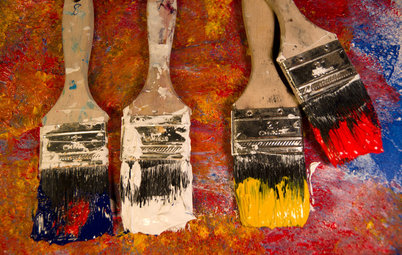
You can apply paint with a small foam roller or a brush (non-foam rollers are too fluffy and will leave little fibres in your paint finish). Buy the best you can afford as better-quality brushes will give you a far superior result. Some of the newer synthetic-bristle brushes are great quality. A small, angled brush is handy for getting into little corners or picking out decorative details such as beading and moulding.
Applying the paint
Apply two to three light coats of paint, letting it dry between coats. Check the surface and if it’s gritty or bumpy, sand lightly with very fine sandpaper (240 grit or higher), then wipe dust away with a damp cloth before applying your next coat. Apply paint in long, smooth strokes along the grain of the wood, never across. This will create a smoother finish.
You can apply paint with a small foam roller or a brush (non-foam rollers are too fluffy and will leave little fibres in your paint finish). Buy the best you can afford as better-quality brushes will give you a far superior result. Some of the newer synthetic-bristle brushes are great quality. A small, angled brush is handy for getting into little corners or picking out decorative details such as beading and moulding.
Drying and curing
The newly painted surface will be fragile and scratch easily until it has fully cured – that is, dried to maximum hardness. To preserve the beautiful finish you’ve just laboured over, give it sufficient time to cure before putting it to use. Acrylic and chalk paints take between two and four weeks to cure; oil-based paint takes about a week.
The newly painted surface will be fragile and scratch easily until it has fully cured – that is, dried to maximum hardness. To preserve the beautiful finish you’ve just laboured over, give it sufficient time to cure before putting it to use. Acrylic and chalk paints take between two and four weeks to cure; oil-based paint takes about a week.
Choosing the Colour
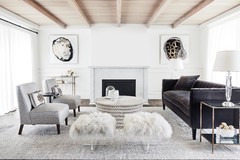
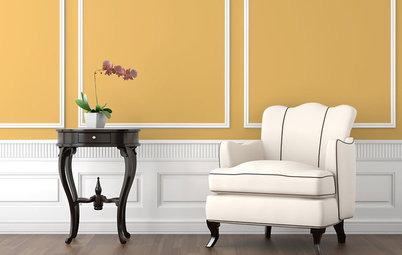
Wonderful white
White is crisp and classic and will give any vintage piece a fresh, new look. It’s particularly well-suited to more ornate, pre-1950s pieces with turned legs and decorative detailing. Dress them up with interesting knobs and drawer-pulls. You can add further flair by highlighting the beading and decorative accents with gold or a contrasting colour.
Tip: Avoid stark whites that can look cheap and unnatural. Choose an off-white instead. Base your colour selection on the undertones of the wall your furniture will eventually sit against. If it’s a cool-toned wall, choose a white with a grey undertone. If it’s a warmer colour choose a creamy white.
Beautiful brights
On the flip side, a palette of unexpectedly bold colours will give ornate vintage pieces a distinctly contemporary feel. This traditional dining setting would once have been dark timber, but finished in super-glossy bright pink and yellow, it suddenly becomes thoroughly modern.
Tip: Furniture generally doesn’t require a lot of paint, so it can be more economical to use sample pots. Bear in mind, however, that sample pots are usually only available in a low-sheen finish. Although it’s a great all-rounder, it won’t give you a high gloss or chalky matt finish, if that’s the look you’re after.
See more eclectic dining rooms
Colour is a great tool for adding character to plain furniture and modernising outmoded pieces. Transform a set of standard dining chairs into a conversation piece by painting them in a selection of vibrant, contrasting colours.
Alternatively, a single colour can be used to unify a selection of mismatching chairs for a quaint, homey feel.
Alternatively, a single colour can be used to unify a selection of mismatching chairs for a quaint, homey feel.
Special Finishes
Distressed
If the piece of furniture you’re restoring is severely battered or if you love the shabby-chic look, you may want to give it a distressed finish. This ‘perfectly imperfect’ look has a lovely, rustic charm and is easy to achieve. One method is to paint the furniture in a base colour and allow it to thoroughly dry. Then apply a top coat of colour, allow it to dry for an hour or so, then rub it back with a scourer in places where you want the base coat to show through. Pay particular attention to those areas that would weather naturally over time, such as edges and corners.
For a soft, pretty effect, use a pastel base coat (think pale blues, pinks or greys) with a white topcoat. Or, for a dramatic look that oozes old-world charm, consider a black base coat beneath a bold colour such as green or mid-blue, as pictured here.
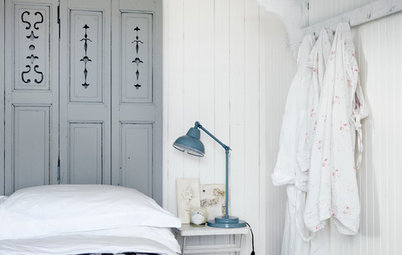
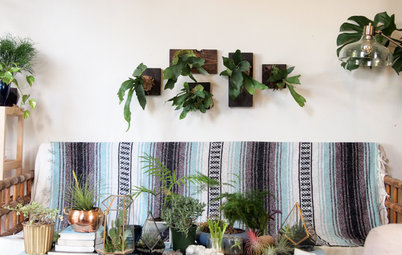
Stencilled
Stencilling is a great way to further personalise your painted pieces. There are plenty of pre-cut stencils available in craft supply stores, so it’s easy to find a pattern you’ll love. The dainty, delicate floral stencilling on this bedhead ties in with the room’s shabby-chic theme.
Stencilling is a great way to further personalise your painted pieces. There are plenty of pre-cut stencils available in craft supply stores, so it’s easy to find a pattern you’ll love. The dainty, delicate floral stencilling on this bedhead ties in with the room’s shabby-chic theme.
A couple of guidelines for stencilling success: always wait until your base coat of paint has fully cured before applying the stencil. Use top-quality masking tape to further reduce the risk of damaging your paint finish. Make sure the stencil sits close to the surface or the edges will come out blurred. Using spray paint tends to give a sharper, more precise result than you’d get with paint brushes or sponges.
Tell us
Have you transformed an old piece with paint? Tell us in the Comments below. And if you enjoyed this story, don’t forget to like it, share it, bookmark it or save the photos. Join the conversation.
More
Read more stories about decorating
Tell us
Have you transformed an old piece with paint? Tell us in the Comments below. And if you enjoyed this story, don’t forget to like it, share it, bookmark it or save the photos. Join the conversation.
More
Read more stories about decorating
If you’re in the market for an old, salvageable piece of furniture, you won’t have to look far. Check kerbside rubbish collections, hunt through local markets, op-shops, and visit websites such as Gumtree, where people often list unwanted furniture for free. Or perhaps you have some ugly ducklings at home just waiting for a transformation.
Look for furniture with a strong shape and good proportions, and check that it’s structurally sound. If it’s wobbly, water-damaged, the drawers are stuck fast, or parts are missing, leave it behind unless you have the carpentry skills to repair it.
For the best chance of painting success, choose pieces made from timber, timber veneer, cane, rattan or wrought iron. Avoid laminate and melamine finishes as paint won’t always adhere to these surfaces.
Tip: Sticky timber drawers can sometimes be loosened by rubbing a cake of soap along the runners.