
Your Post-Christmas Sort-Out Starts Here
Follow this guide to keeping your home clean and ordered beyond the festive season

With Christmas over, dealing with the aftermath can be a little daunting. Here we take a look at some jobs that can be undertaken over the month of January to get your house shipshape once again. Whether it’s dealing with the influx of new things, particularly in kids’ zones, or dealing with the Christmas lunch and/or dinner workhorse – a.k.a. the refrigerator – make your life a little easier with these tips and instructions on how to get those pesky jobs done, and done without harsh chemicals, which is my preferred method.
Clear out the chill zone
The refrigerator is the workhorse of the kitchen and it takes a pounding, particularly over Christmas. It’s the one appliance that never really gets a rest and is subject to spills and odours. Keeping a refrigerator clean means food will stay fresher, so in the wake of the Christmas onslaught, January is a great time to clean your fridge.
Start by temporarily removing all food and composting any fruit or veg that has seen better days. Then wash the door seals with hot water and a mild detergent and dry them with a clean cloth. Remove the drawers and soak them in warm soapy water. Wipe down the interior with a mix made up of two tablespoons of bicarbonate of soda and a litre of hot water. Rinse away the residue with a clean, damp cloth and dry with a clean towel. Don’t use detergent as it could leave an odour that food will absorb.
TIP: Get rid of odours by spreading some bicarbonate of soda onto a tray and placing the tray in the fridge until any strong smells are gone.
Clean the cooker
This has to be my least favourite job and one I put off until the oven has reached ‘that’ point. Oven cleaning products don’t just smell toxic… they ARE toxic so I like to use a natural method to get my oven sparkling clean.
Firstly, remove the oven racks and run them through the dishwasher if they’ll fit. Otherwise, put them into a large tub of very hot water and dishwashing detergent and let them soak overnight to soften up the baked-on residue. Scrub them down, rinse and dry.
While the racks are soaking, make up a paste of half a cup of bicarbonate of soda and about three tablespoons of water. Spread the paste all over the interior surfaces of your oven and let it sit overnight. Wipe down the oven with a damp cloth and then spritz with some household vinegar. This will make the remaining bicarb foam up, which makes it easier to wipe down. Repeat the vinegar process at least once more, until your oven is sparkling clean.
TIP: Buy a self-cleaning oven!
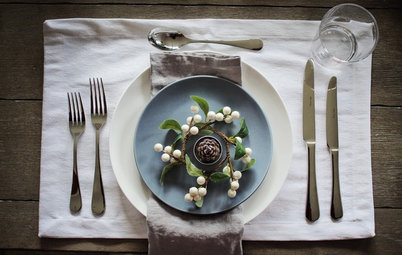
Order your pantry
A clean and well organised pantry will make you more efficient, reduce your grocery bills and make meal preparation less stressful for the year ahead.
Drag your rubbish bin in close so you can discard all those out-of-date herbs and spices, and empty the rest of the contents of your pantry onto the kitchen bench. Take an inventory of what you have and throw out anything out of date. Set aside what you’re unlikely to use, ready for donation. January is a great time of year to donate to food banks depleted after the busy Christmas period.
Once you’ve wiped down the shelves with a vinegar and bicarb soda mix, dry them off and scatter some bay leaves around to keep the pantry moths at bay. Replace the contents, grouping like foodstuffs together and the most used products at eye level. Finally, clear out your pantry at the beginning of each season to keep it clutter free.
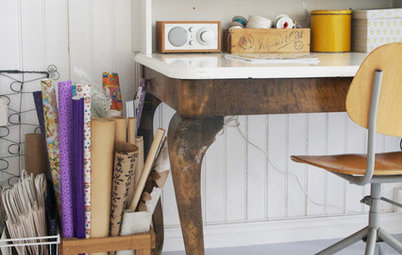
Slap on labels
Once you’ve cleaned your pantry, purged its contents and categorised what was left, you are ready to restock and re-stack the shelves. Use bins, baskets, airtight containers and dividers to get things in order and keep food fresh. Label containers so you can see at a glance what’s in them. If your pantry shelves are deep, use large, deep bins for storage.
TIP: Kids’ snacks tend to take over a pantry space, so I remove any surplus packaging straight from the shopping bags and place the contents into large, easily accessible airtight storage containers.
Plan an organised kitchen pantry
Freshen up pillows
Pillows need to be cleaned at least twice a year, and in warmer climates, probably more like four times per year. Start by rolling the pillows lengthwise and securing them with a large rubber band at each end and one in the middle. This will prevent the fibre from clumping up during the washing process.
Wash two pillows together to balance the machine and use a mild liquid detergent on a warm, gentle cycle or follow the instructions on the pillow. Add a half cup of vinegar to deal with any mildew and mould and a quarter of a cup of bicarbonate of soda to eliminate odours (or just buy new pillows). Run the pillows through the rinse and spin cycle twice to eliminate detergent or any cleaning agent residue. Then dry them flat in the sun as this is a great way to kill bacteria. Finish them off in the dryer on a low heat setting with a couple of tennis balls to stop fibres clumping and to speed up the drying process.
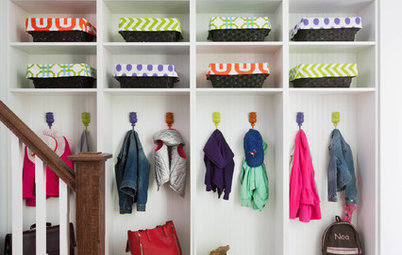
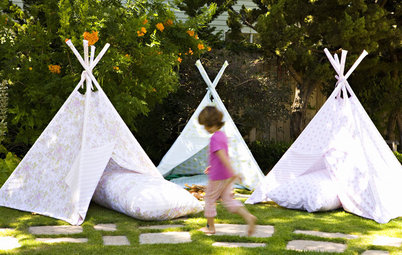
Bring order to kids’ rooms
With the Christmas influx of more stuff, January is the perfect time to do an audit of kids’ rooms. I love that rule whereby for every one new thing that comes into the house, one must go out of the house. Get your kids involved in the process; explain to them that they do grow out of toys and games.
Start with a clean slate and plan the space. Clear everything from the room, give it a good old clean and then assess and zone the room: play space, storage space, chill space, etc. Then sort through games and puzzles to make sure that all the pieces are still there. Place puzzle pieces or dice and game pieces into ziplock bags to keep them together. Anything broken should be discarded and anything damaged, mended.
TIP: Make a game of cleaning up the clutter at the end of each day to involve the kids and teach some early good habits!
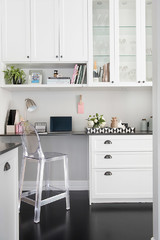
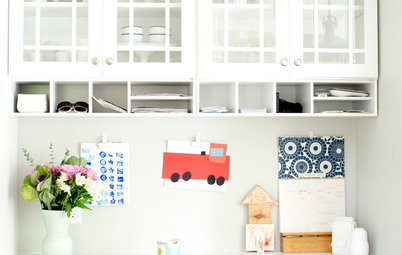
Remove clutter from the office
A messy workspace often reflects a muddled brain. Take some time in January to clean up your home workspace and clear your mind in the process.
Start by taking everything out of your desk drawers. Throw away the obvious items you don’t need and put the rest into a box by your desk. As you need an item, take it out of the box, use it and then find a place for it in your desk drawer. Any items remaining in the box after a week are either surplus to your requirements and can be tossed, recycled or boxed up for charity, or don’t need pride of place and can be stored for infrequent use. Use ring binders to file and store paperwork and desktop boxes and totes to hold pens, paper and other small items you use daily. Get your cables under control by using rain gutter-style cable organisers.
TIP: Make an effort to spend 5-10 minutes at the end of your day to put your desk in order in preparation for the next day.
Add sparkle to window panes
Windows are often the most overlooked part of the house when it comes to cleaning. It’s one of those jobs that often gets put off in preference of something more pressing or immediate. But clean windows make an enormous difference to your living spaces.
Start by brushing down the windows to get rid of dust and cobwebs, and then wet down the windows to dislodge the dirt and grime. I like to use a spray bottle filled with white vinegar. Let it soak in and then spray the window with water. Squeegees are great for window cleaning, but I like to use microfibre or lint-free cloths to give the windows a good solid clean and final sparkle. Be sure to clean down the edges of the windows as this is where a lot of the dust and grime gathers. Use a soapy mix and a microfibre cloth to dislodge dirt and grime.
For the outside of windows, spray them down with the garden hose on a high pressure setting and then wipe down with a dry microfibre cloth or old newspaper.
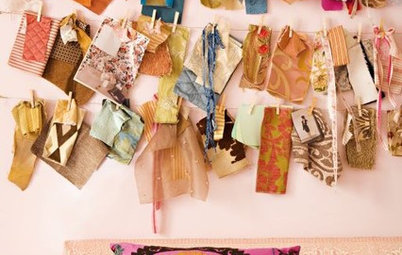
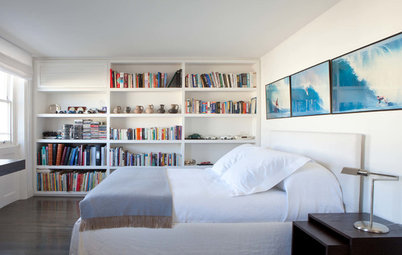
Arrange your books
An ordered bookshelf goes beyond the practical and becomes a design element in itself. There are a number of ways to do this but here are a few ideas on where to start.
First and foremost, sort your books into piles of those you want to keep and those for the secondhand bookshop or charity shop. Once that’s done, decide on a criteria below to help guide your arrangement and stick to it.
- Alphabetical: Often the most obvious choice, with books sorted into alphabetical order based on the author’s last name.
- Colour: Now this is a controversial sorting system that has been popular with designers over the past few years. Books are arranged in chromatic order or colour blocked, based on the colour wheel.
- Chronological: So you might sort your design books starting with Art Nouveau through Art Deco, to Modern 21st Century.
- Genre: Sorted into sections based on subject, i.e. mystery, thrillers, romance, art, design, craft.
Sort out the wardrobe
Don’t rush this process. There is nothing worse than not properly thinking through what clothes you’re discarding, only to find you really, really need an outfit you just tossed out! With that in mind, carefully sort through your wardrobe and donate or sell any unwanted items. Then, with your wardrobe empty, give it a good clean and, if necessary, hang moth and damp-proofing products.
The next step is to sort clothes into seasons: spring/summer and autumn/winter. Now sort into clothing type: skirts, trousers, shirts, dresses, and hang them accordingly. Consider going one step further and sort into a sub-category, i.e. by colour. Sorting clothes this way saves time down the line.
If you’re pressed for space, store away the non-seasonal clothing until required. Space bags are wonderful for keeping clothes in good shape and saving space. Fill shelves with handbags and shoes, particularly if you store shoes in shoe boxes.
Tips on planning a wardrobe
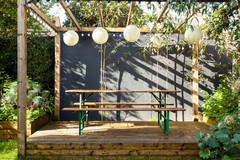
Air your house
Finally, open up your windows and doors to let fresh air and sunshine stream in and flow throughout your home. Then sit back and admire your hard work and beautifully ordered home.
TELL US
What are your sorting and cleaning tips post-Christmas? Share them with us in the Comments section.
MORE
33 Magic Household Cleaning Tips From Houzzers
10 January To-Dos to Leave You Feeling Like a Winner
Resolution Overload? 4 Strategies to Put You Back in Control


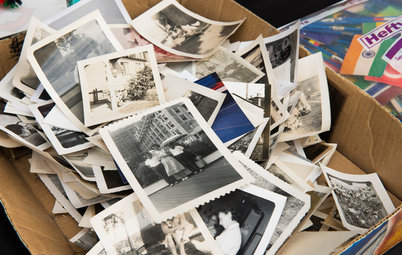


Every year as I pack up the Christmas tree and decorations, untangling lights as I go, I try to bring order to the chaos. Here’s how to do it.
Start by wrapping each set of fairy lights around a piece of cardboard, with a slit cut for securing the end. Pack the lights in with the Christmas tree in its original box. Then pack all your smaller precious baubles into egg cartons. For larger baubles and decorations that don’t have their own box, use paper or plastic cups to protect each decoration.
Use colour-coded plastic tubs to store decorations, lights and garlands, and label them accordingly. If you have different decorations for specific rooms, pack each room into their own box. Finally, pack everything away in the order in which you’ll need them for next year, for a less chaotic decorating process.