How to Create a 3D Floor Plan
3D Floor Plans on Houzz Pro enable you to visually bring your project to life. You can view your plans in 2D, dollhouse, and walkthrough modes for a 3D experience. Once you create your floor plan, you can use the Houzz Pro life-sized walkthrough on the Mobile App to immerse clients into a virtual tour of the finished project.
There are several different ways to get started on your project’s floor plan. You can:
- Create from scratch
- Create from a pre-built template
- Scan rooms on the Houzz Pro app
- Upload existing 2D plan

Create Floor Plan from Scratch
If you prefer to completely customise all aspects of your 3D floor plan, starting from scratch might be the best option.
To start:
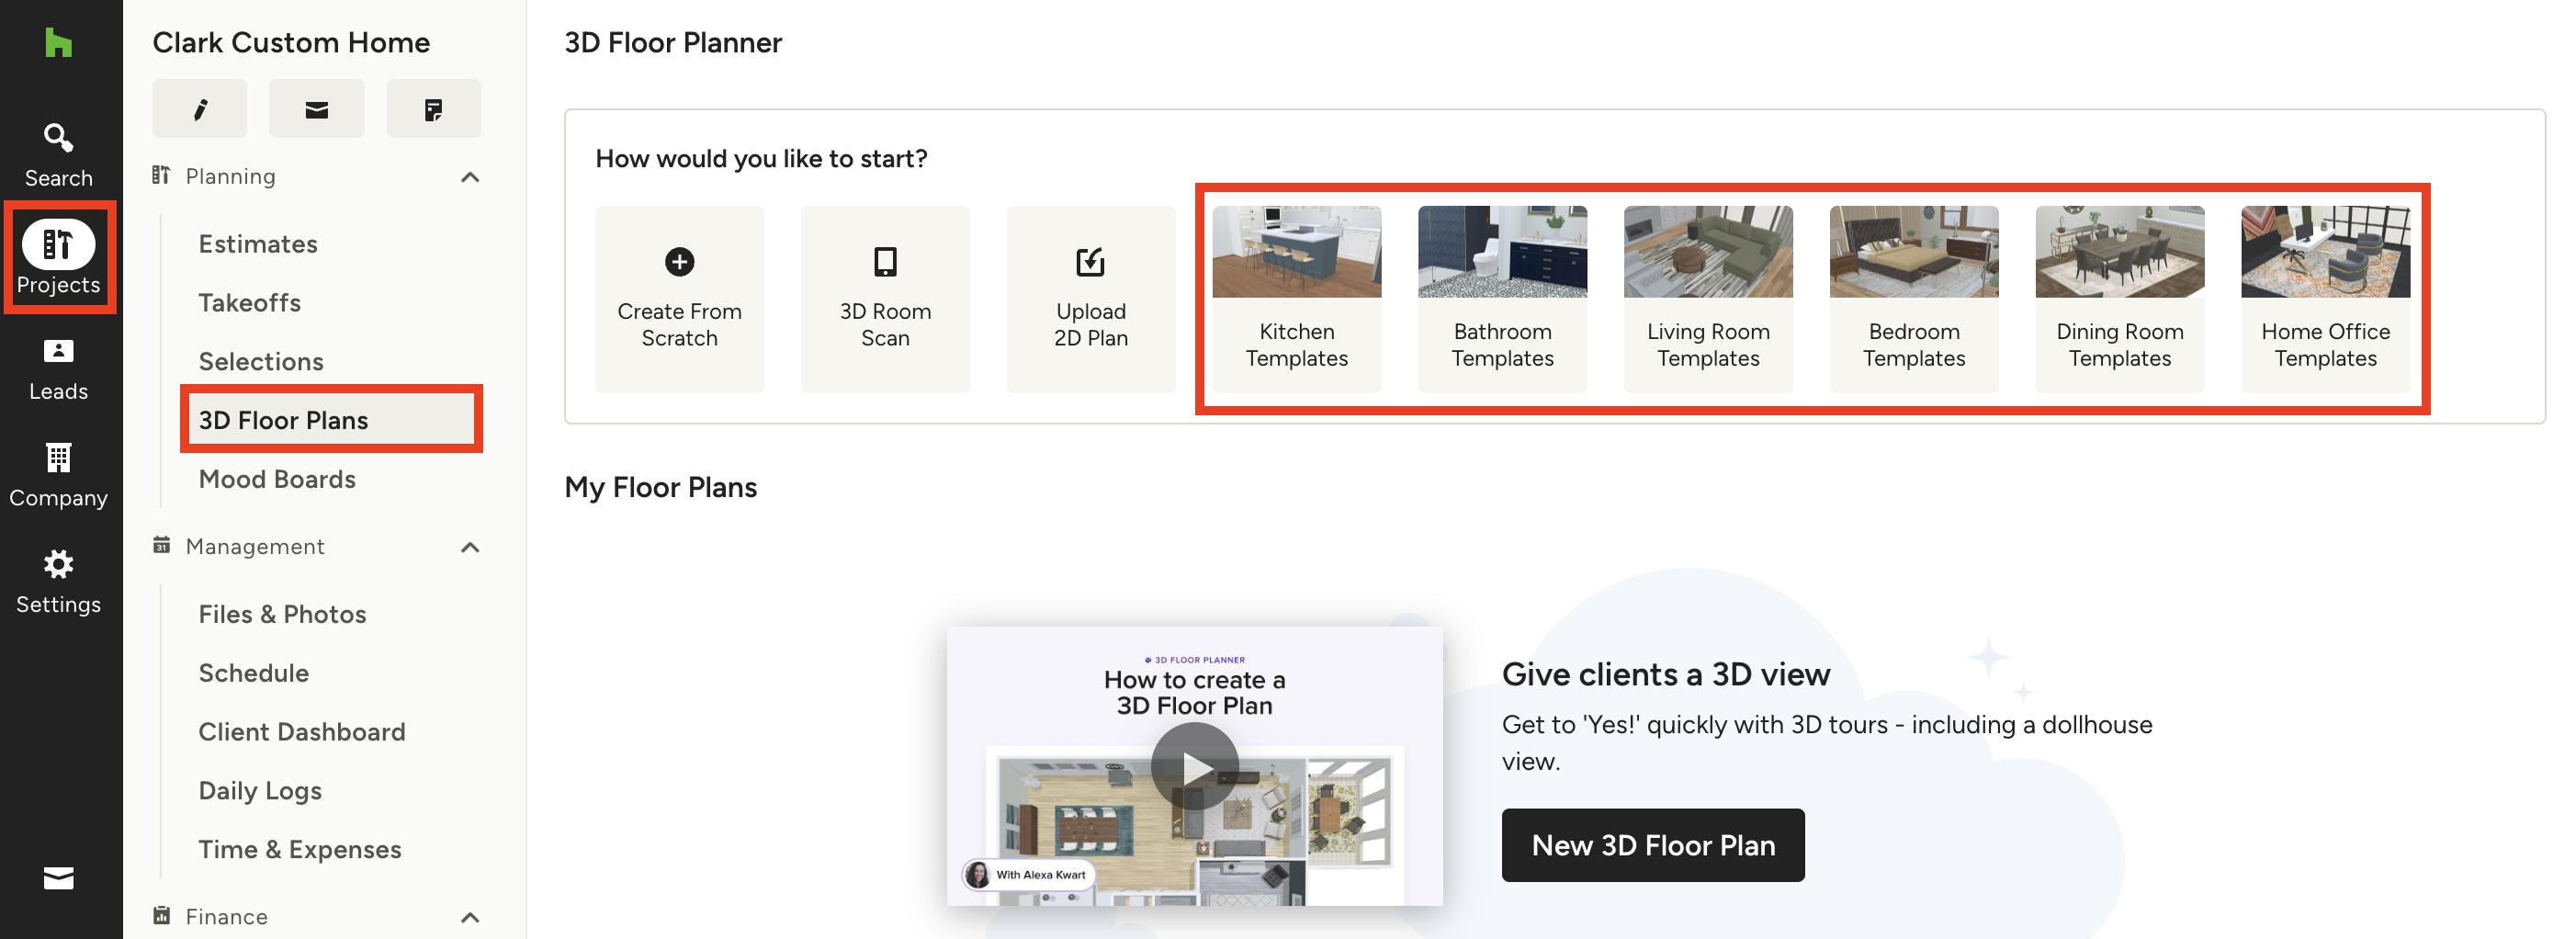
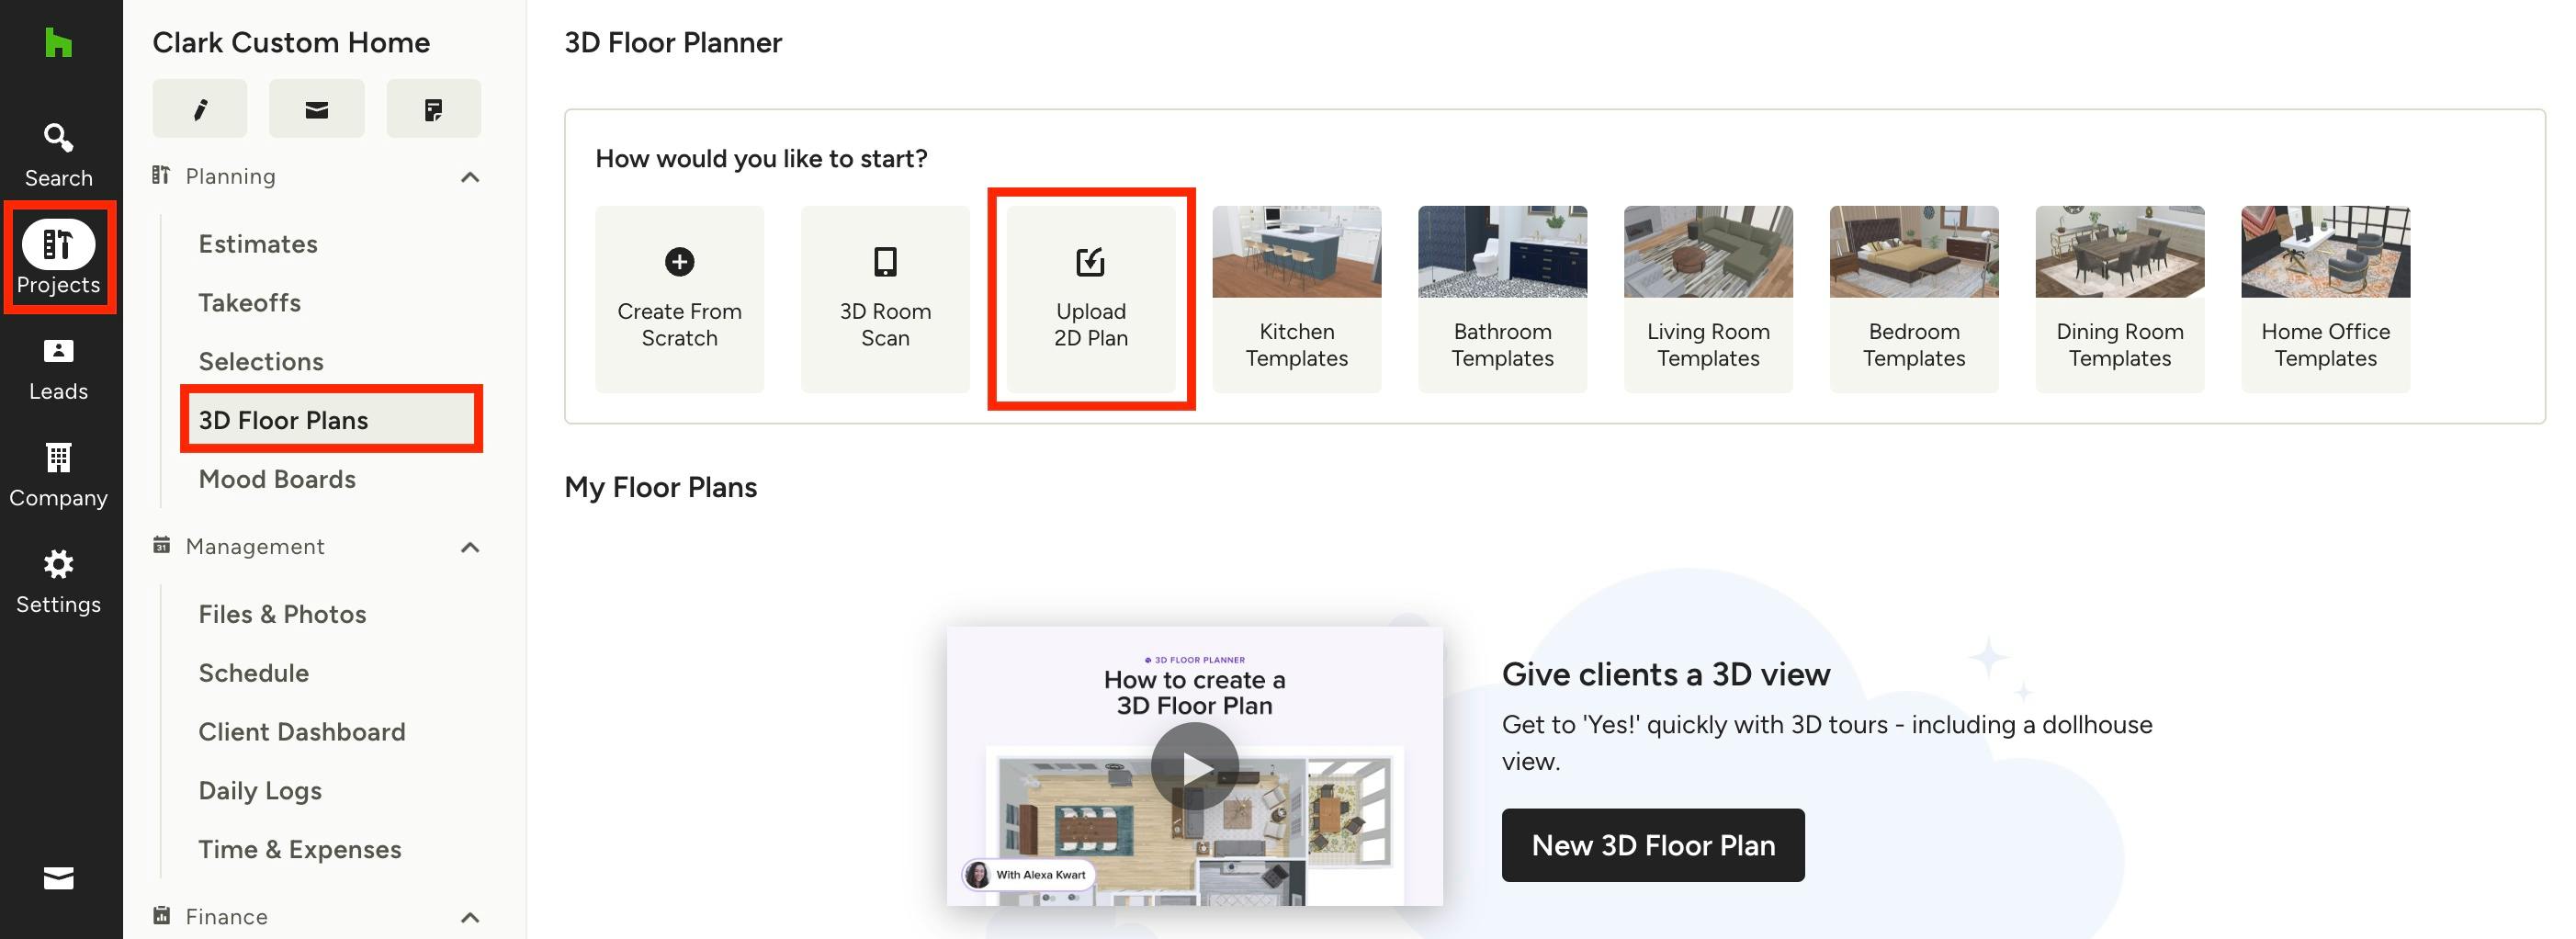
1. Open up the relevant project from the Projects section in the left navigation. From there, click on 3D Floor Plans.
2. At the top of the page, select Create from Scratch. A new floor plan will open up in a new screen — you are ready to start working!
Create Floor Plan from a Template
If you are short on time, you can use one of our pre-built templates to start out your 3D floor plan. It’s an easy way to get started and is still fully customisable, so you can adjust all the details later on.
To start:
1. Open up the relevant project from the Projects section in the left navigation. From there, click on 3D Floor Plans.
2. At the top of the page, select one of our six pre-built templates depending on the type of project. We currently offer Kitchen, Bathroom, Living Room, Bedroom, Dining Room and Home Office templates.
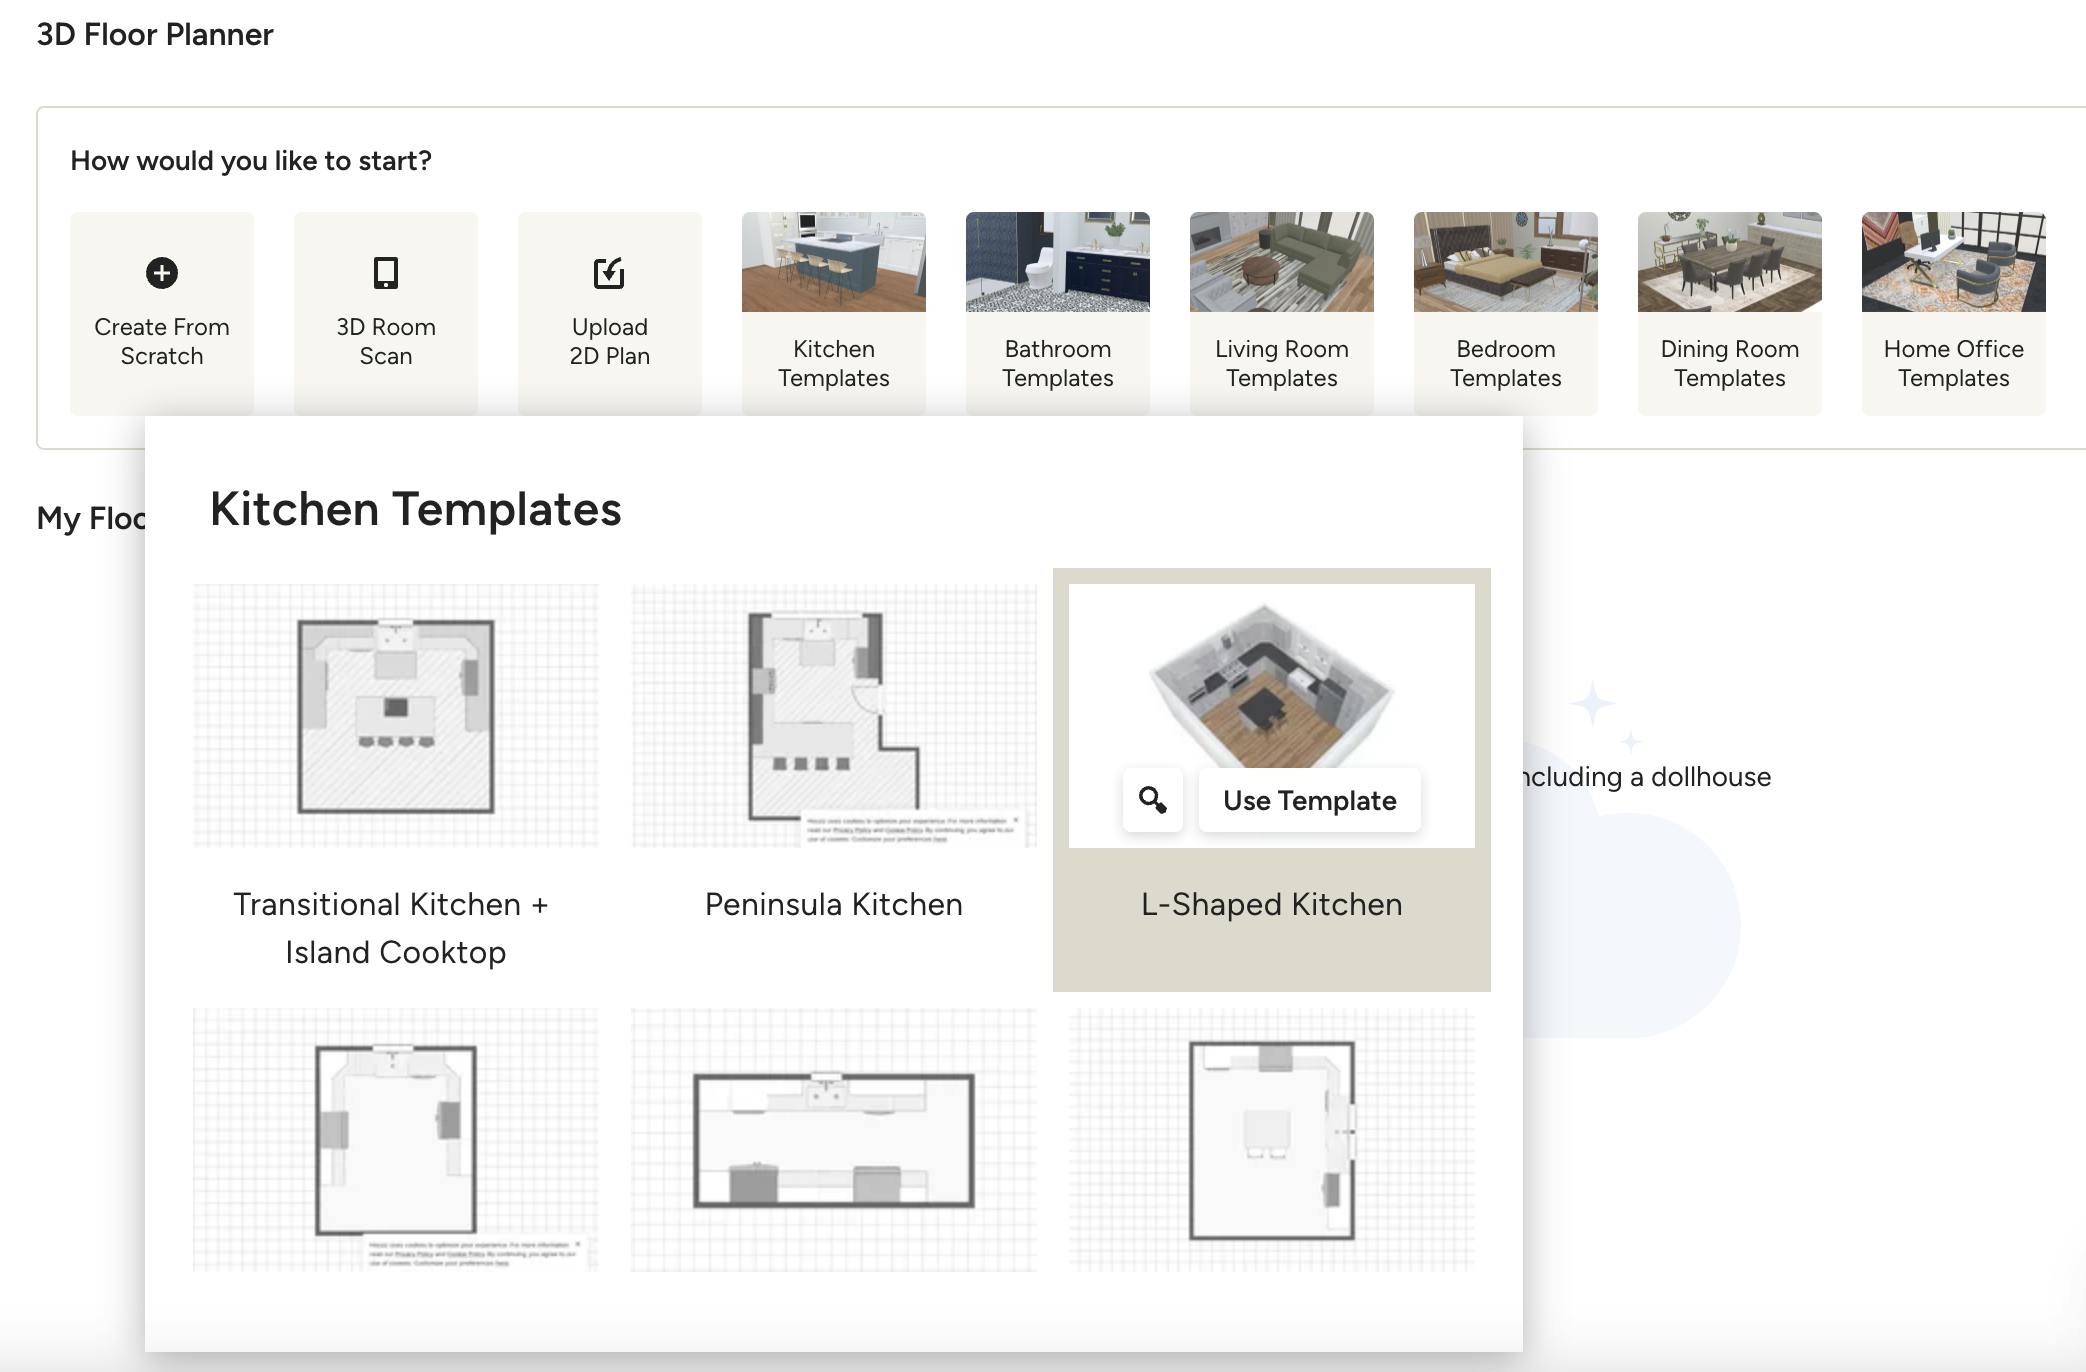
3. When you select the room template, you can then choose the most relevant design from 4-6 options. Before you select your template, you can preview it by clicking the magnifying glass on the design. Once you find the best fit, click the Use Template button to get started.

Scan Rooms on the Houzz Pro App
If you want a perfect match of your project space, you can quickly scan the room on the Houzz Pro app and turn that scan into a 3D floor plan.
To start:
1. Open up your Houzz Pro app. Make sure you are signed in to your Houzz Pro account.
2. From the home page, select 3D Room Scan from the Create New menu.
3. Scan your room. Once the scan is complete, click Done.
Depending on your device, here are some tips and best practices for the scanning process.
How to Scan a Room Using LiDAR Technology (LiDAR device)
How to Scan a Room With the Mobile App (non-LiDAR device)
Please note: LiDAR technology is only available on an iPhone Pro 12 or newer or an iPad Pro 4th generation or newer, running at least iOS 16.
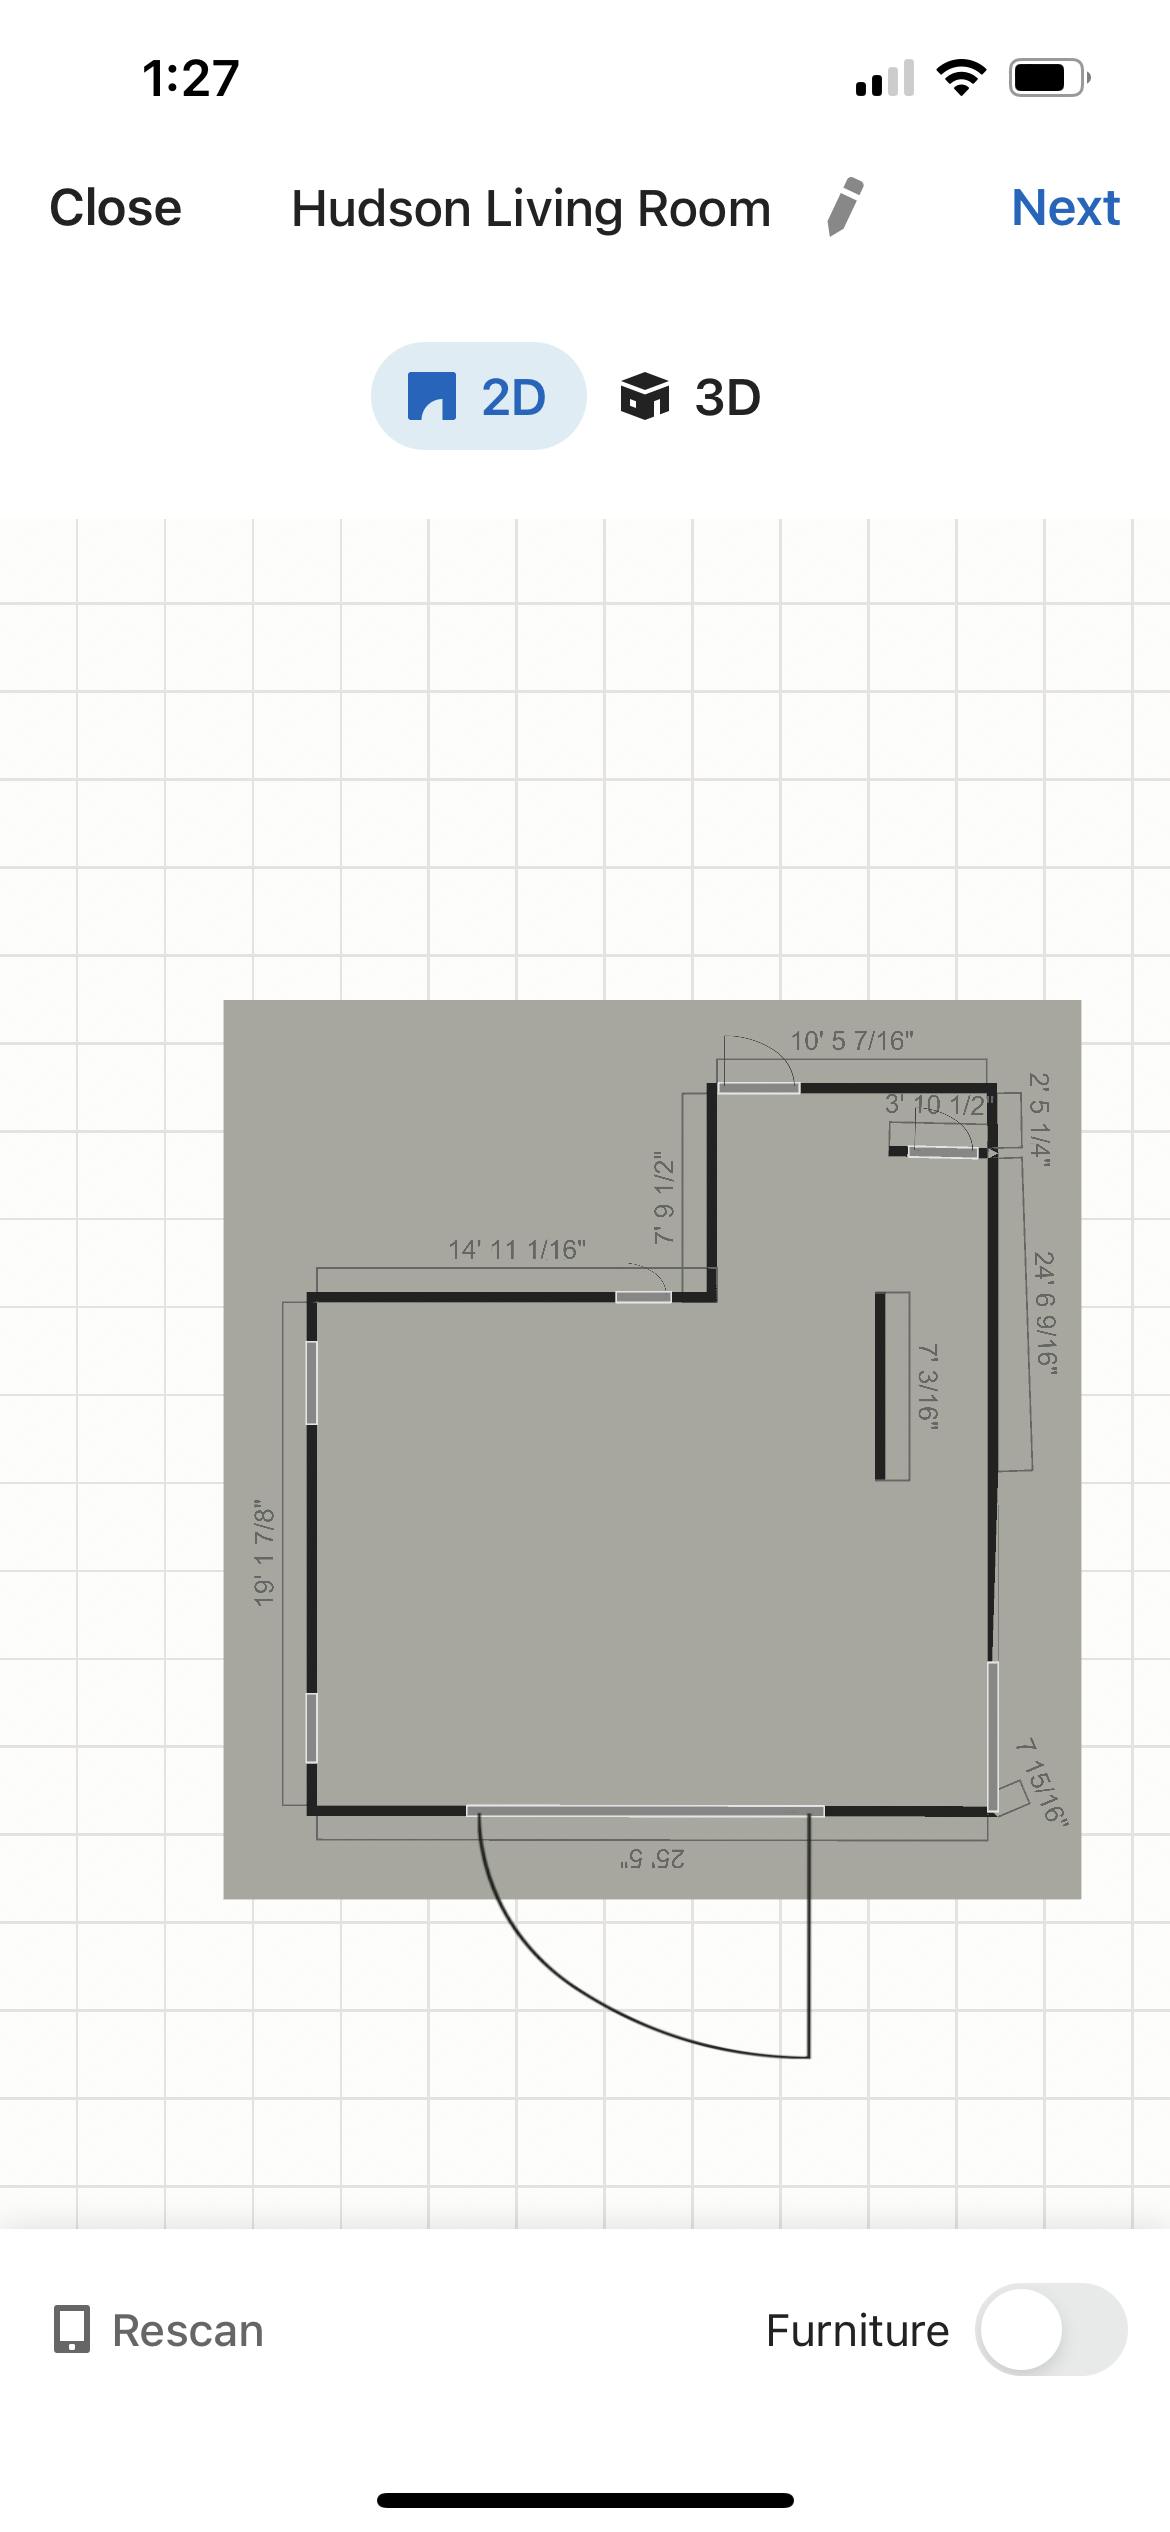
4. The room will then show as a 2D and 3D floor plan on your mobile device. You can rename the floor plan and add it to a project (or create a new project). After saving, you can go to the desktop experience and make more edits, including updating dimensions or adding walls, windows, doors and furniture.
Upload Existing 2D Plan
If you already have a 2D drawing, you can save a lot of time by importing it to trace over the drawing and build out your 3D floor plan. You can import pdf, jpg or png files with a maximum file size of 50MB.
To start:
1. Open up the relevant project from the Projects section in the left navigation. From there, click on 3D Floor Plans.
2. At the top of the page, select Upload 2D Plans. A new floor plan will open up in a new screen. You can then upload your file by either selecting the file from your computer, or dragging and dropping the file.
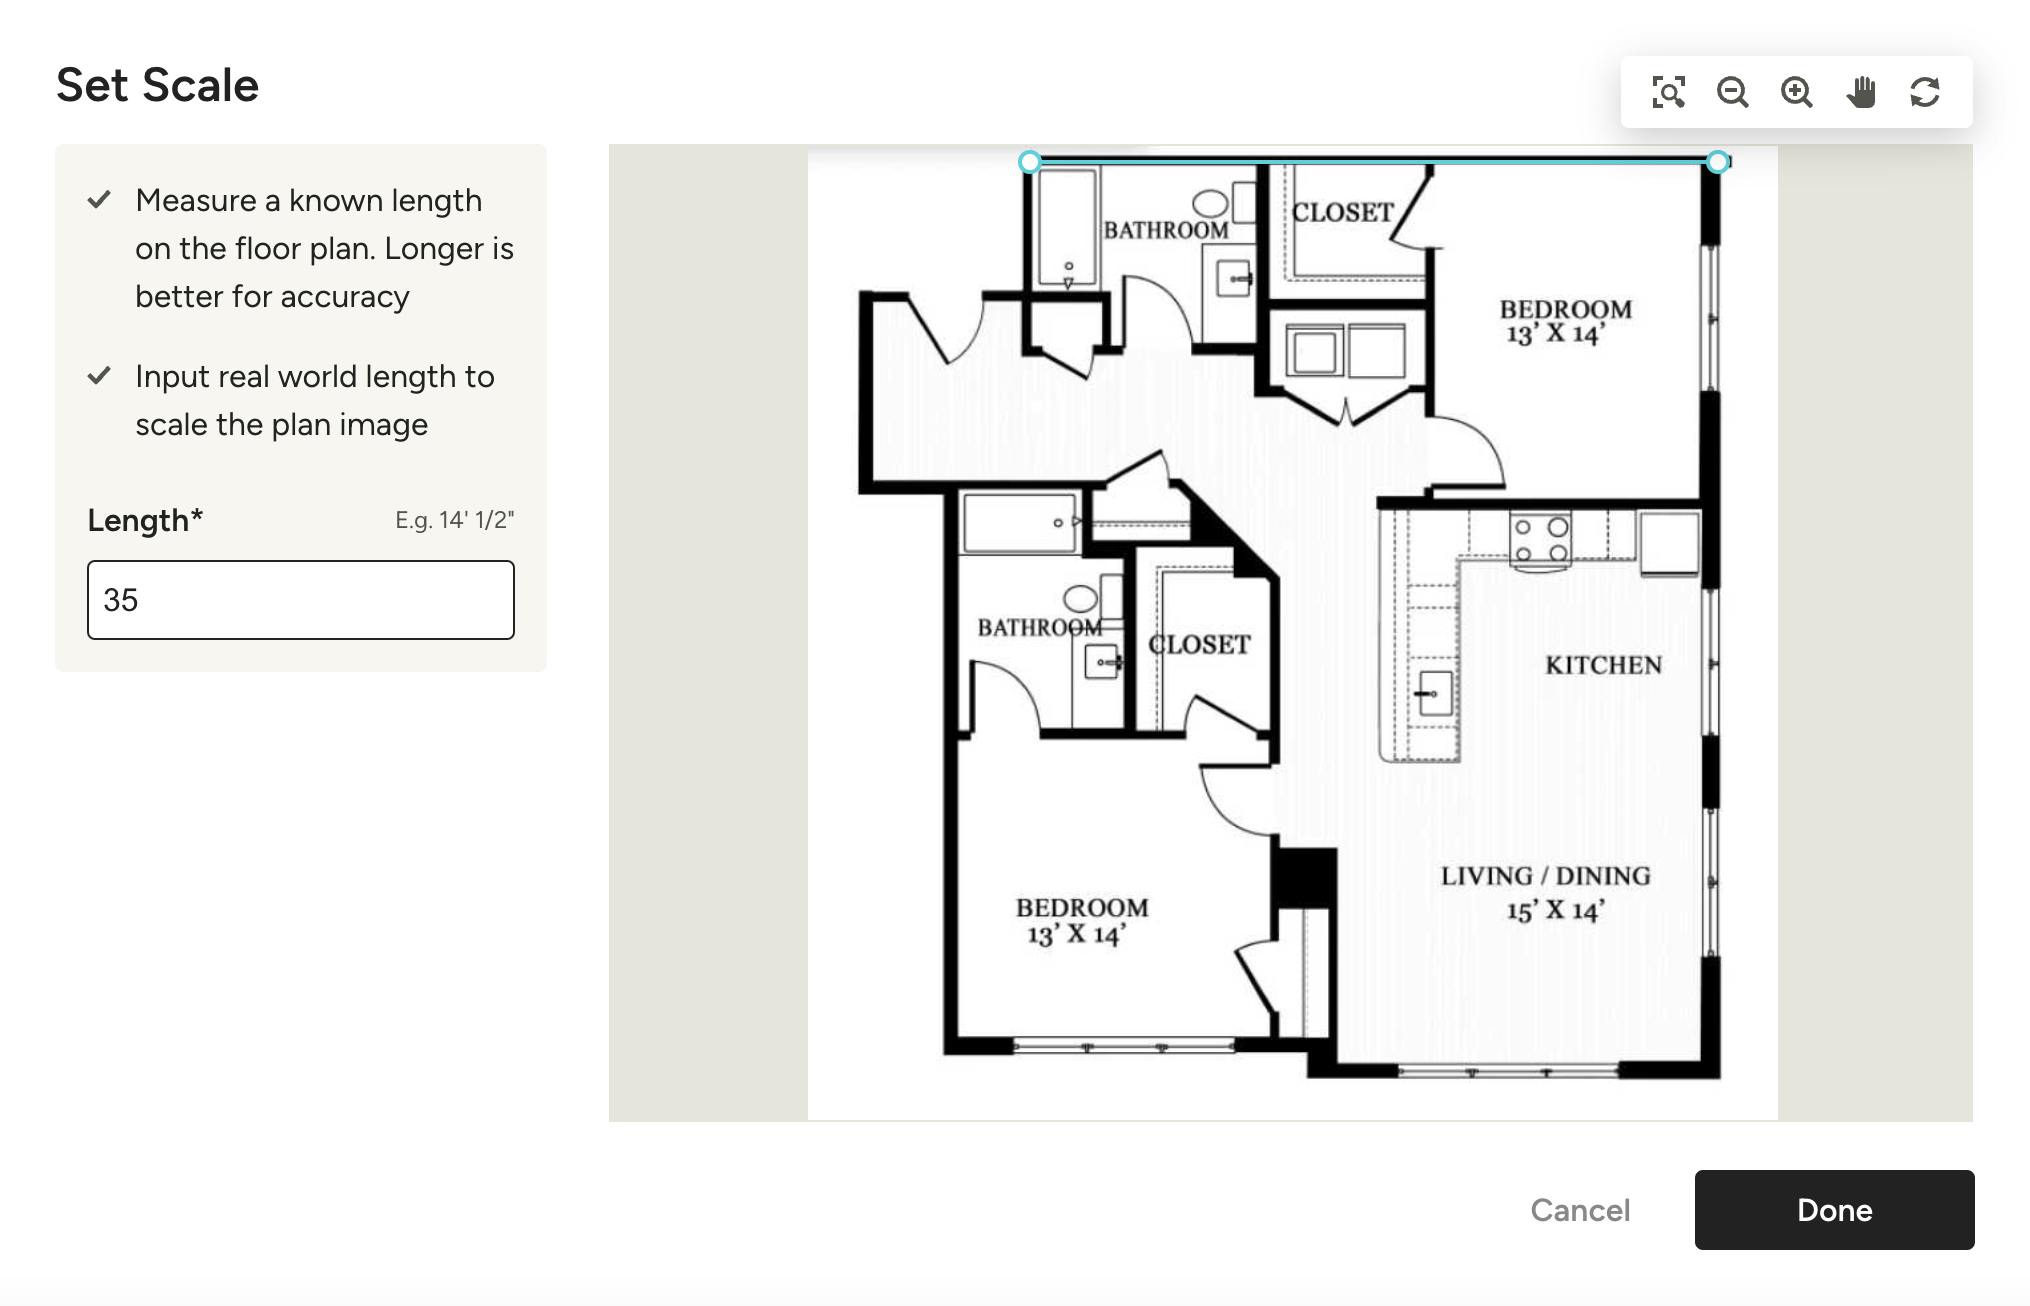
3. During upload, it's important to set the scale to ensure measurement accuracy. To set the correct scale of your 2D imported image, move the ruler end points on the floor plan image to a known length, and enter the length in the Length box.
If you make a mistake during the upload process, you can always adjust later on.
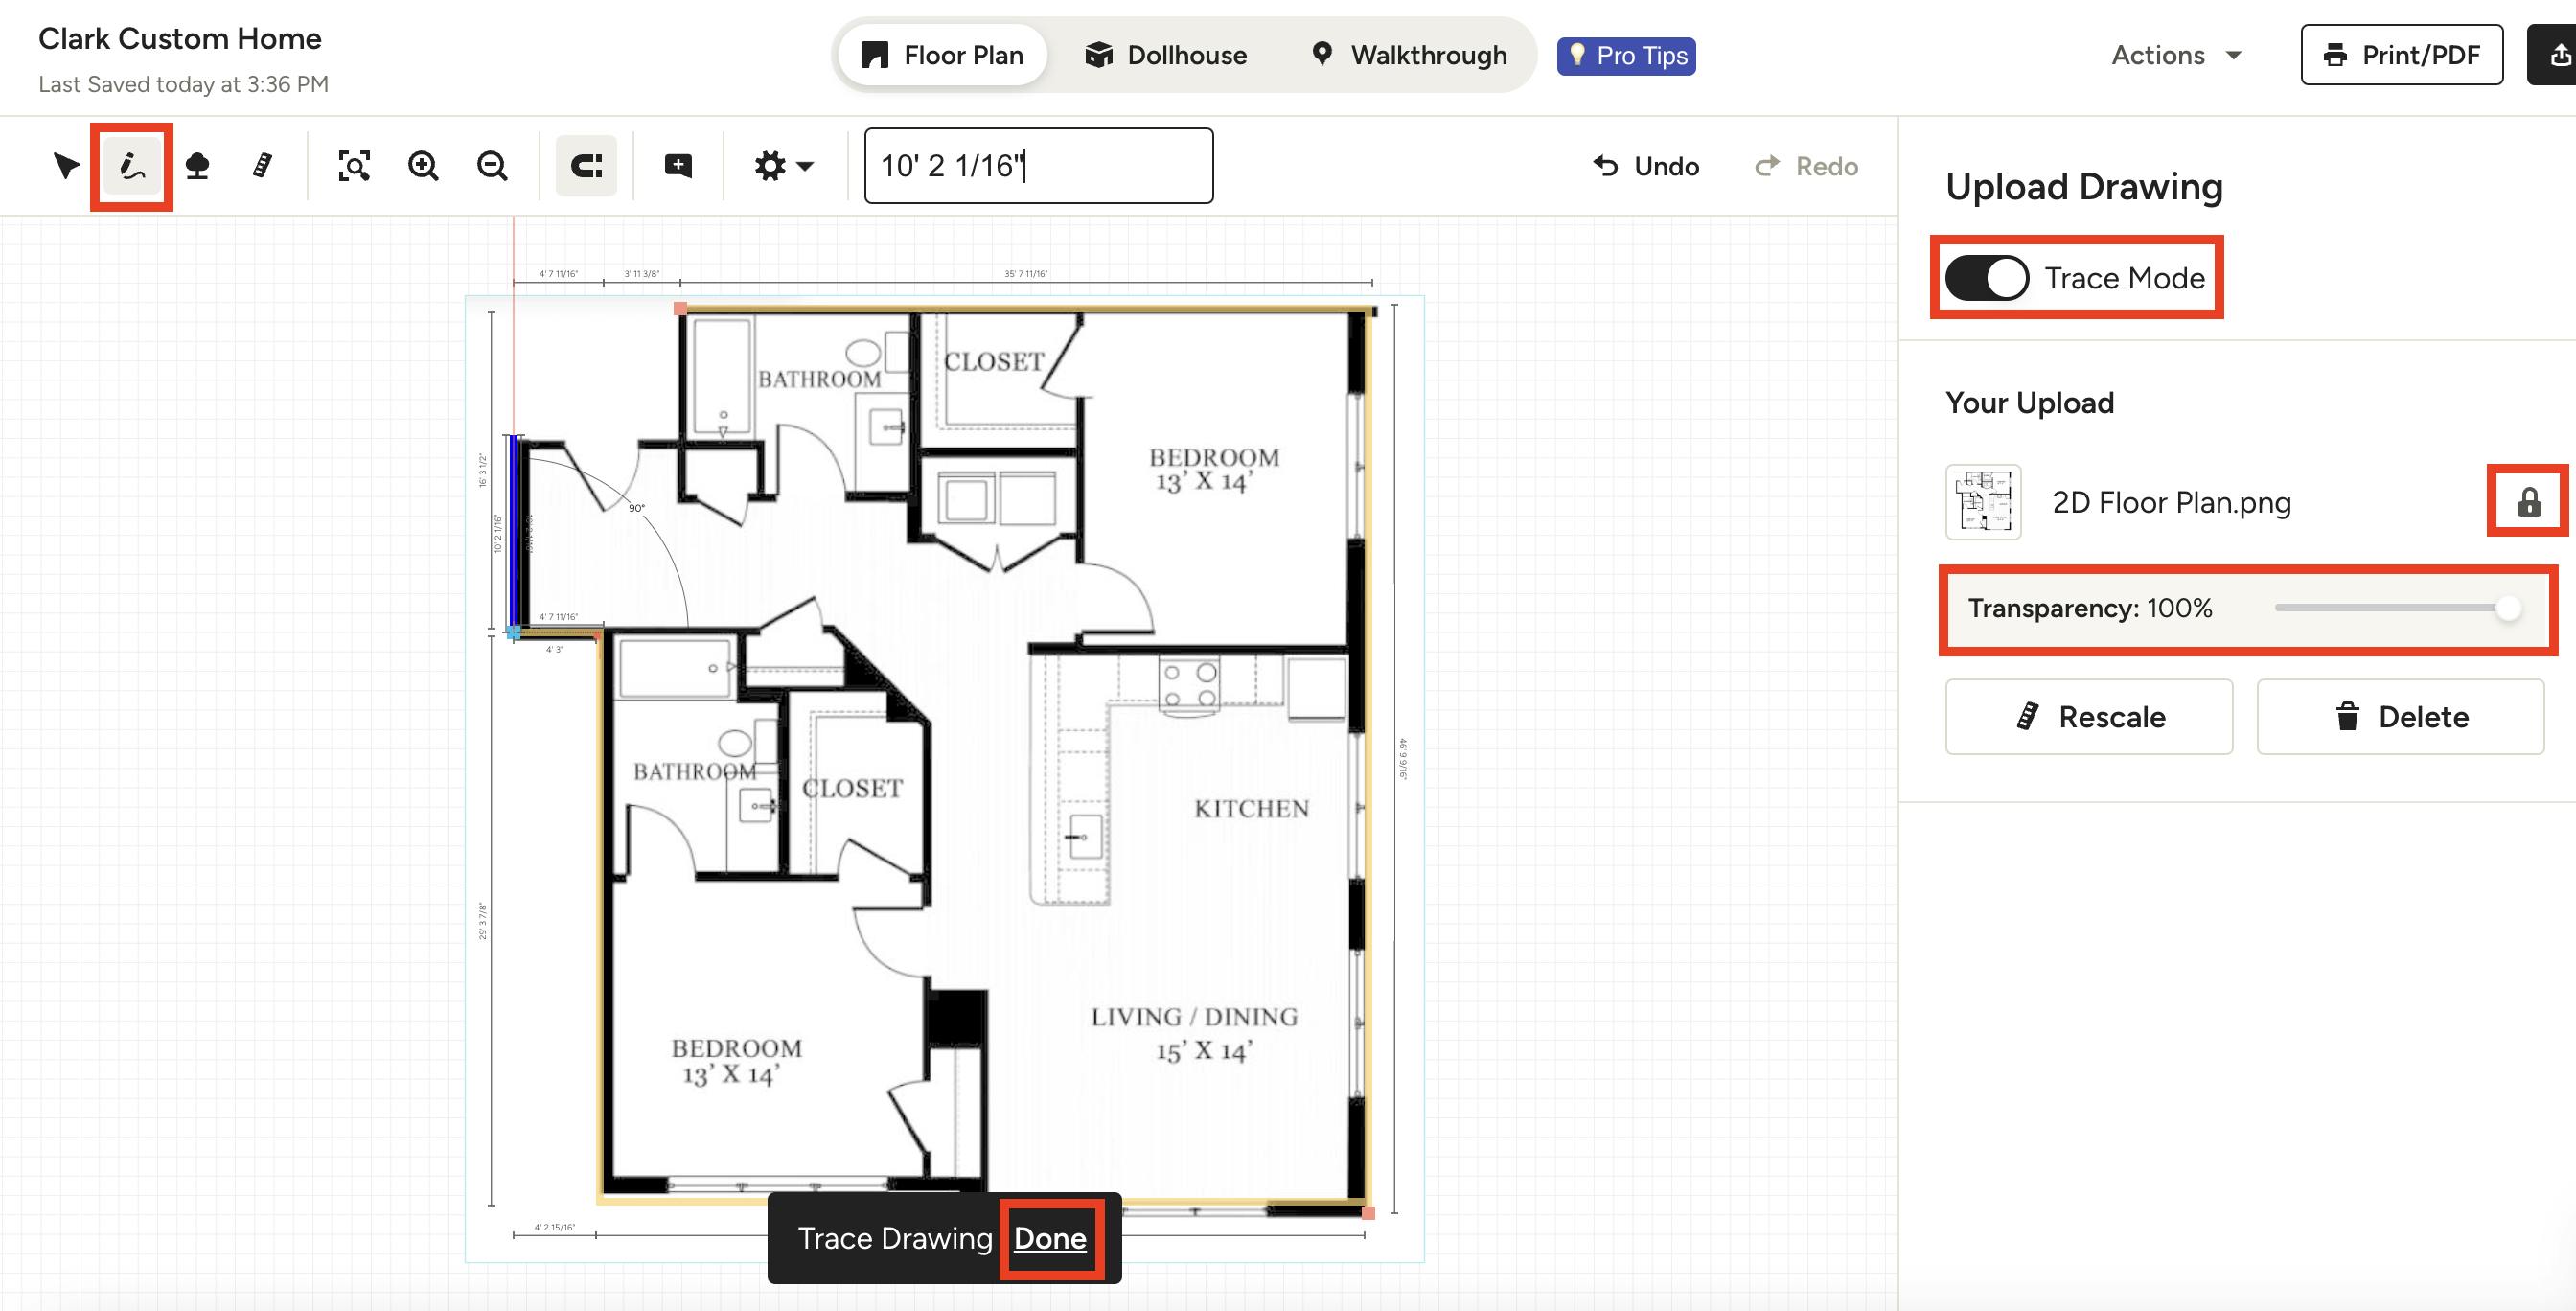
4. The imported plan will now be an image layer. Turn on Trace Mode, and find the Draw Walls tool in your toolbar to trace your imported plan and create a 3D version.
Some tips:
- Make sure that the walls are fully traced and rooms are fully enclosed before adding doors and windows. If you stop your walls at the door openings when tracing, the floors will not be correctly captured.
- For easier tracing, you can adjust the transparency of your uploaded plan image using the “transparency” slider. If you need to rescale your floor plan, just click on the ruler icon. When you’re done tracing your floor plan, click done or toggle off “trace mode.”
5. Once you are done working with your imported 2D plan, you can move it out of the way by clicking the lock icon on the right panel.
Customize Your Floor Plan
Once you created your floor plan, you can now start the customisation process by adjusting dimensions and adding walls, floors, windows, doors and furniture.
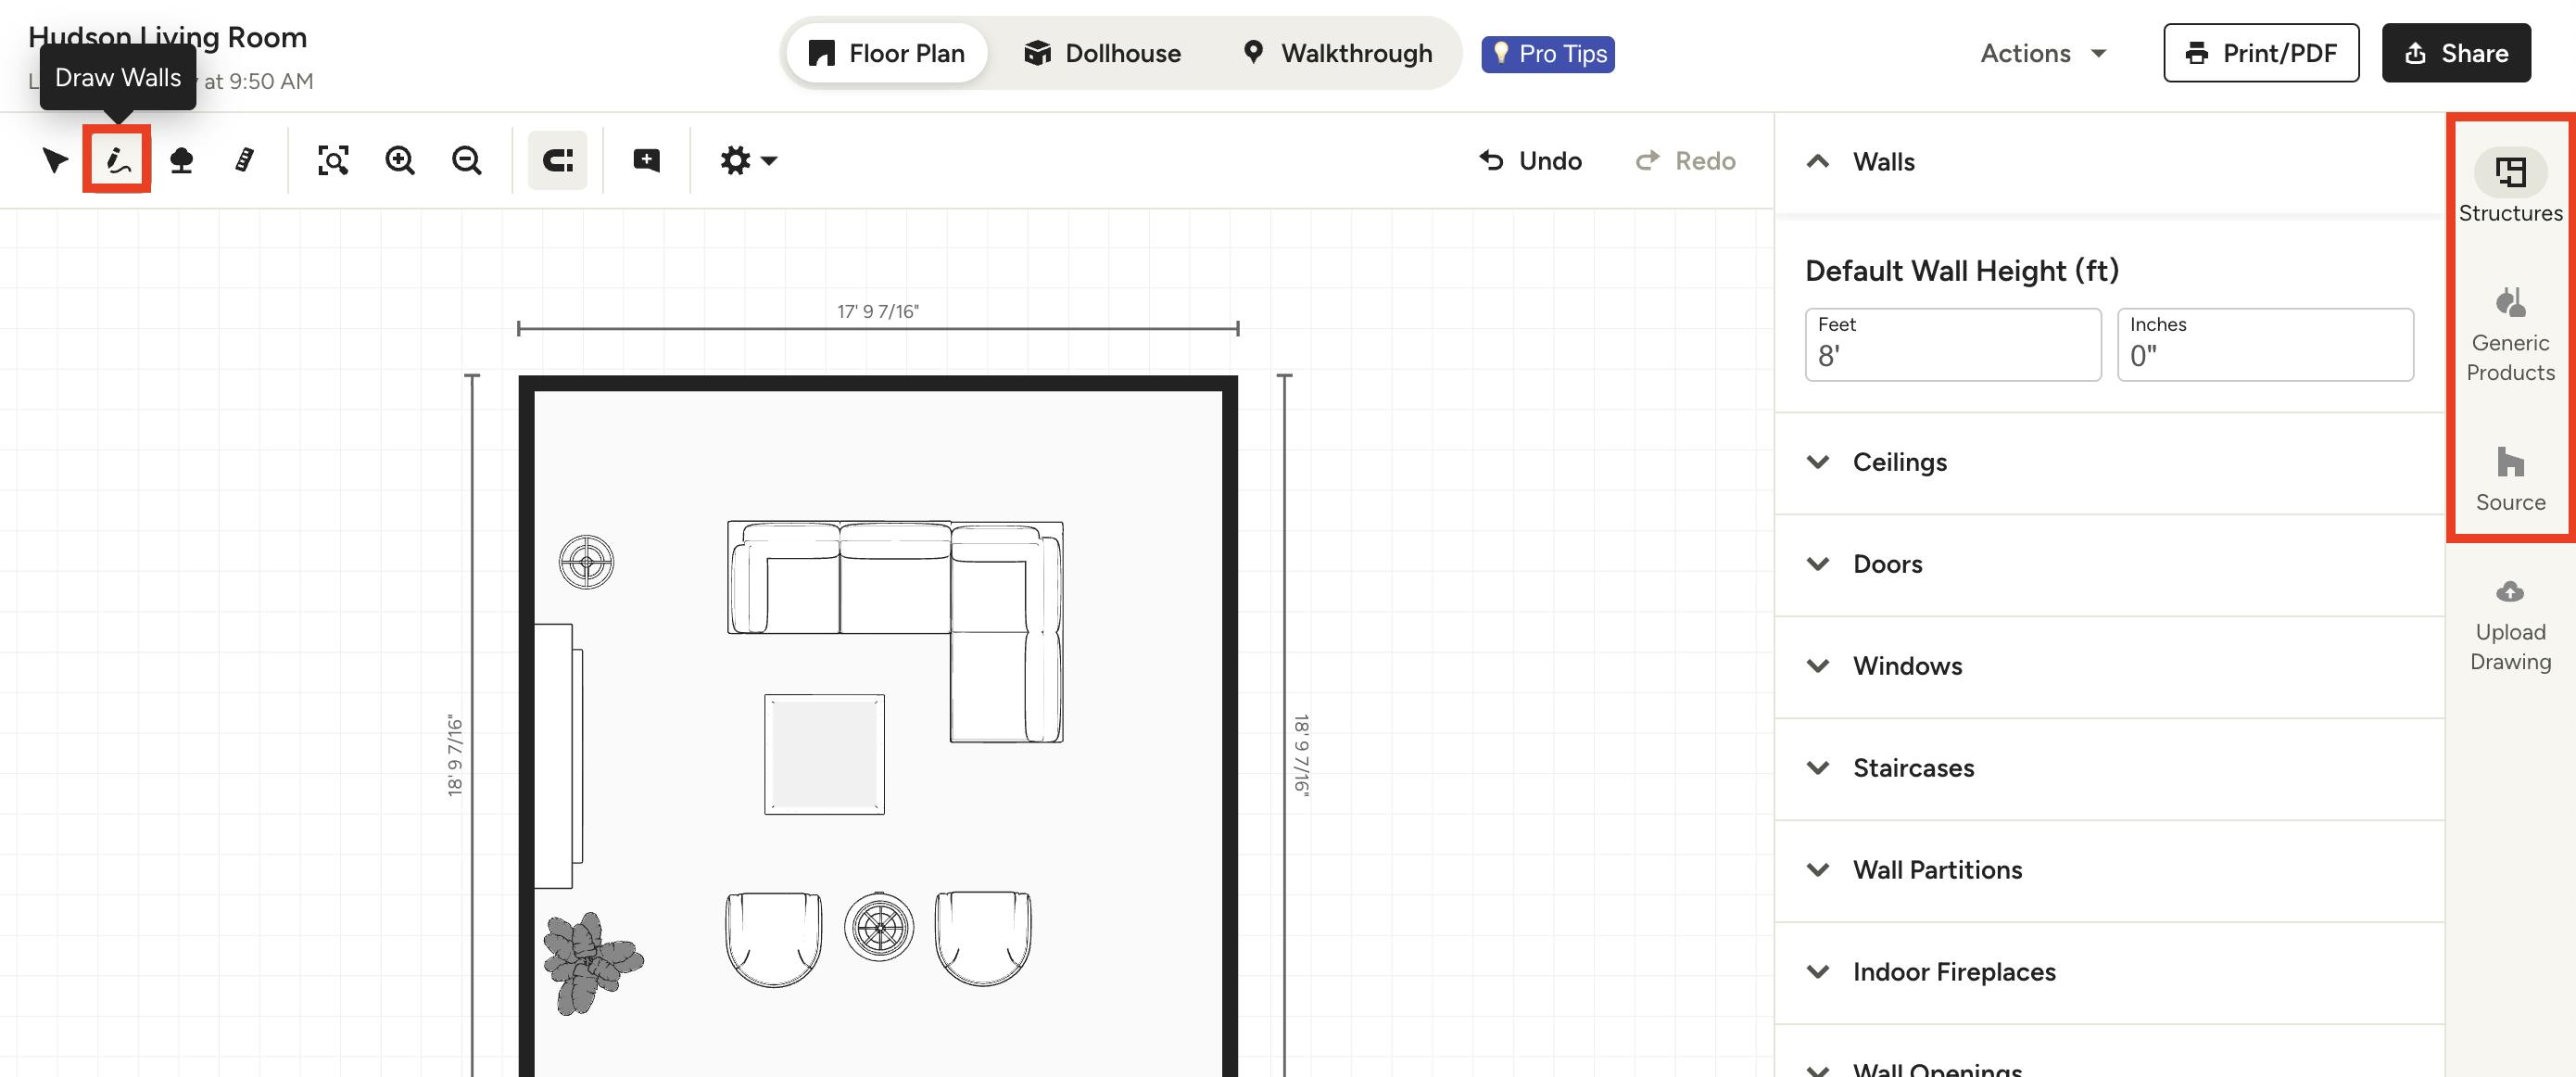
To start building out your walls, use the Draw Walls tool in the toolbar at the top of your screen. How to Create Accurate Wall Lengths provides more details on how to build out the walls for your project.
Select Structures from the right-hand menu to adjust wall heights, ceilings and add doors, windows, staircases and other architectural details.
When you're ready to fill your space with furniture, select the Generic Products tab to browse your options. You can either use search to look for a specific product or browse by category. How to Line Up Floor Plan Items provides more details on properly placing furniture.
If you prefer to use products you can buy on Houzz, select the Source tab. This will allow you to browse thousands of 3D products we sell on Houzz and input them into your design.
View Your Floor Plan
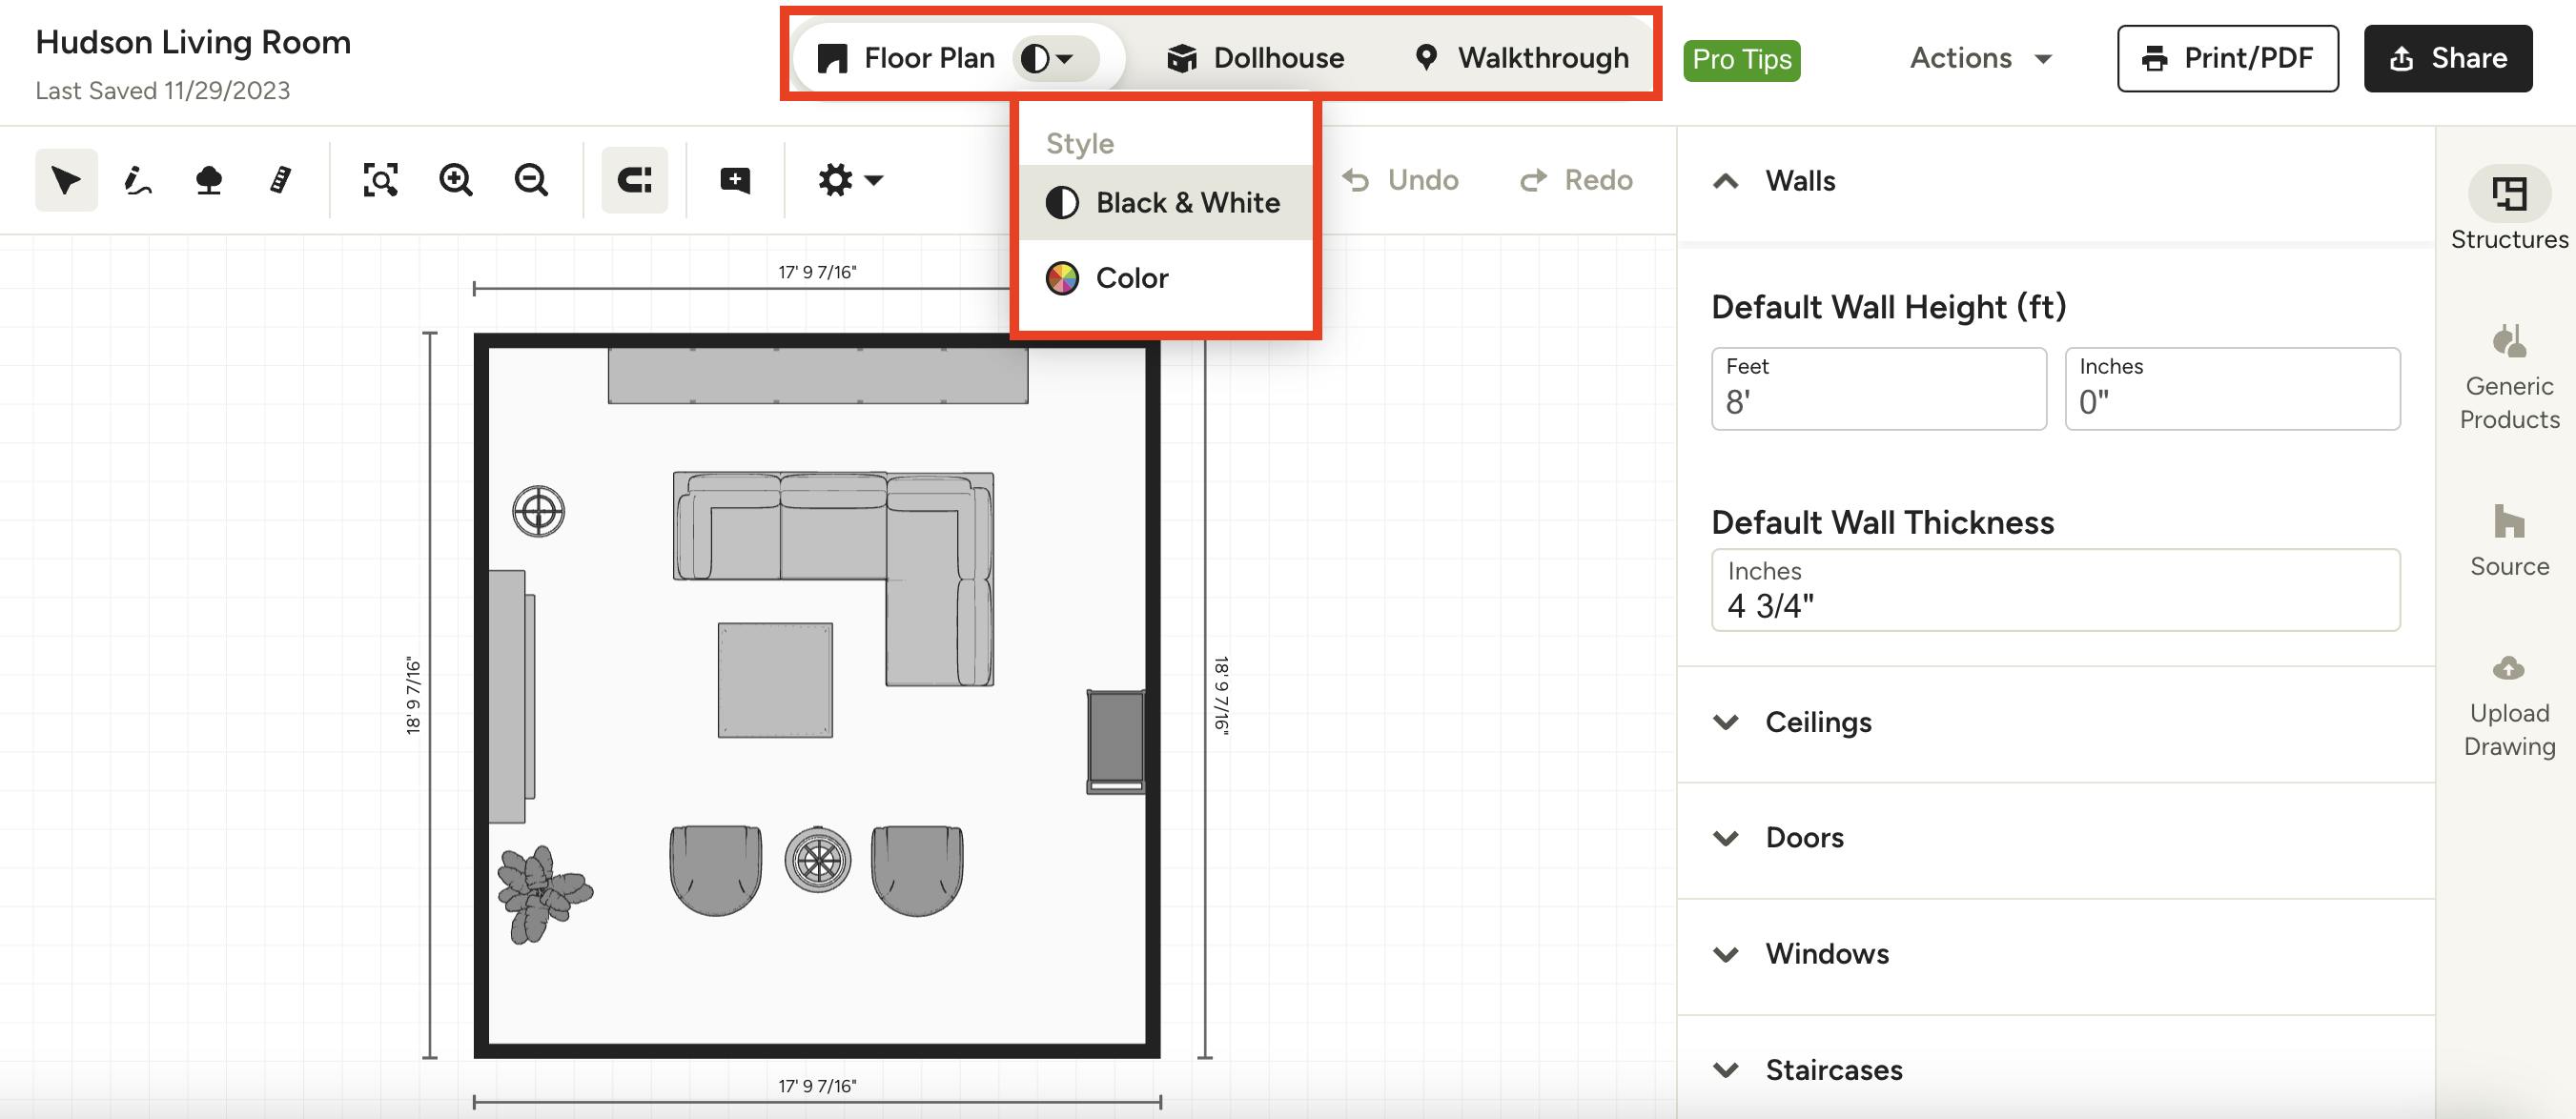
As you work on your floor plan, there are several different viewing perspectives you can use. At the top of your screen, you will see three viewing modes: Floor Plan, Dollhouse and Walkthrough.
- Floor Plan: This is a 2D mode like a blueprint. You can view this mode in both black and white or color. To change, just select your preferred option from the dropdown next to Floor Plan.
- Dollhouse: This shows you the room from a 3D perspective.
- Walkthrough: This shows you the room as if you're standing in it.
In all of these modes, you can navigate throughout the room using left-click to rotate or right-click to adjust the position.
Share Your Floor Plan
Once you've crafted the perfect design and layout, it's easy to share your floor plan, receive feedback, and make decisions with clients to move your project forward.
How to Share and Collaborate on a 3D Floor Plan provides step-by-step details on how to share with clients, add comments and more.