How to Create an Invoice
With Houzz Pro, you can create invoices from scratch, from template, or by converting both approved and unapproved estimates and proposals. This lets you easily schedule future payments and ensures you get paid on time.
An invoice code will be generated when you create an invoice, so you can reference the invoice with team members, clients, and bookkeepers, even before issuing it.
There are several options to choose from when creating a new invoice for your project. You can:
- Convert to invoice from a proposal or estimate
- Create an invoice from an existing template
- Create your own invoice template
- Create an invoice from scratch
- Duplicate an existing invoice from another project
Converting a Proposal/Estimate to an Invoice
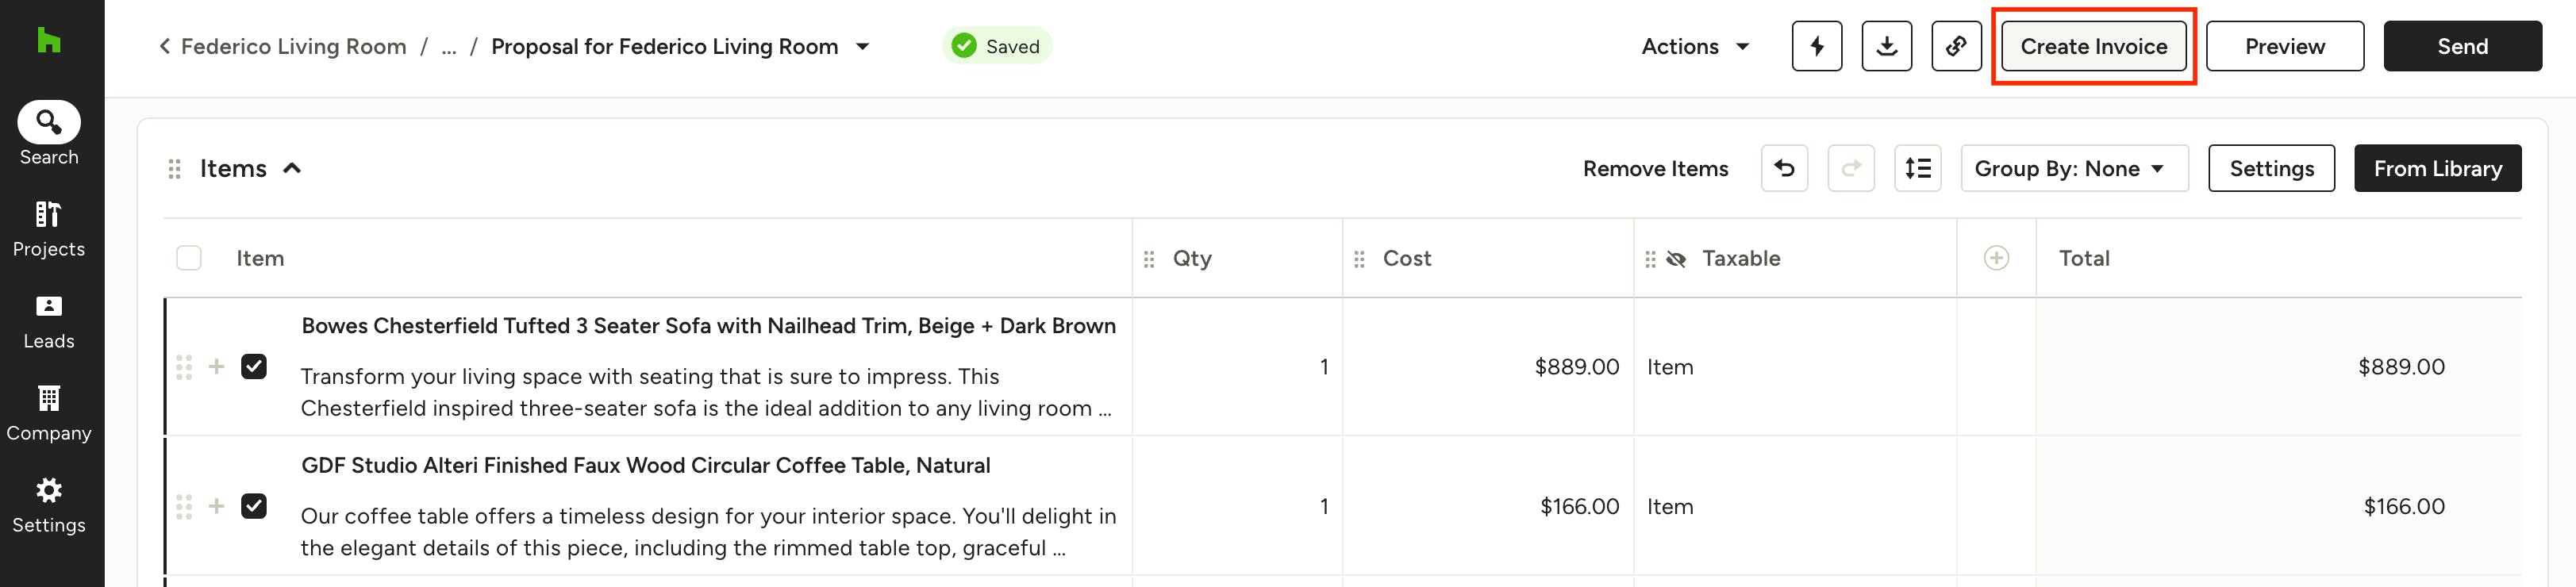
You can create an invoice for an entire estimate/proposal, for a single line item, or for a group of line items. To create an invoice for selected line items, open the estimate or proposal and check off the categories or specific line items you want to invoice, then click the Create Invoice button at the top.
If there are unpaid scheduled payments on the proposal/estimate, those will transfer to the newly created invoice.
Your invoice will include all the information from the line items you selected. You can update the quantities and prices as well as make any additional edits before sharing the invoice with your client.
Line items on invoices that are in Draft or Sent status can still be removed. Removing a line item from an invoice will return that item to the estimate or proposal so you can create an invoice later on.
You can leave the default name for your invoice or click the field to choose your own name. Setting a particular name can help you differentiate between payment requests later on.
Create Invoice from Template
If you have previously saved a past invoice as a template, you can use it to create a new invoice that's already formatted to your desired layout and/or pre-filled with any relevant products or services.
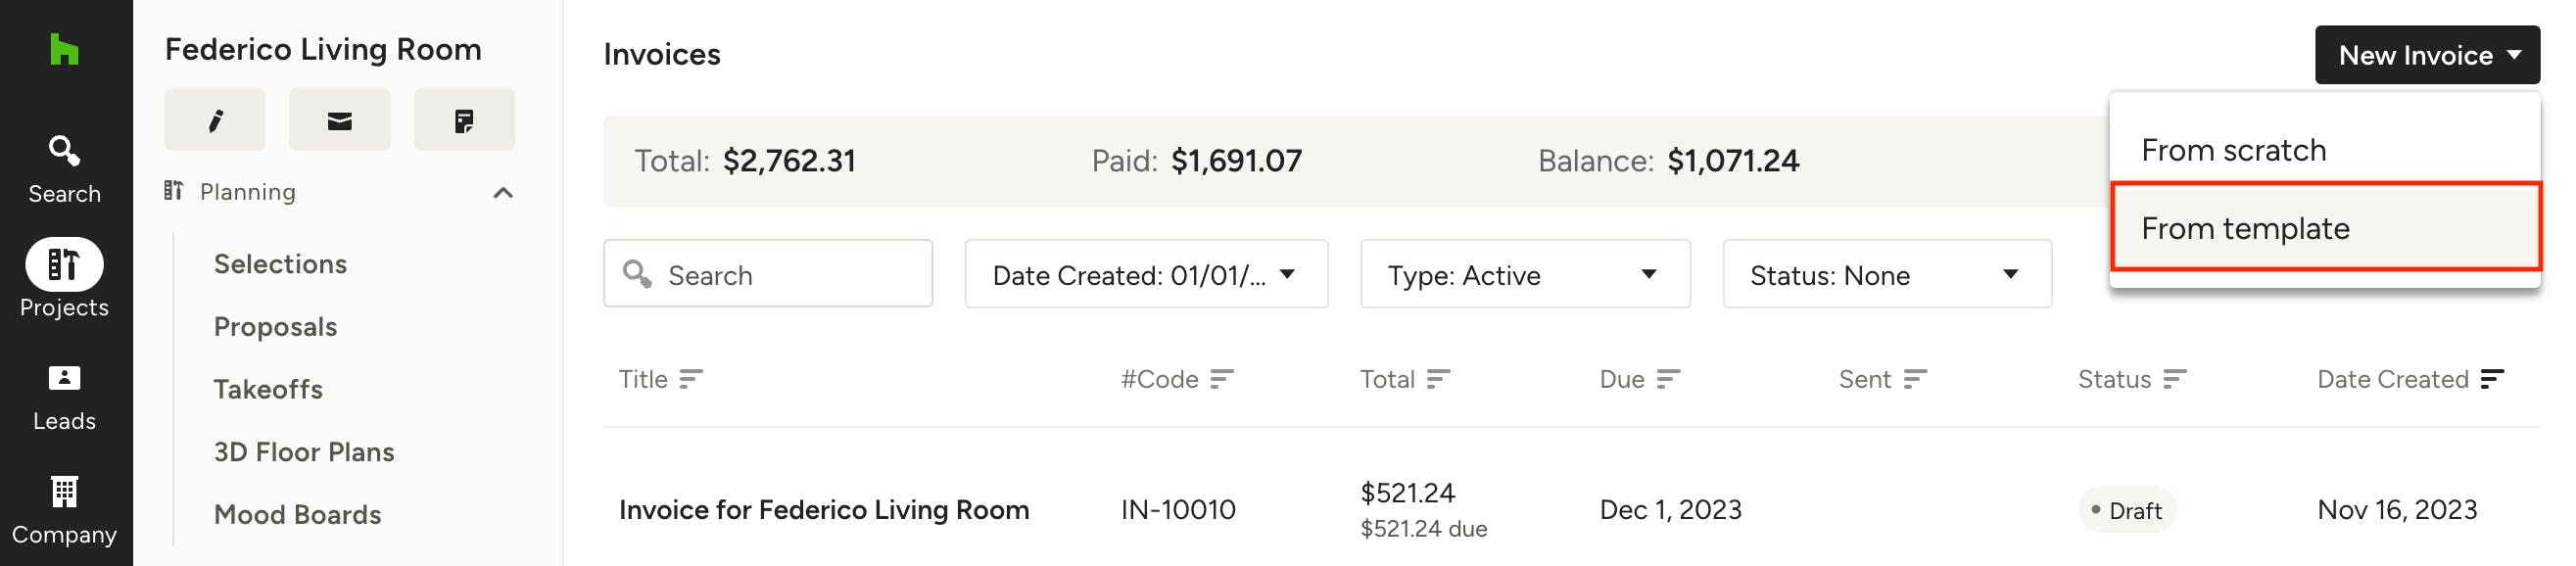
To create an invoice from a saved template, find the Invoices section in your project, click on the New Invoice button and select "From template". Choose the template you want to use and click Create. You can then edit and add any necessary details to your new invoice.
Create Your Own Invoice Template
If you have a standard template for your business that you would like to use time and time again, you can also create your own custom template.
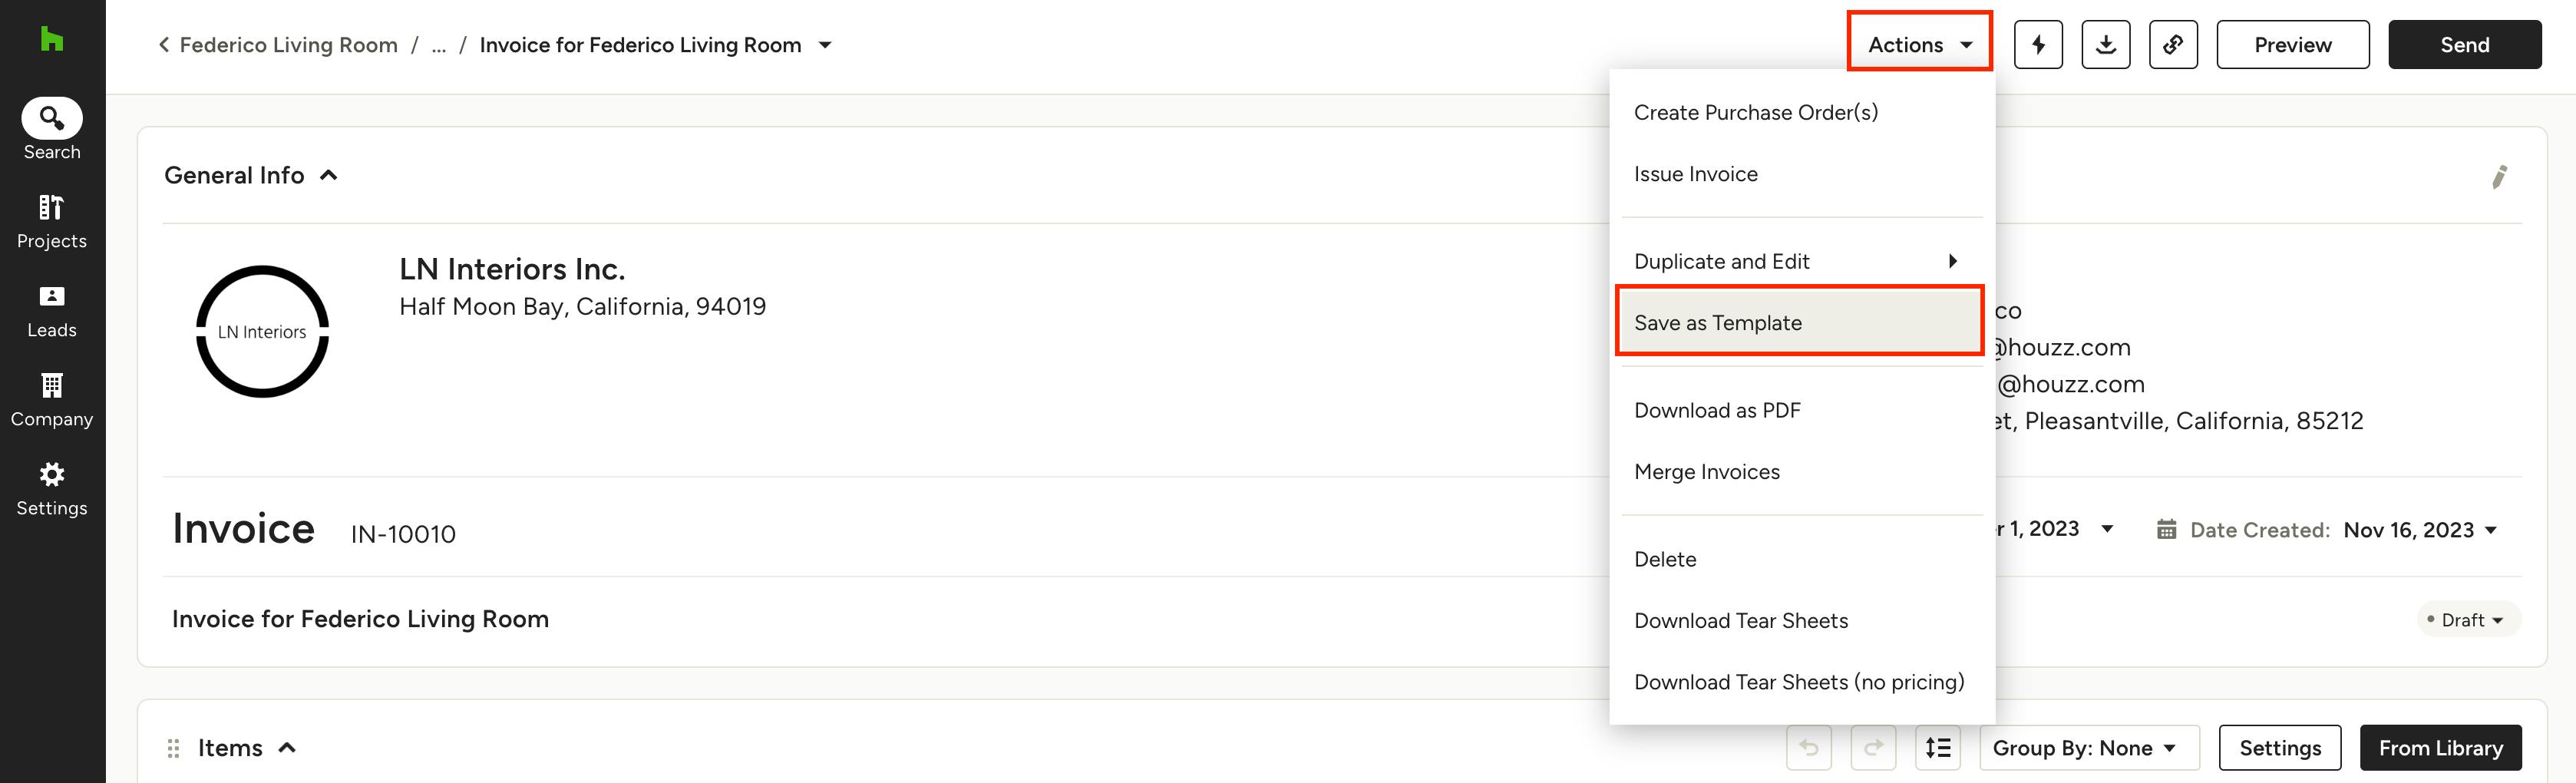
Once you create your invoice with your preferred format, select the Actions dropdown, and find Save as Template.
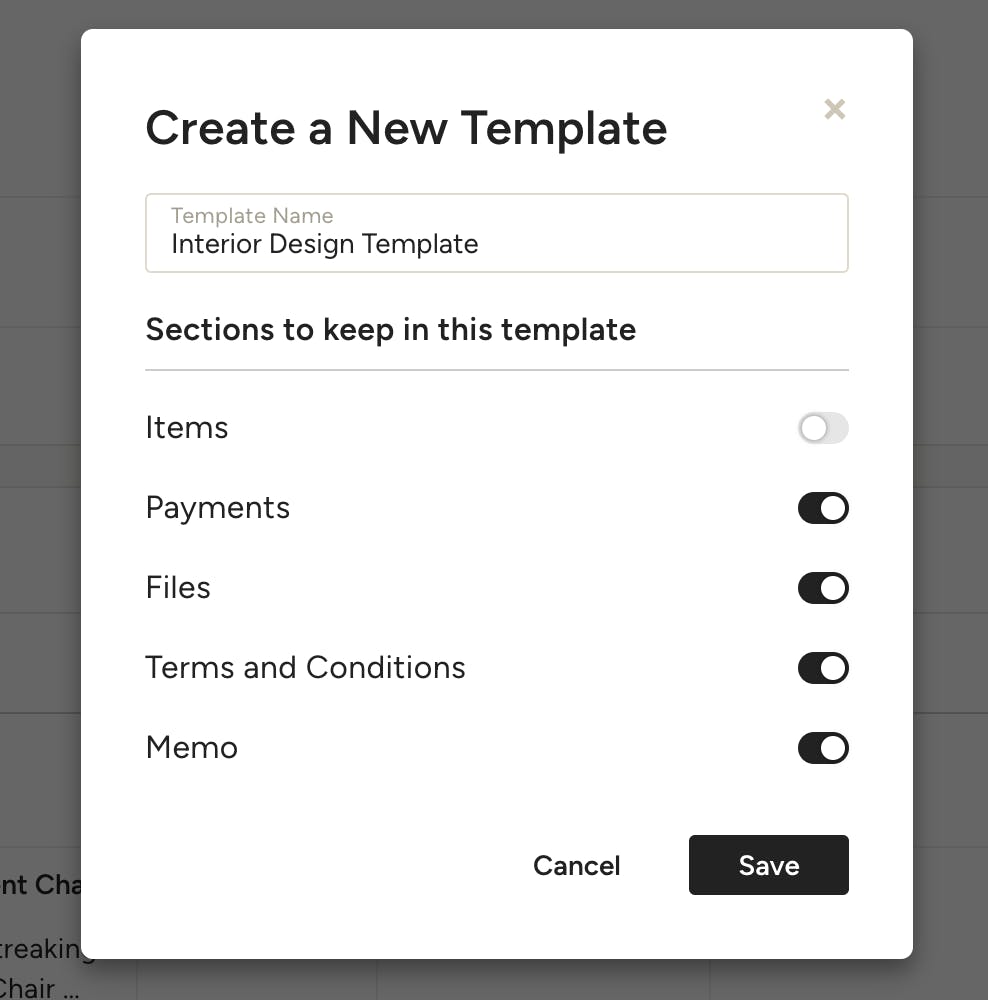
From there, you can name your template and select all the sections you would like to keep for your invoice template. Click Save.
Once you create your template, you will be able to access it in the Template Centre whenever you need it.

Create an Invoice from Scratch
You can also create a new Invoice from scratch to customise it exactly the way you want. There are two ways to do this:
- On your Houzz Pro homepage, click the Invoice icon in the Create New section and select "From scratch", then assign it to a project.
- From the Invoices section within a project, click on the New Invoice button and select "From scratch".
Adding Items
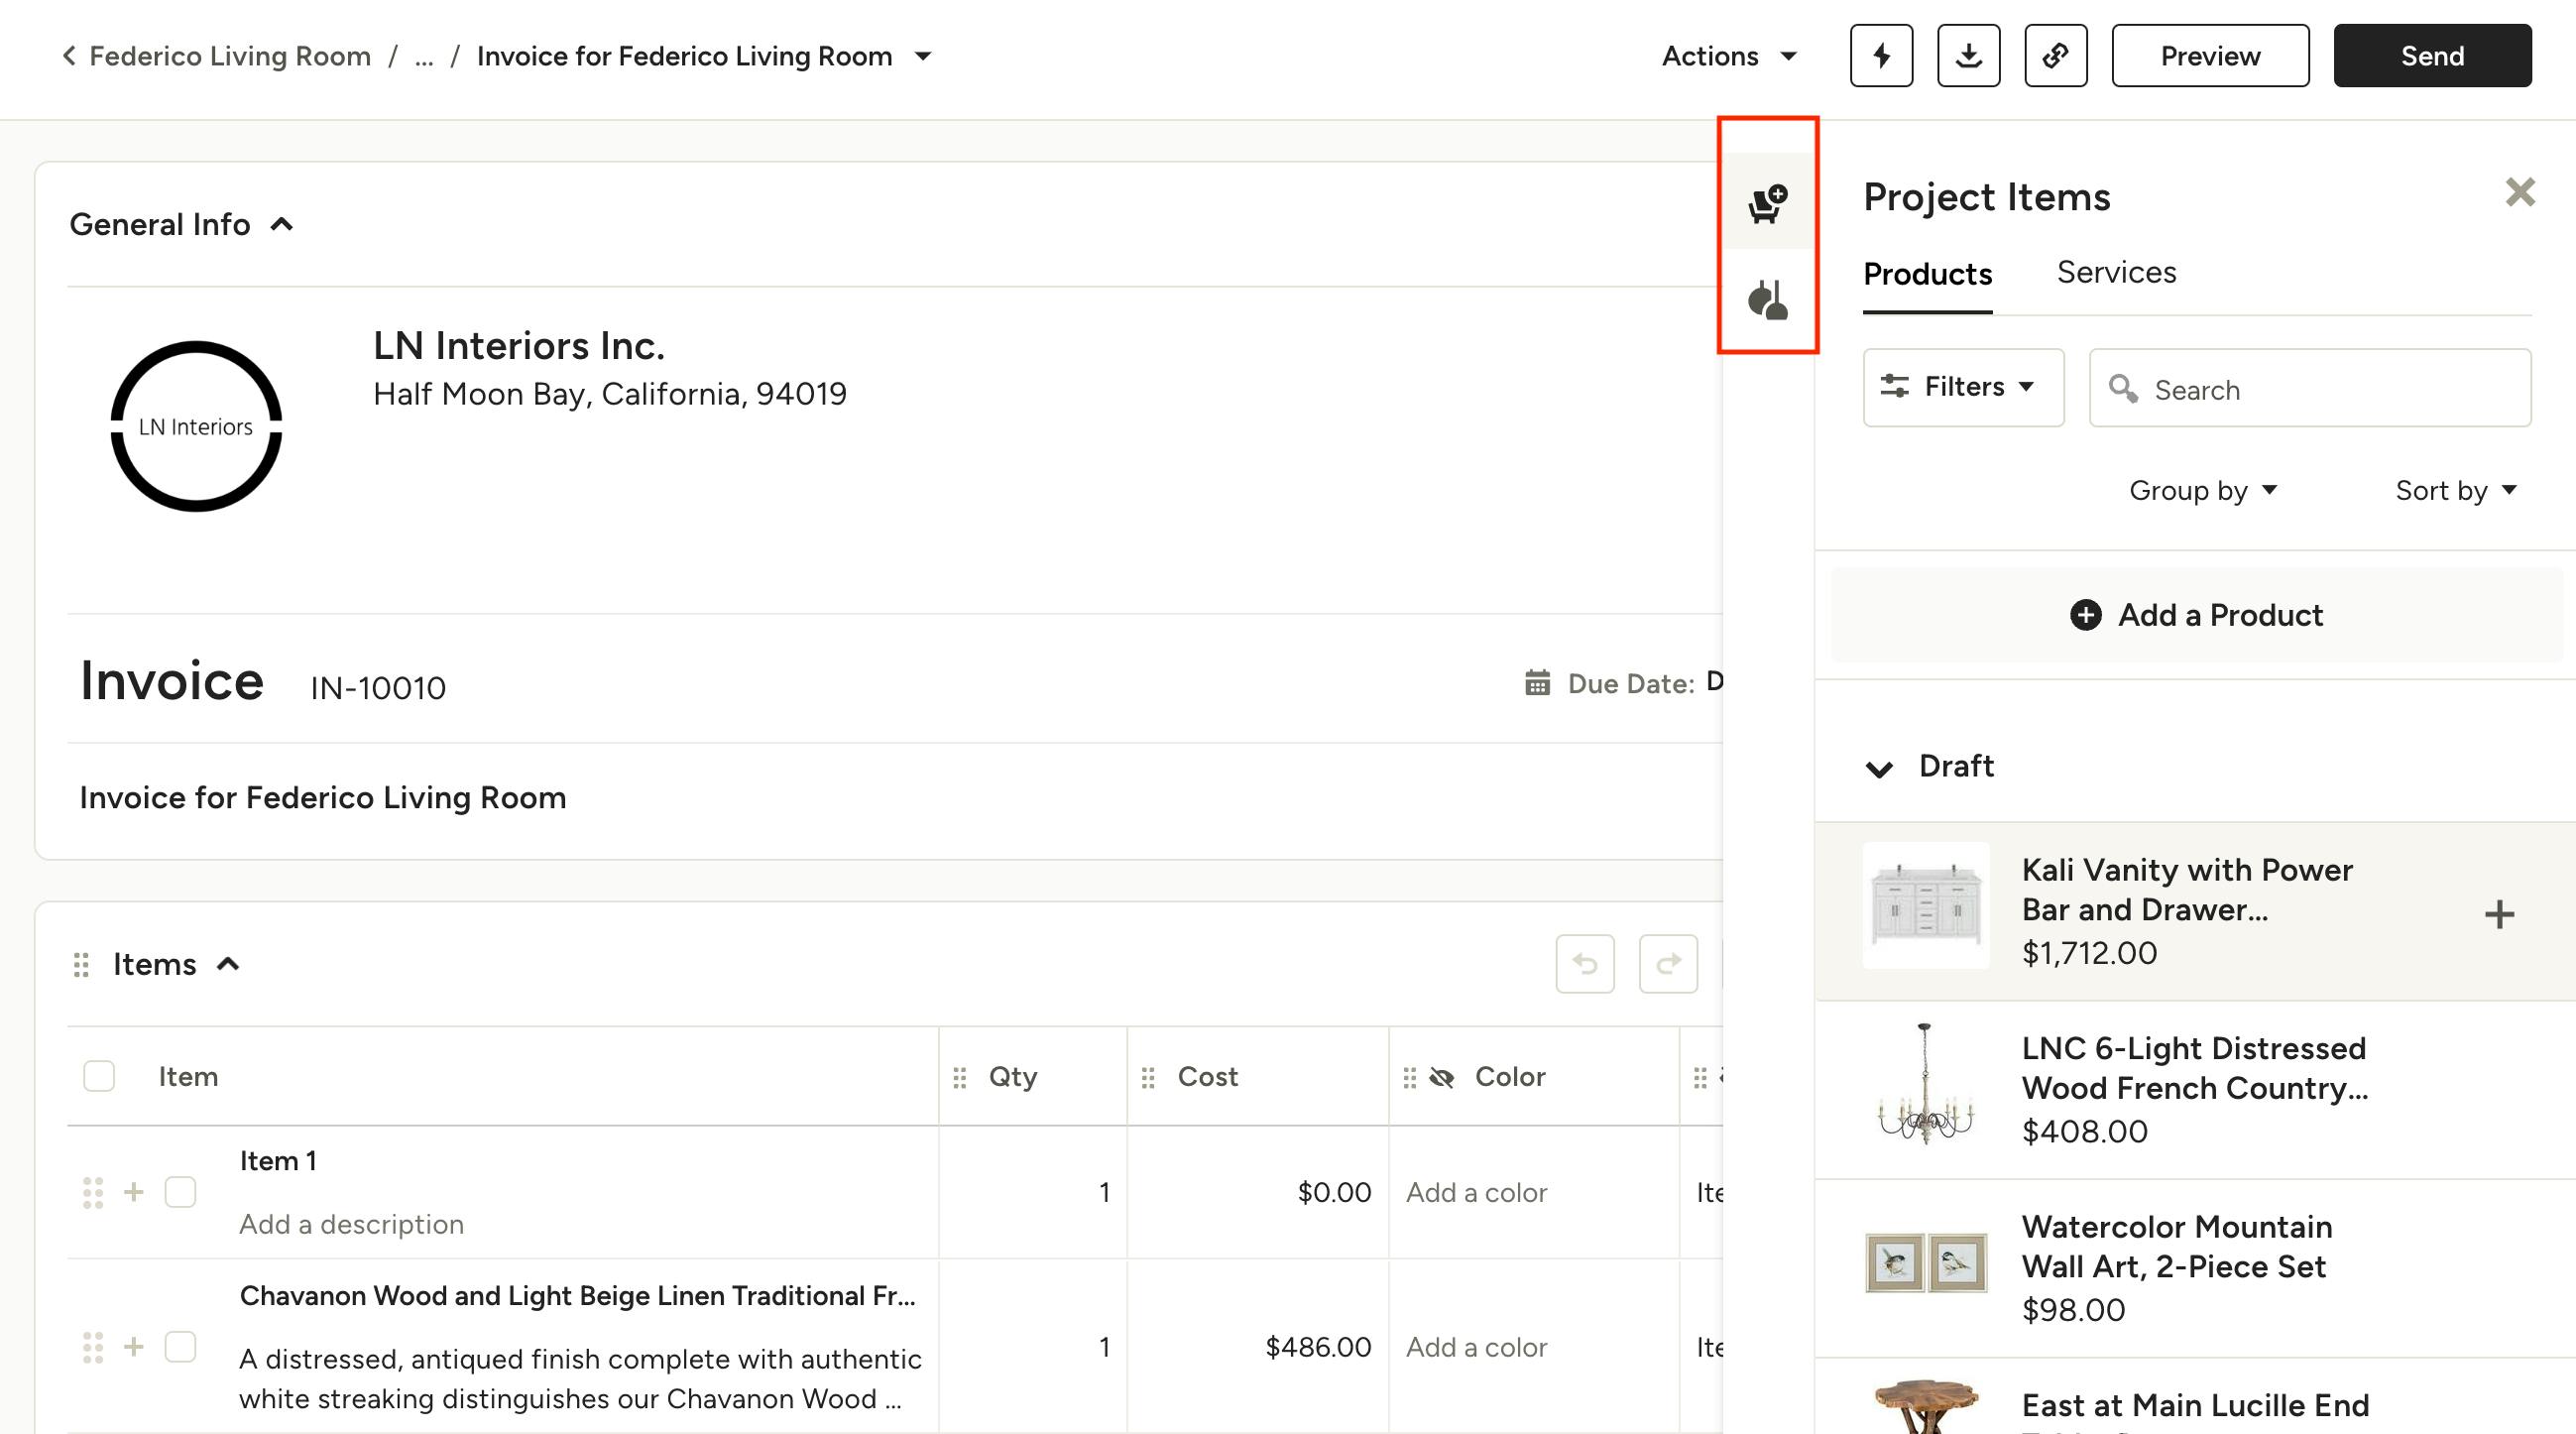
Once your new invoice is created, you're ready to add items. You can click into any field on a line item to manually add information, or click the From Library button on the right to access your Project Items (chair icon) and Product Library (light icon).
Use the filters and search bar to quickly find the items you want , then click the item(s) to add to the invoice. Once added, you can manually update the details, like descriptions, quantity or marking an item taxable / GST applicable.

Grouping Items
Arrange your invoice how you want it by grouping your line items by category, room, any single-select custom field you added, or no grouping at all. These groupings will also be applied to the downloaded PDF and client view of the invoice.
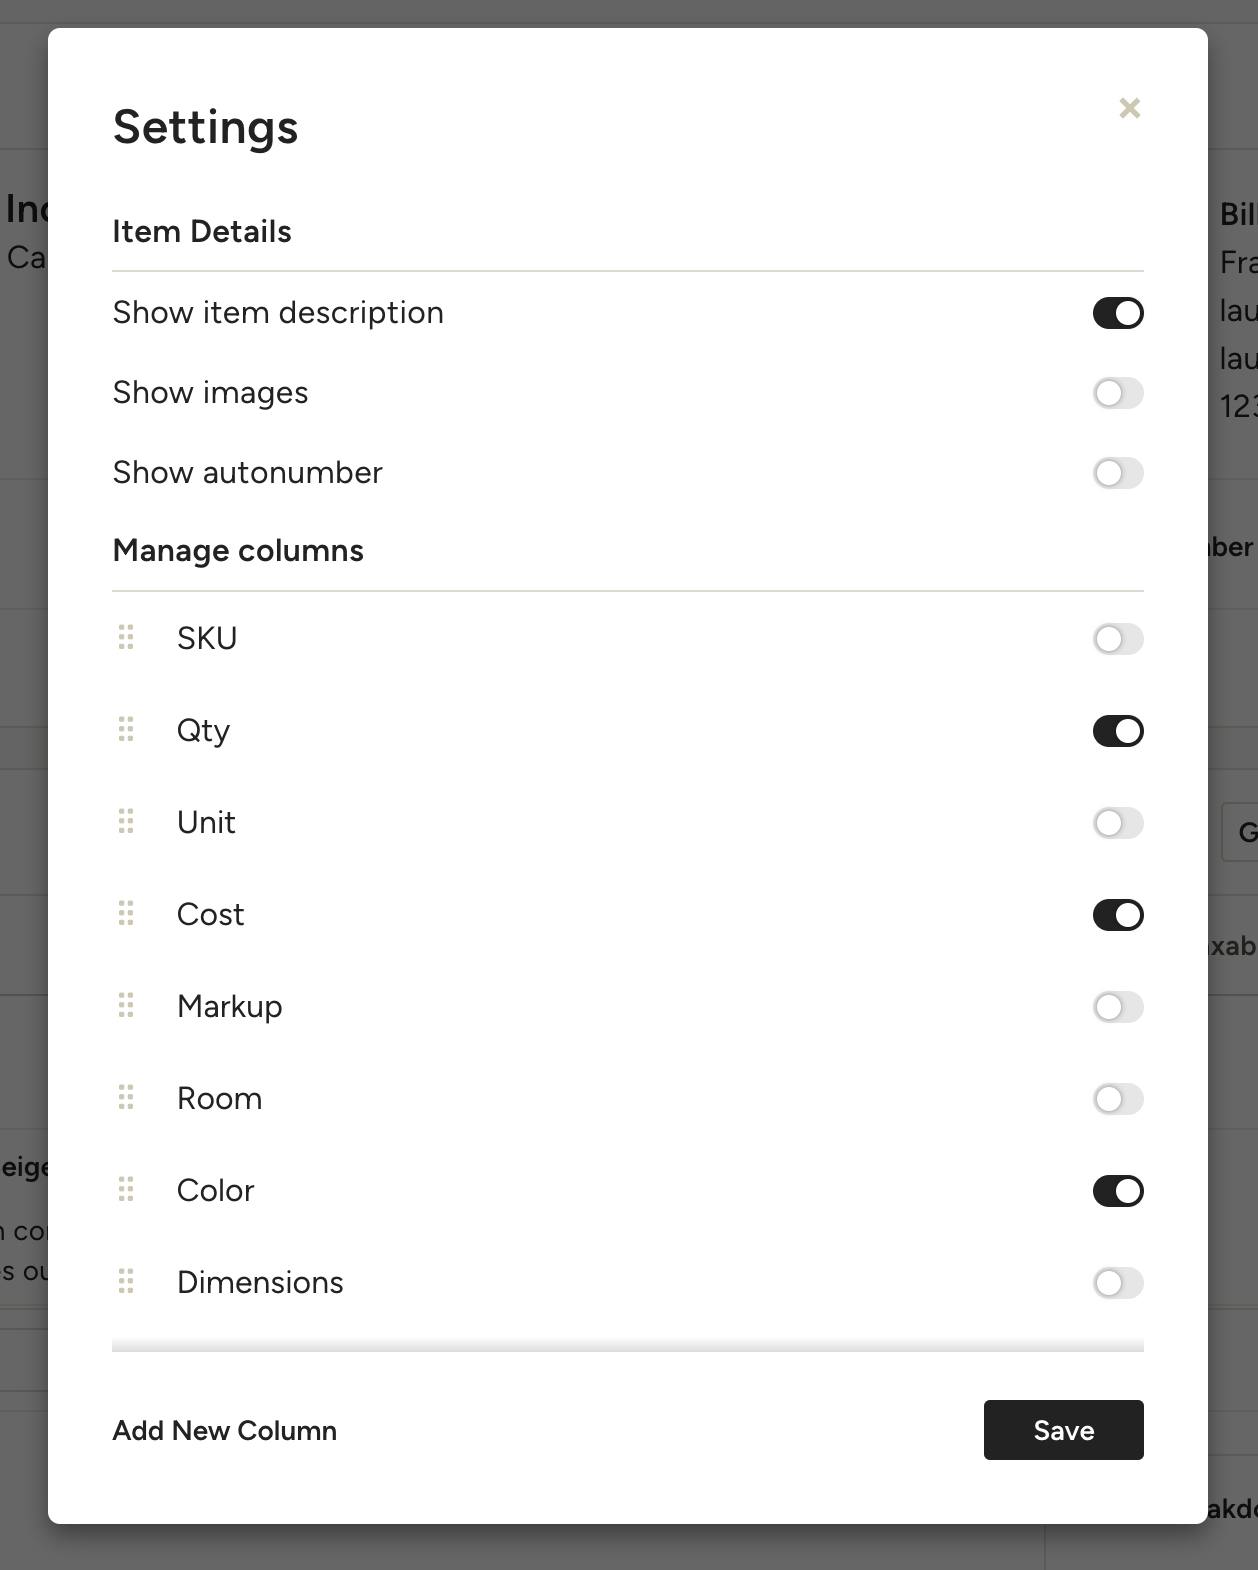
Customising Columns
To add or remove columns, click on Settings and turn on/off the columns you wish to show or hide; this view is for you and your team, not the client. To edit what the client sees, check out the next section about previewing and sharing.

Duplicate Existing Invoice
If you have an invoice that you used in a previous project and would like to use again, you also have the ability to duplicate that invoice and move it to another project. Here's how:
- Open up the invoice you would like to duplicate. Select the Actions dropdown, and find Duplicate and Edit.
- From there, you can choose to either duplicate the invoice to the existing project, or you can duplicate the invoice and move to another project.
3. If you decide to use in another project, just select that Project from the dropdown menu that pops up, or you can choose to create a new project for this invoice.
4. The duplicate invoice will now be in the selected project so you can make changes as needed.
Preview and Share Invoice
Before sending your invoice, you can preview it and choose exactly how it will look to your clients.
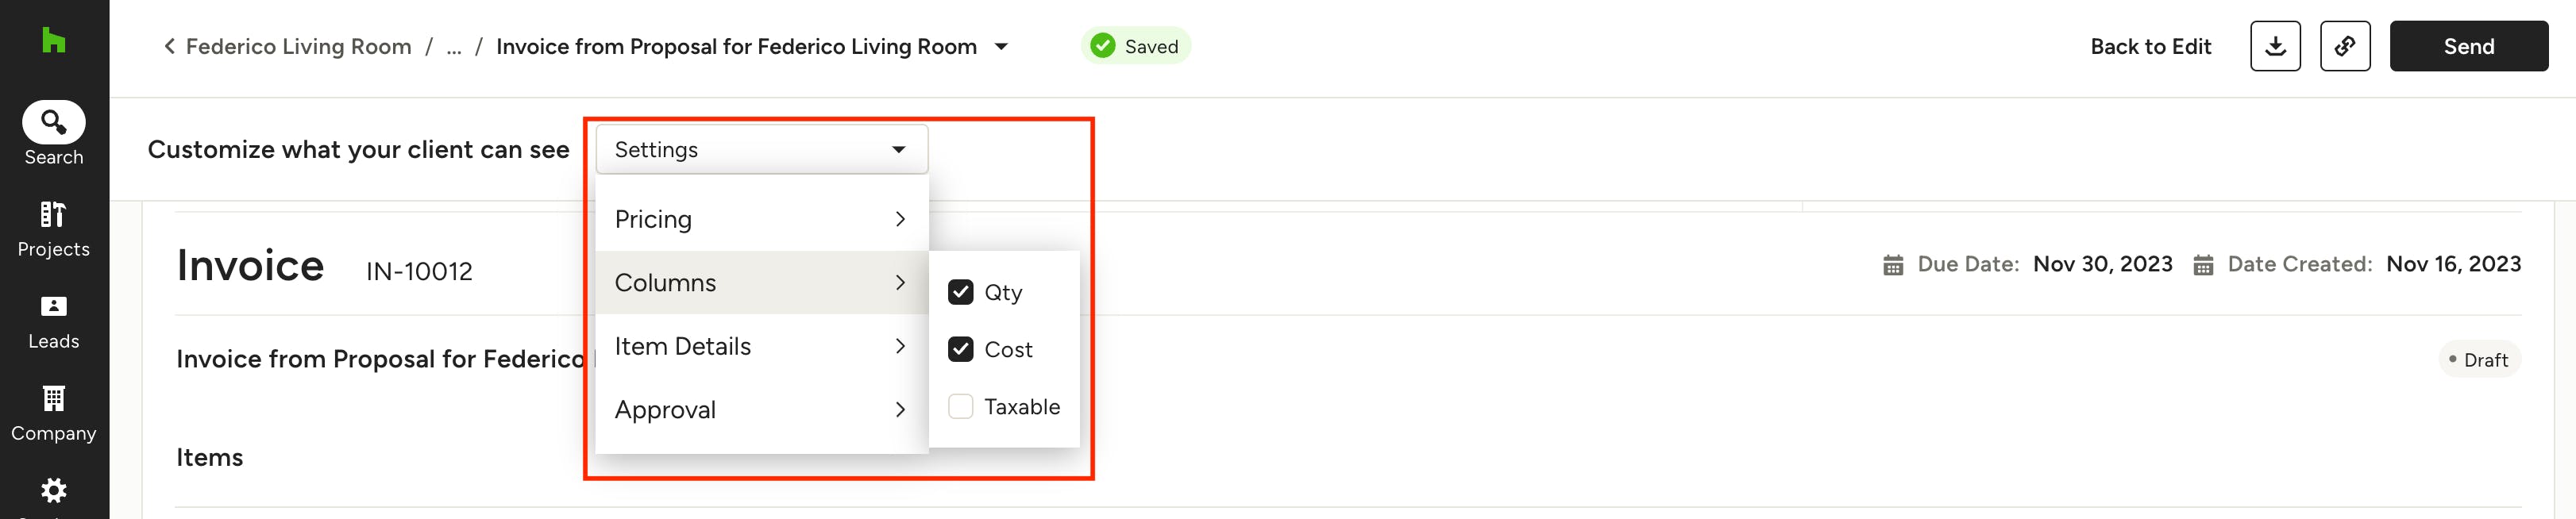
First, click the Preview button at the top.
Next, use the Settings dropdown next to "Customise what your client can see" to check off the relevant boxes next to the information you want to show to the client.
Note: Under the Approval settings you can select "Issue Upon Sending" to automatically issue the invoice when it's sent to the client. This will lock the document from any further edits. Learn more about issuing invoices in the section below.
When your invoice is ready to go, click on Send and you can use your saved message templates instead of writing a new email from scratch every time. Your clients can view the invoice directly from their computer, phone, or tablet device.

Issuing an Invoice
Once you're sure there are no more edits you or the client would like to make to an invoice, issue the document to lock it from further changes; this is for accounting purposes.
To do so, select Issue Invoice under the Actions menu at the top of the document, then click Confirm on the pop-up.
Once you've issued an invoice, it will be synced if you’re integrated with Xero.
Want to automatically issue the invoice when it's sent to the client? Under the Approval settings in preview mode, you can select "Issue Upon Sending". This will lock the document from any further edits once sent.
Not seeing invoices in your reports? Check to make sure they are issued!