How to Access and Organise Your Files
Within each project, you’ll see all your associated files. You can organise your files with folders, upload multiple files at once, preview every file with a click, and manage file permissions with ease.
Here we’ll go through all the different things you can do with Files on Houzz Pro.
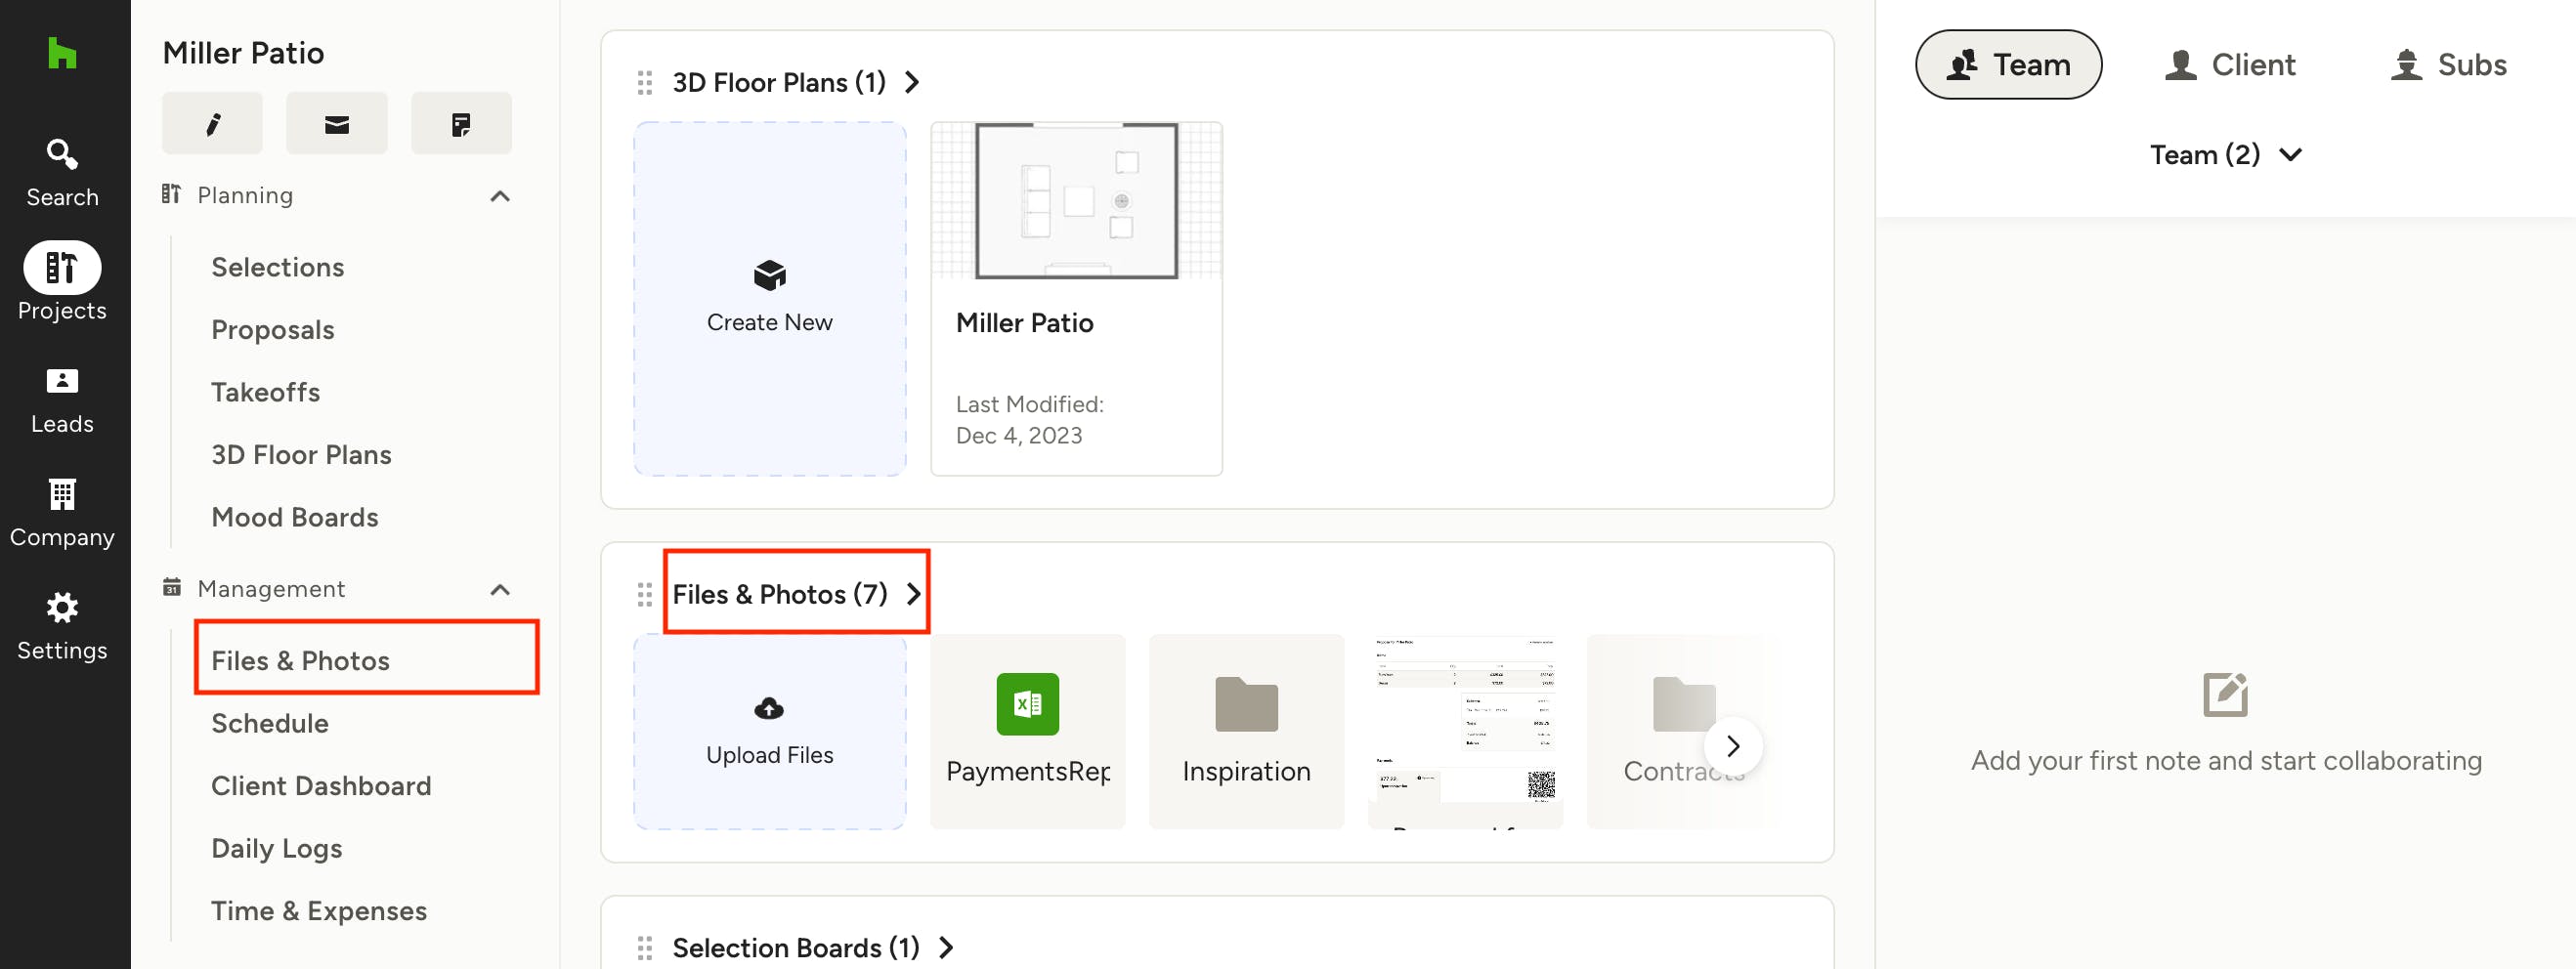
Access files and photos
To access your files and photos for a specific project, navigate to the project overview page, then click on Files & Photos under the Management section in the left navigation. You can also click the title in your Files & Photos tile on the project page.
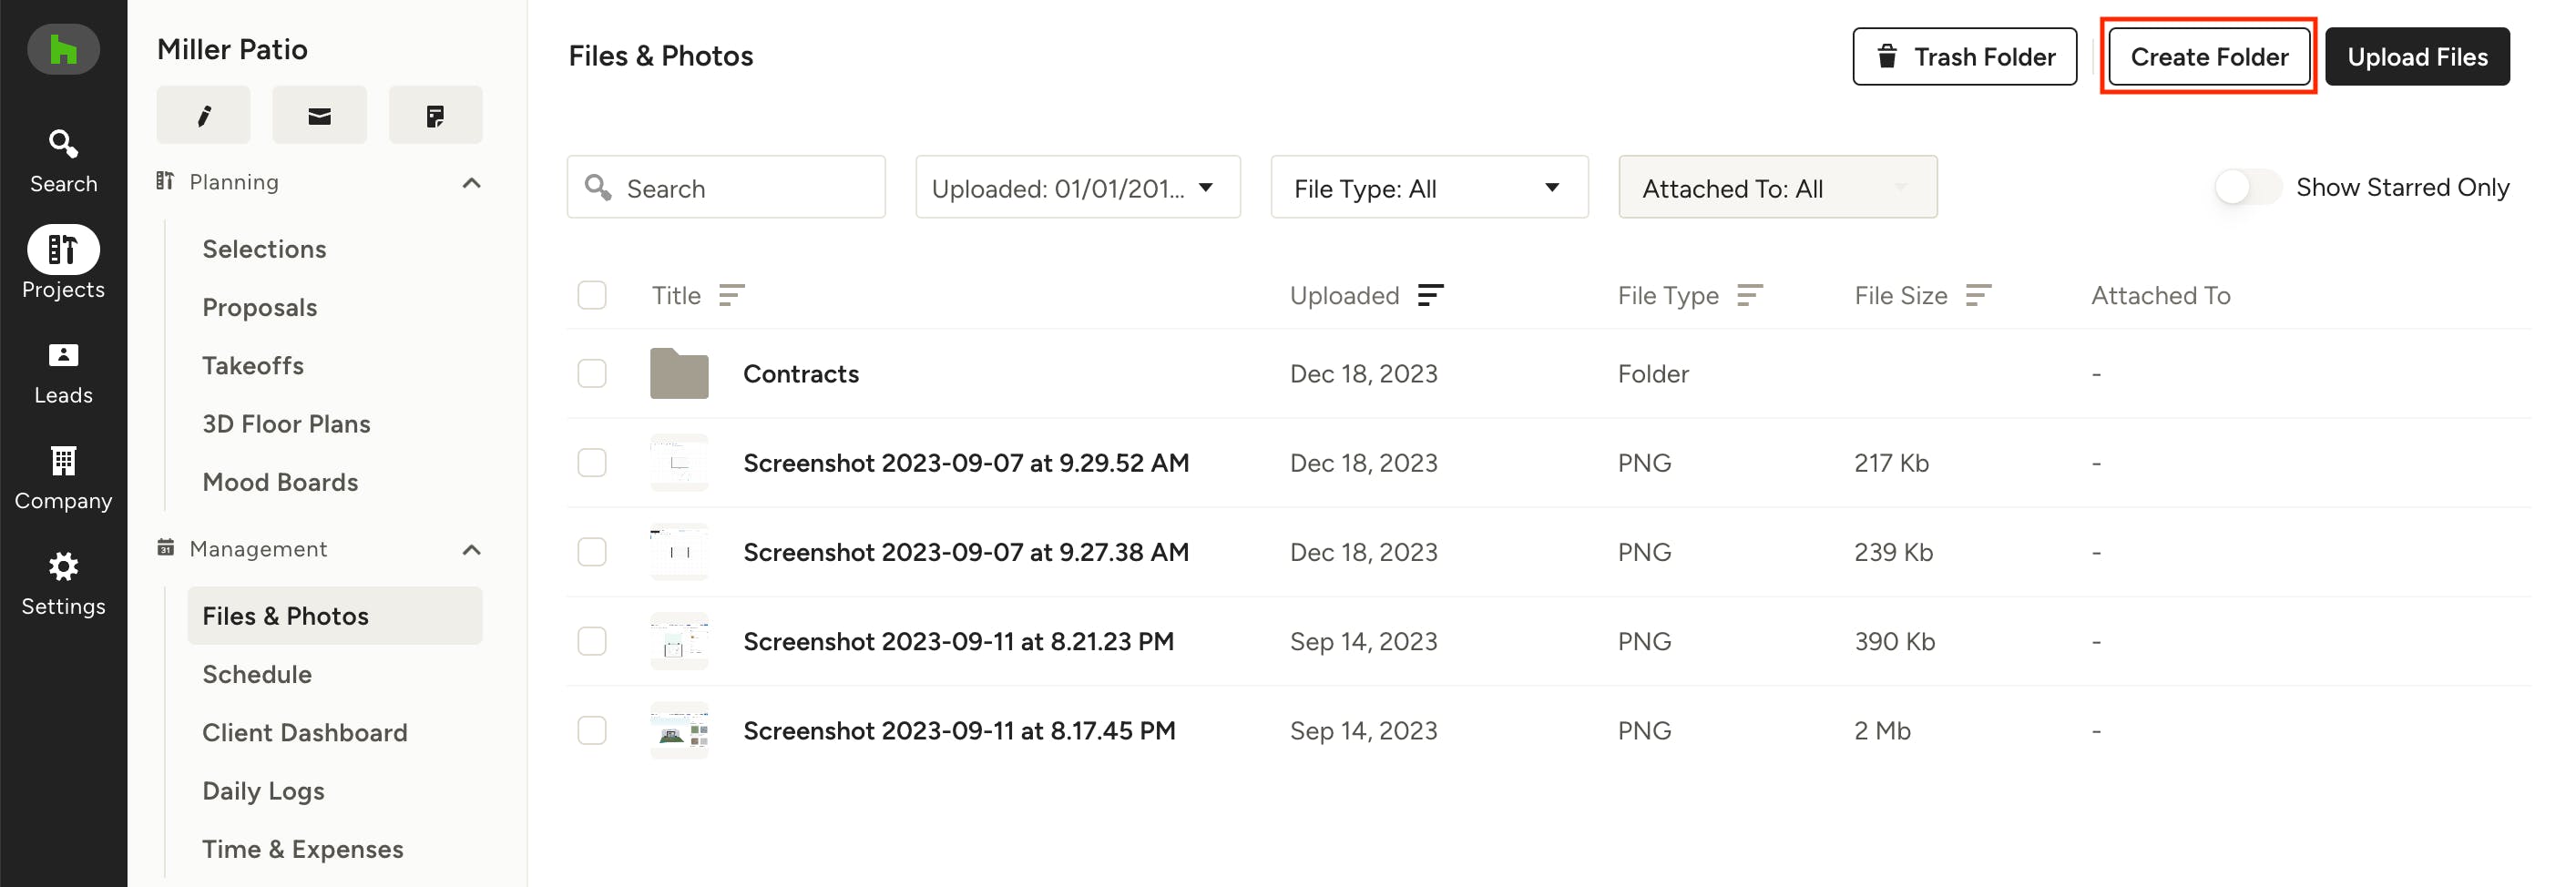
Organise with folders
Create folders and even folders within folders to keep your project organised. Just click the Create Folder button in the top right of the page, add a folder name, then click Create. You can customise the folders names, viewing permissions, and star your favourites.
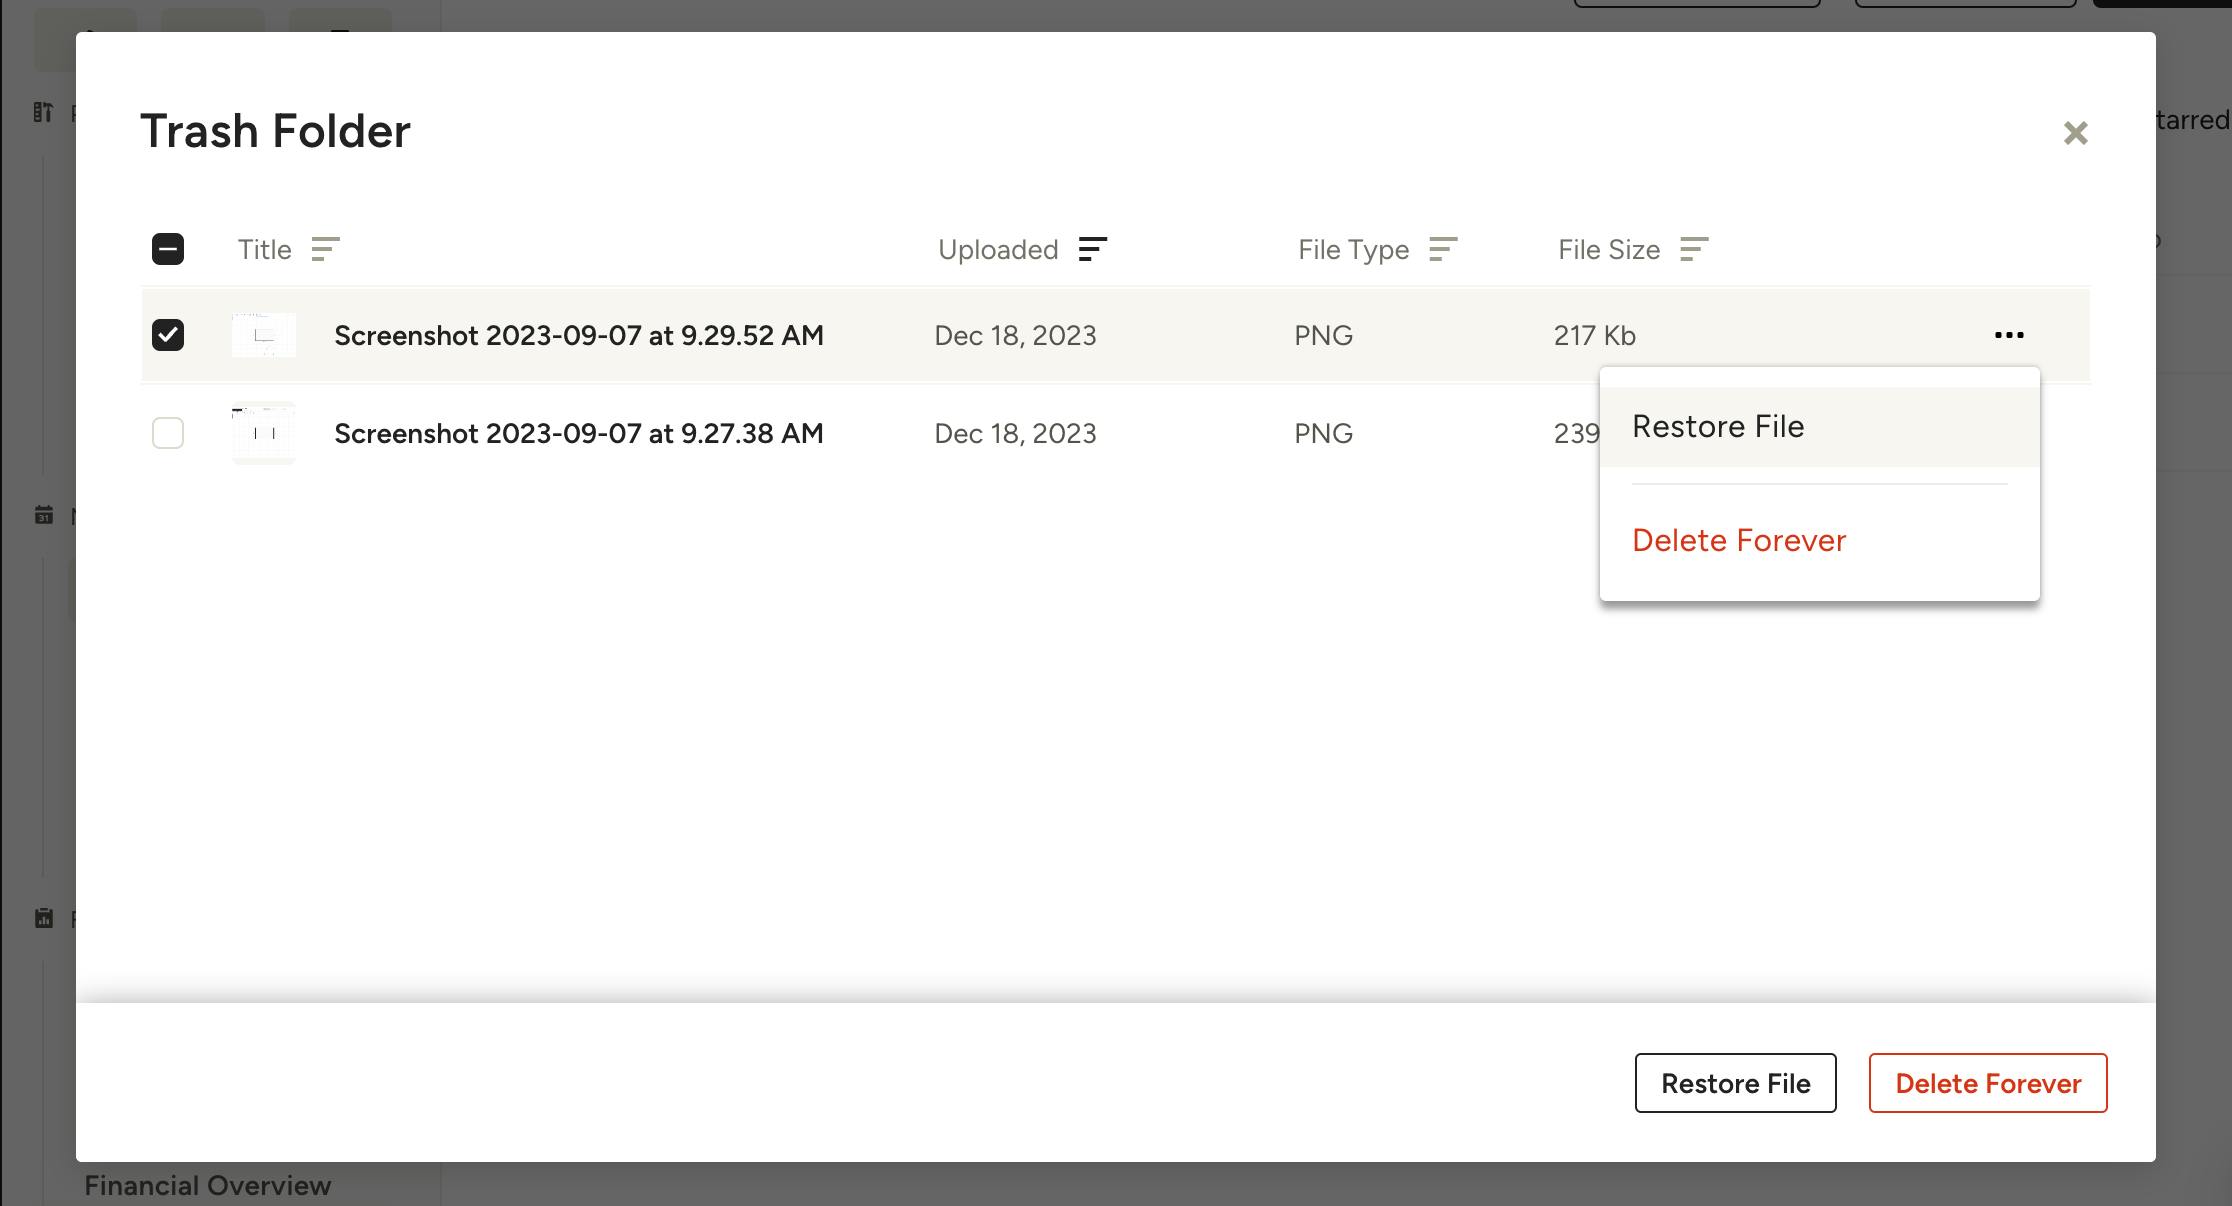
Access deleted files
In the Trash Folder button in the upper-right, you can access deleted files at any time. By hovering on a deleted file, you’ll see 3 horizontal dots where you can access more actions, such as restoring the file or deleting it forever. You can also select multiple files by using the checkbox to the left of each one, then restore or delete them in bulk by using the buttons at the bottom of the modal.
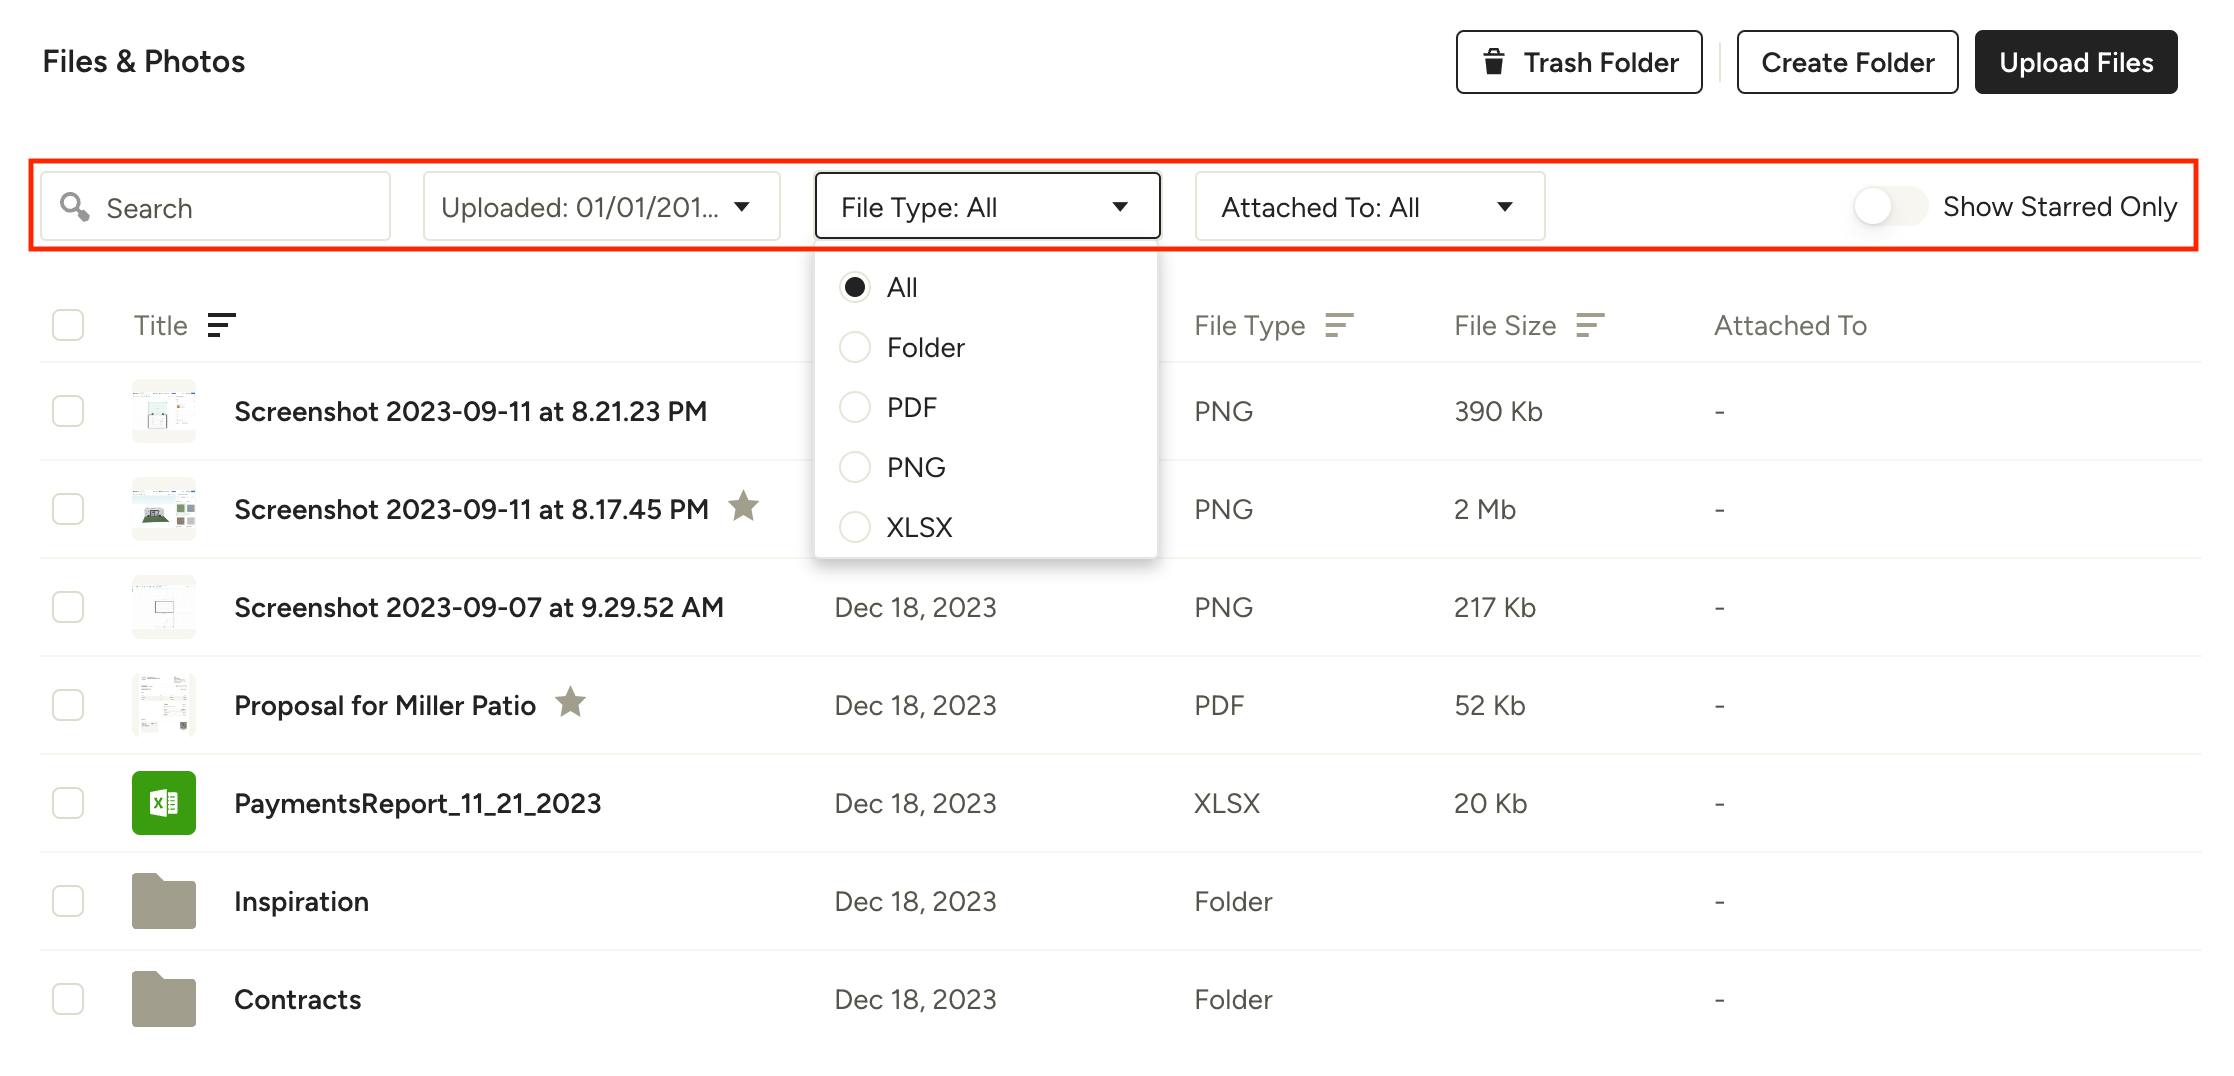
Search and filter through files
Search for a file or folder name, or filter by upload date, file type, or to which documents the file is attached - such as an Estimate, Proposal, Invoice, or Purchase Order. You can also turn on the “Show Starred only” toggle in the upper-right to narrow down the list to only your favourite files.
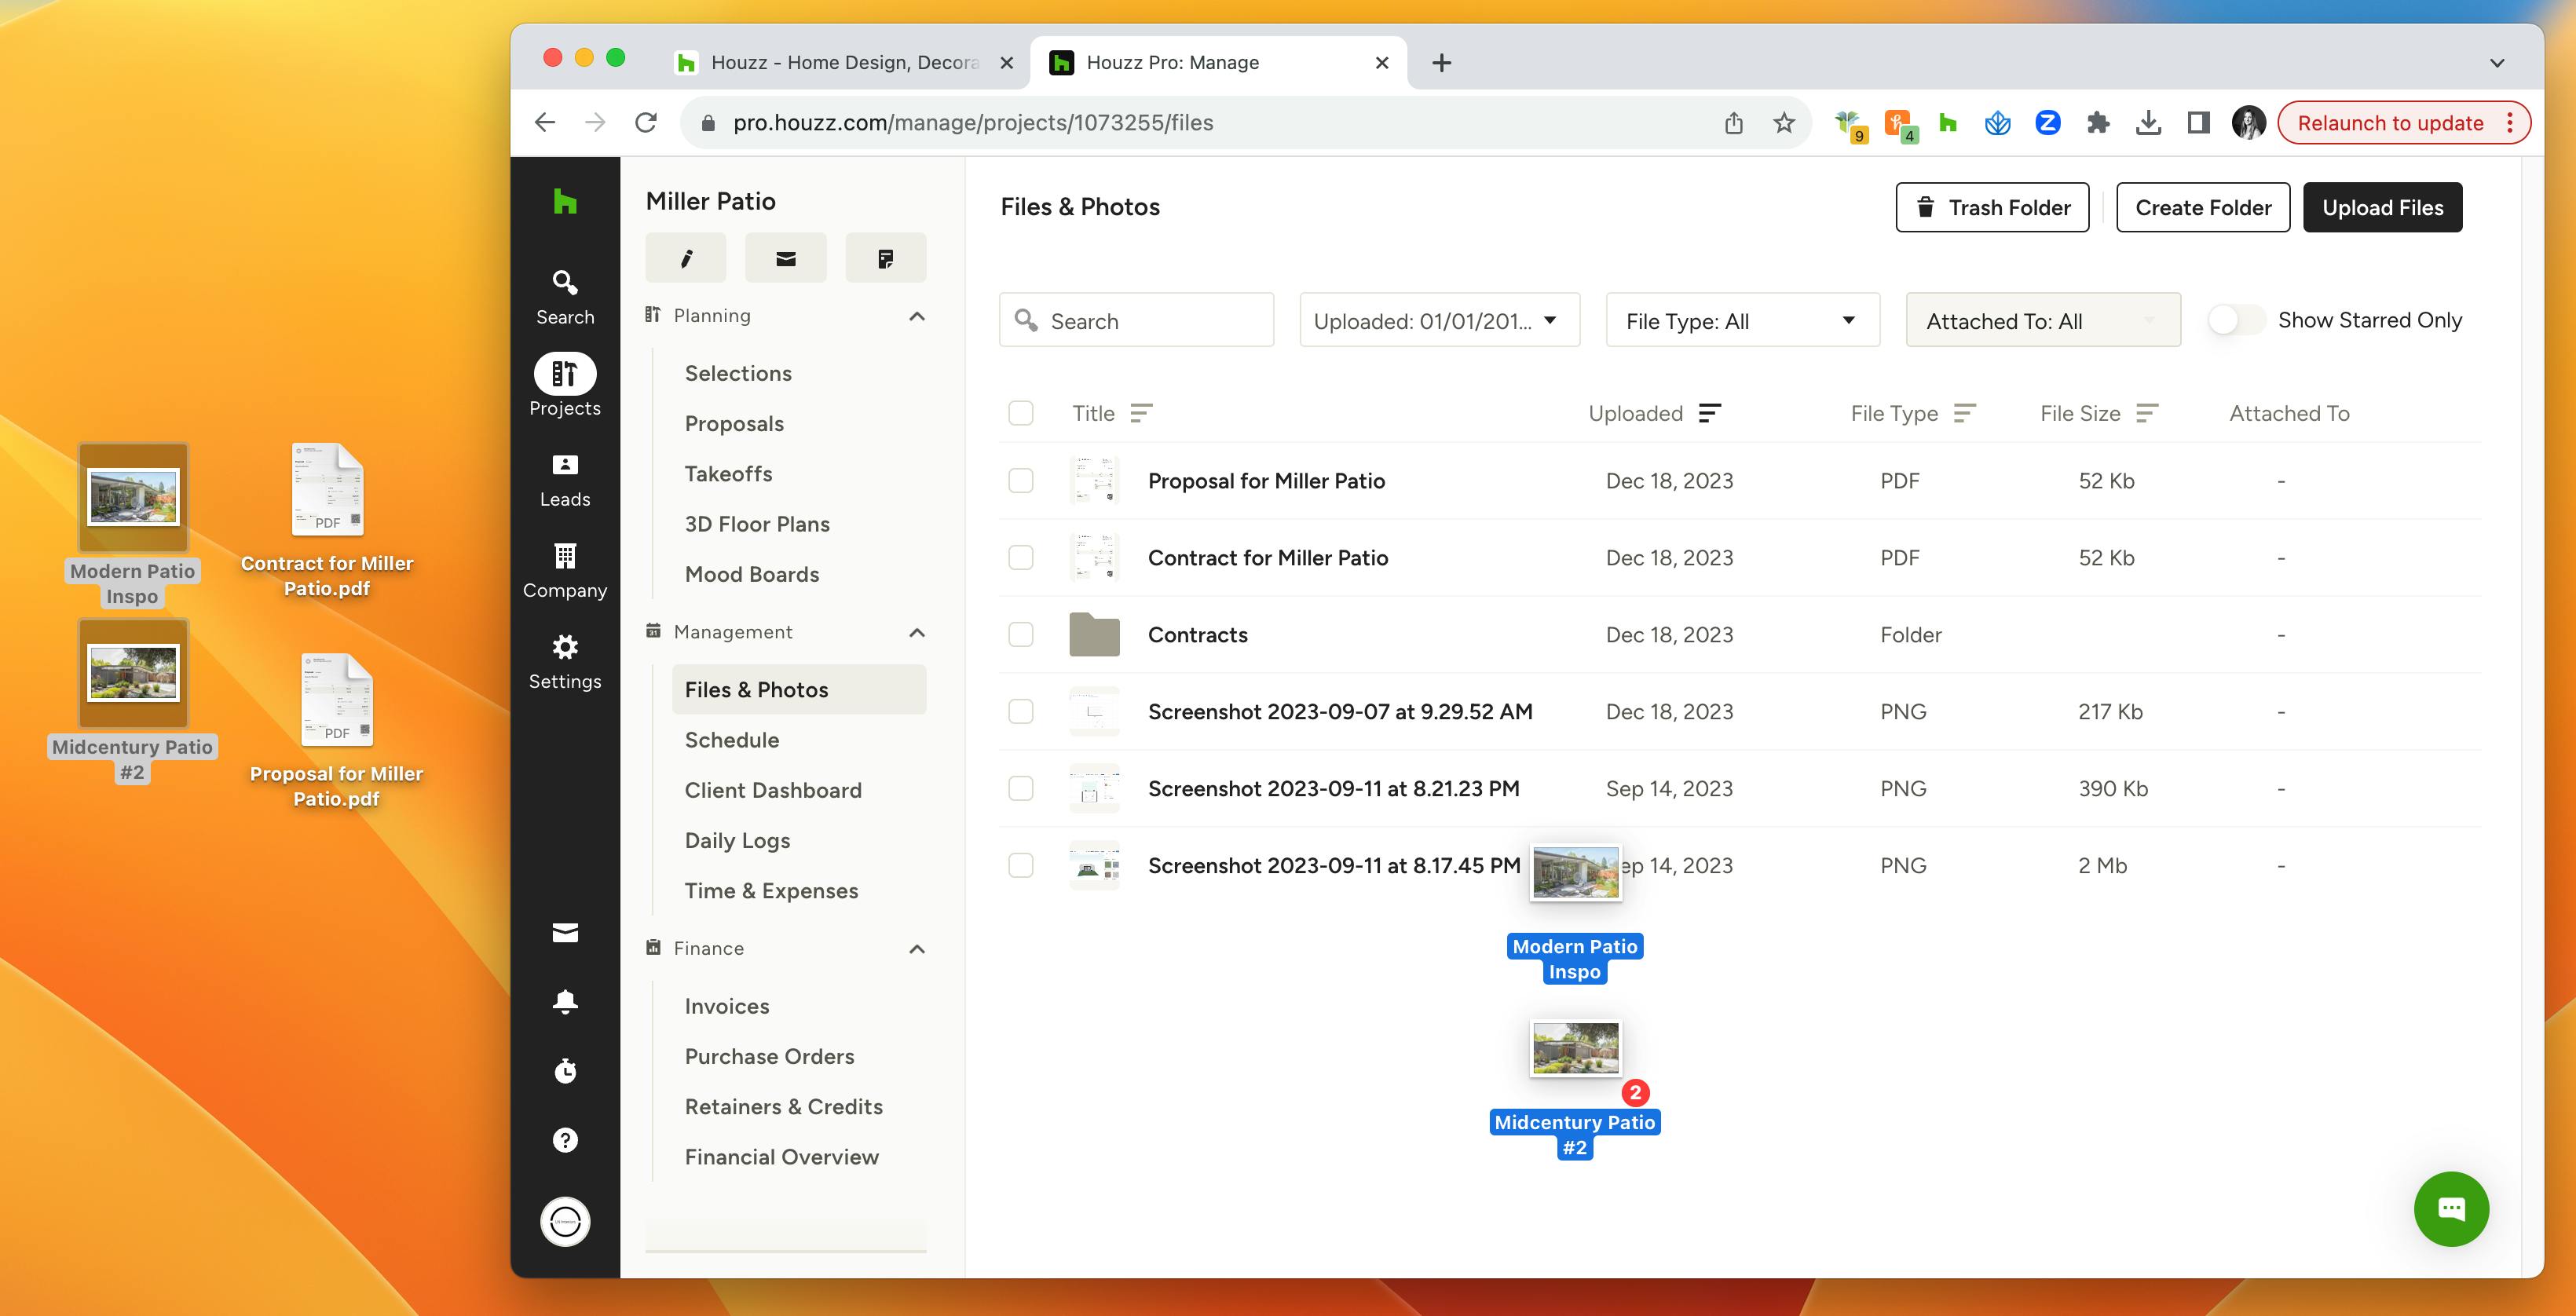
Upload files
There are several ways to upload new files - and you can upload multiple files at once. You can either drag and drop files from your computer to the project’s Files page or click the Upload Files button to select from your computer’s files. Files can be uploaded to folders or standalone.
File types that can be uploaded include: images, videos, PDFs, Word documents, Excel spreadsheets, and text files.
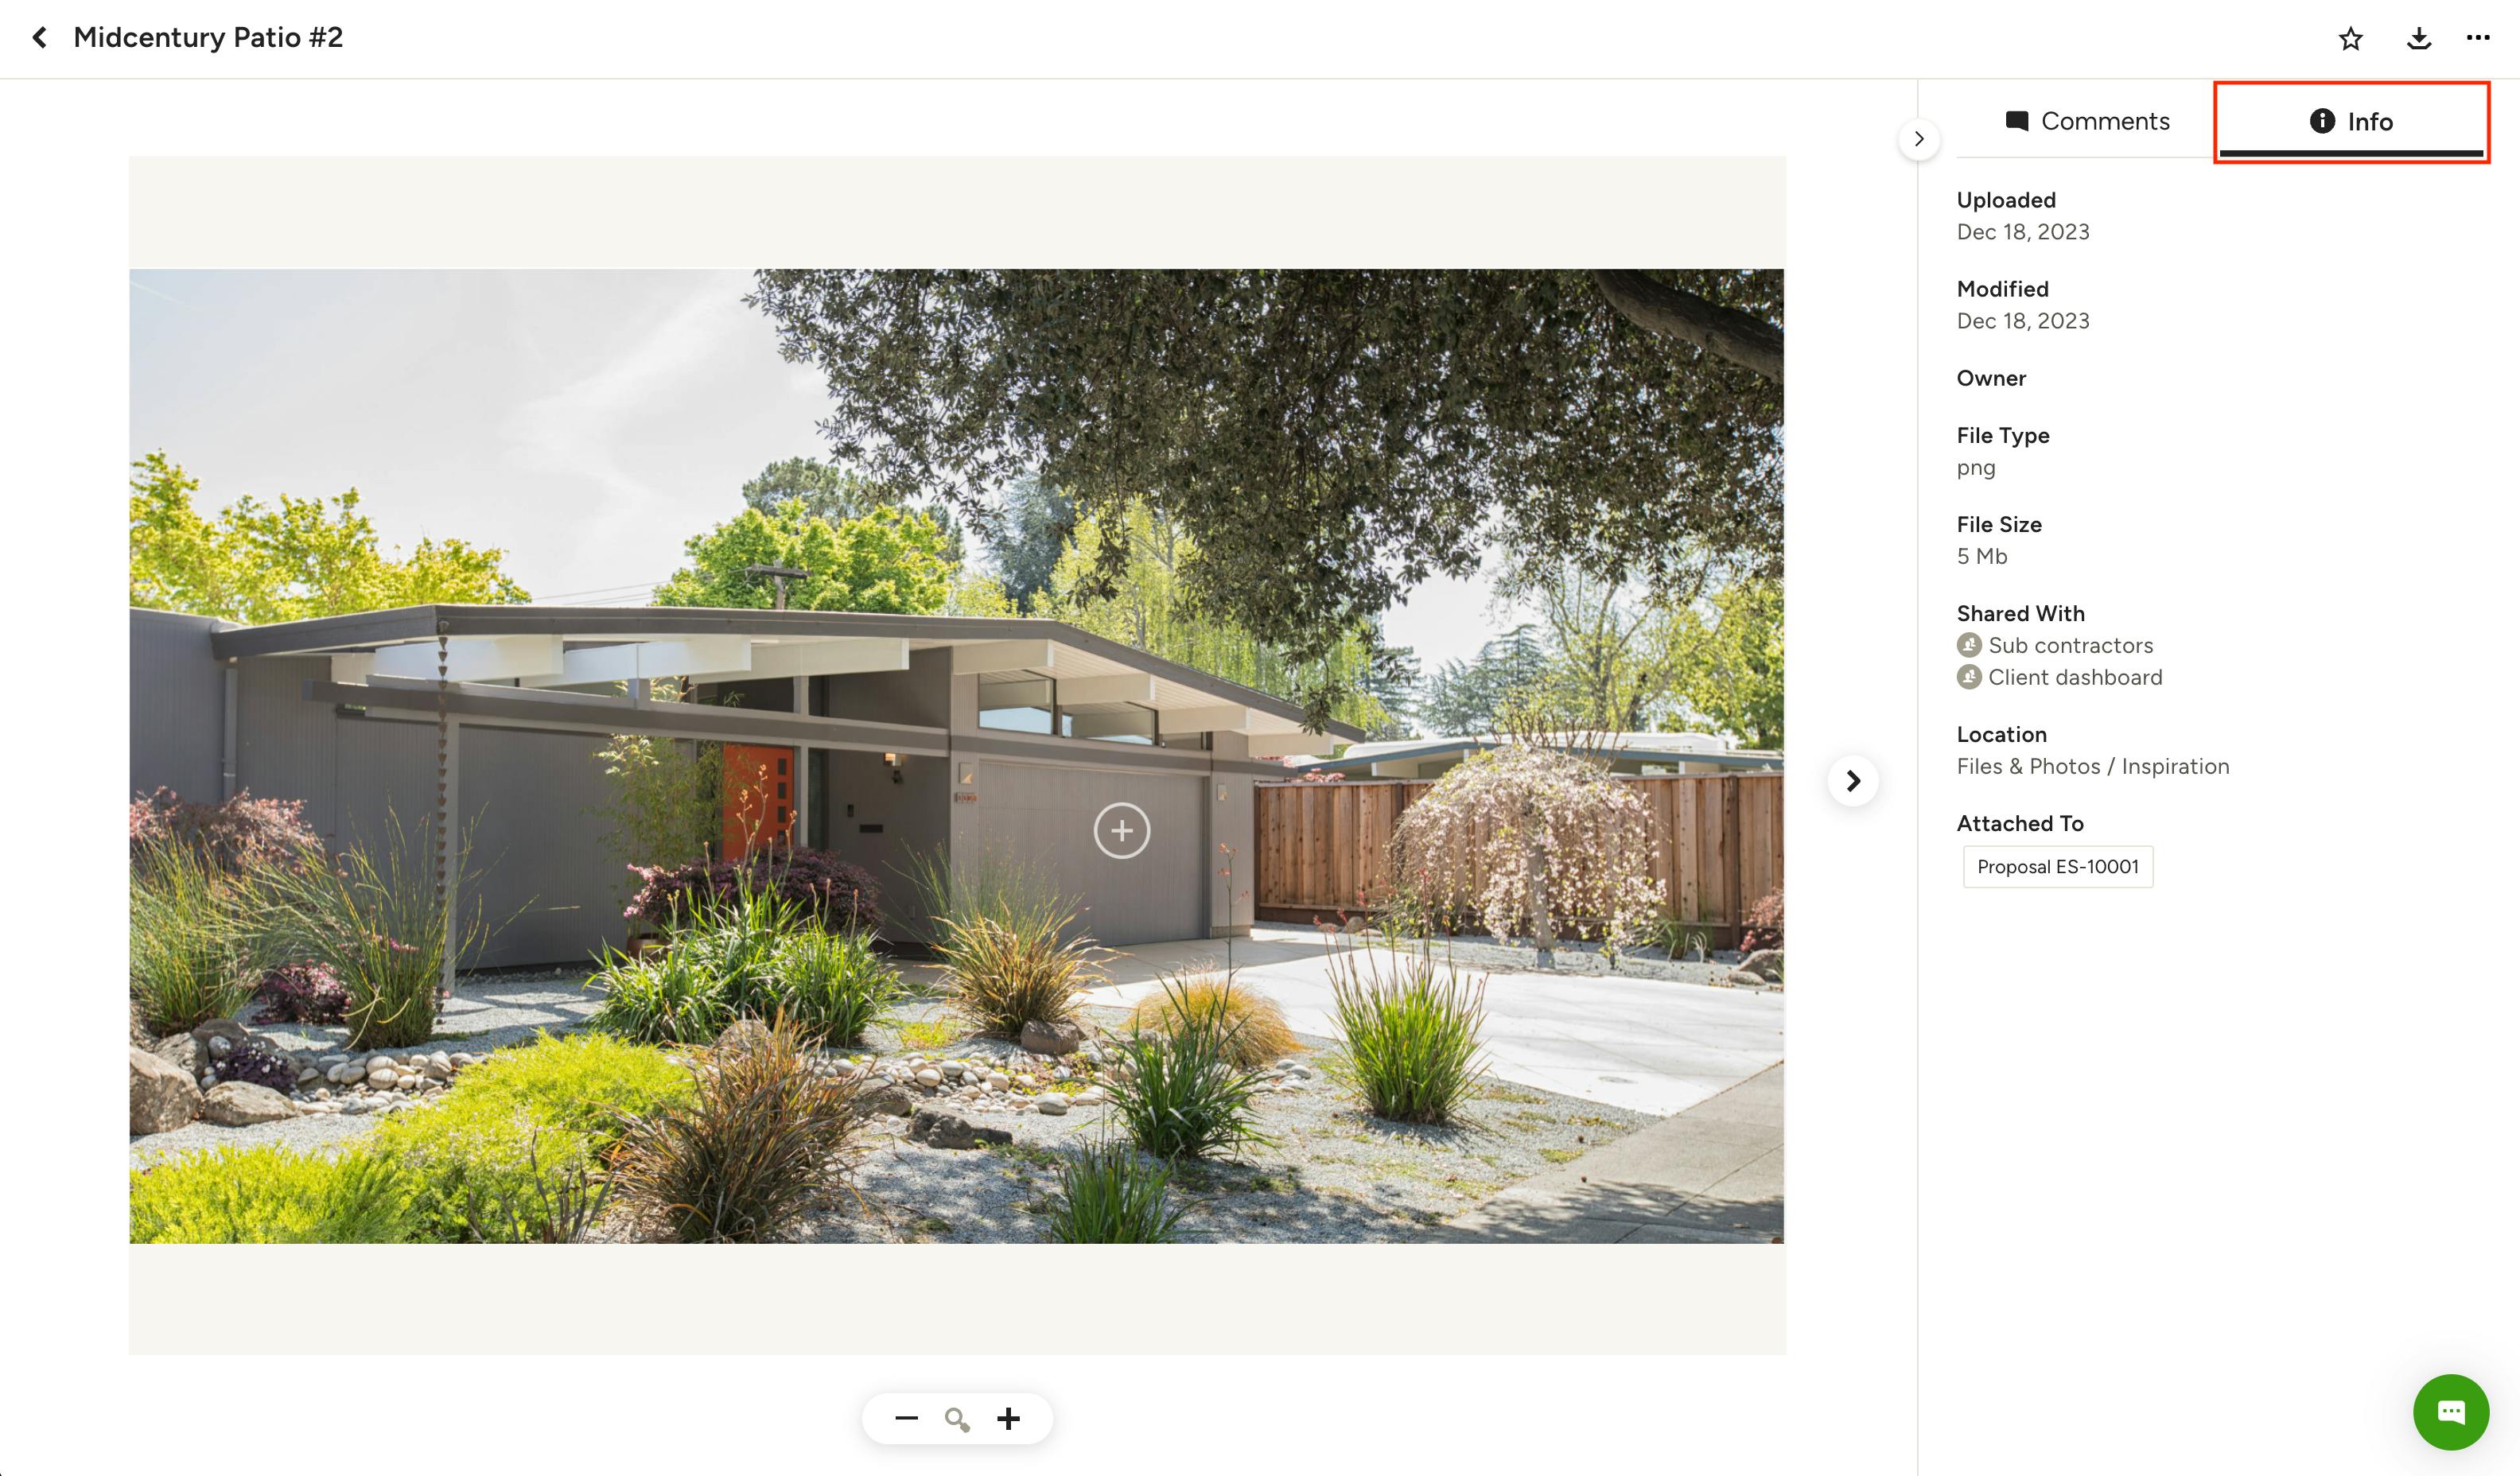
Preview your files
Just click on a file to open its preview and see the file details, such as when it was uploaded, when it was last modified, who uploaded it, the file type, the file size, who the file is shared with, which folders the file belongs to, if any, and which document(s) the file is attached to. You will need to click on the Info tab on the right side to see these details.
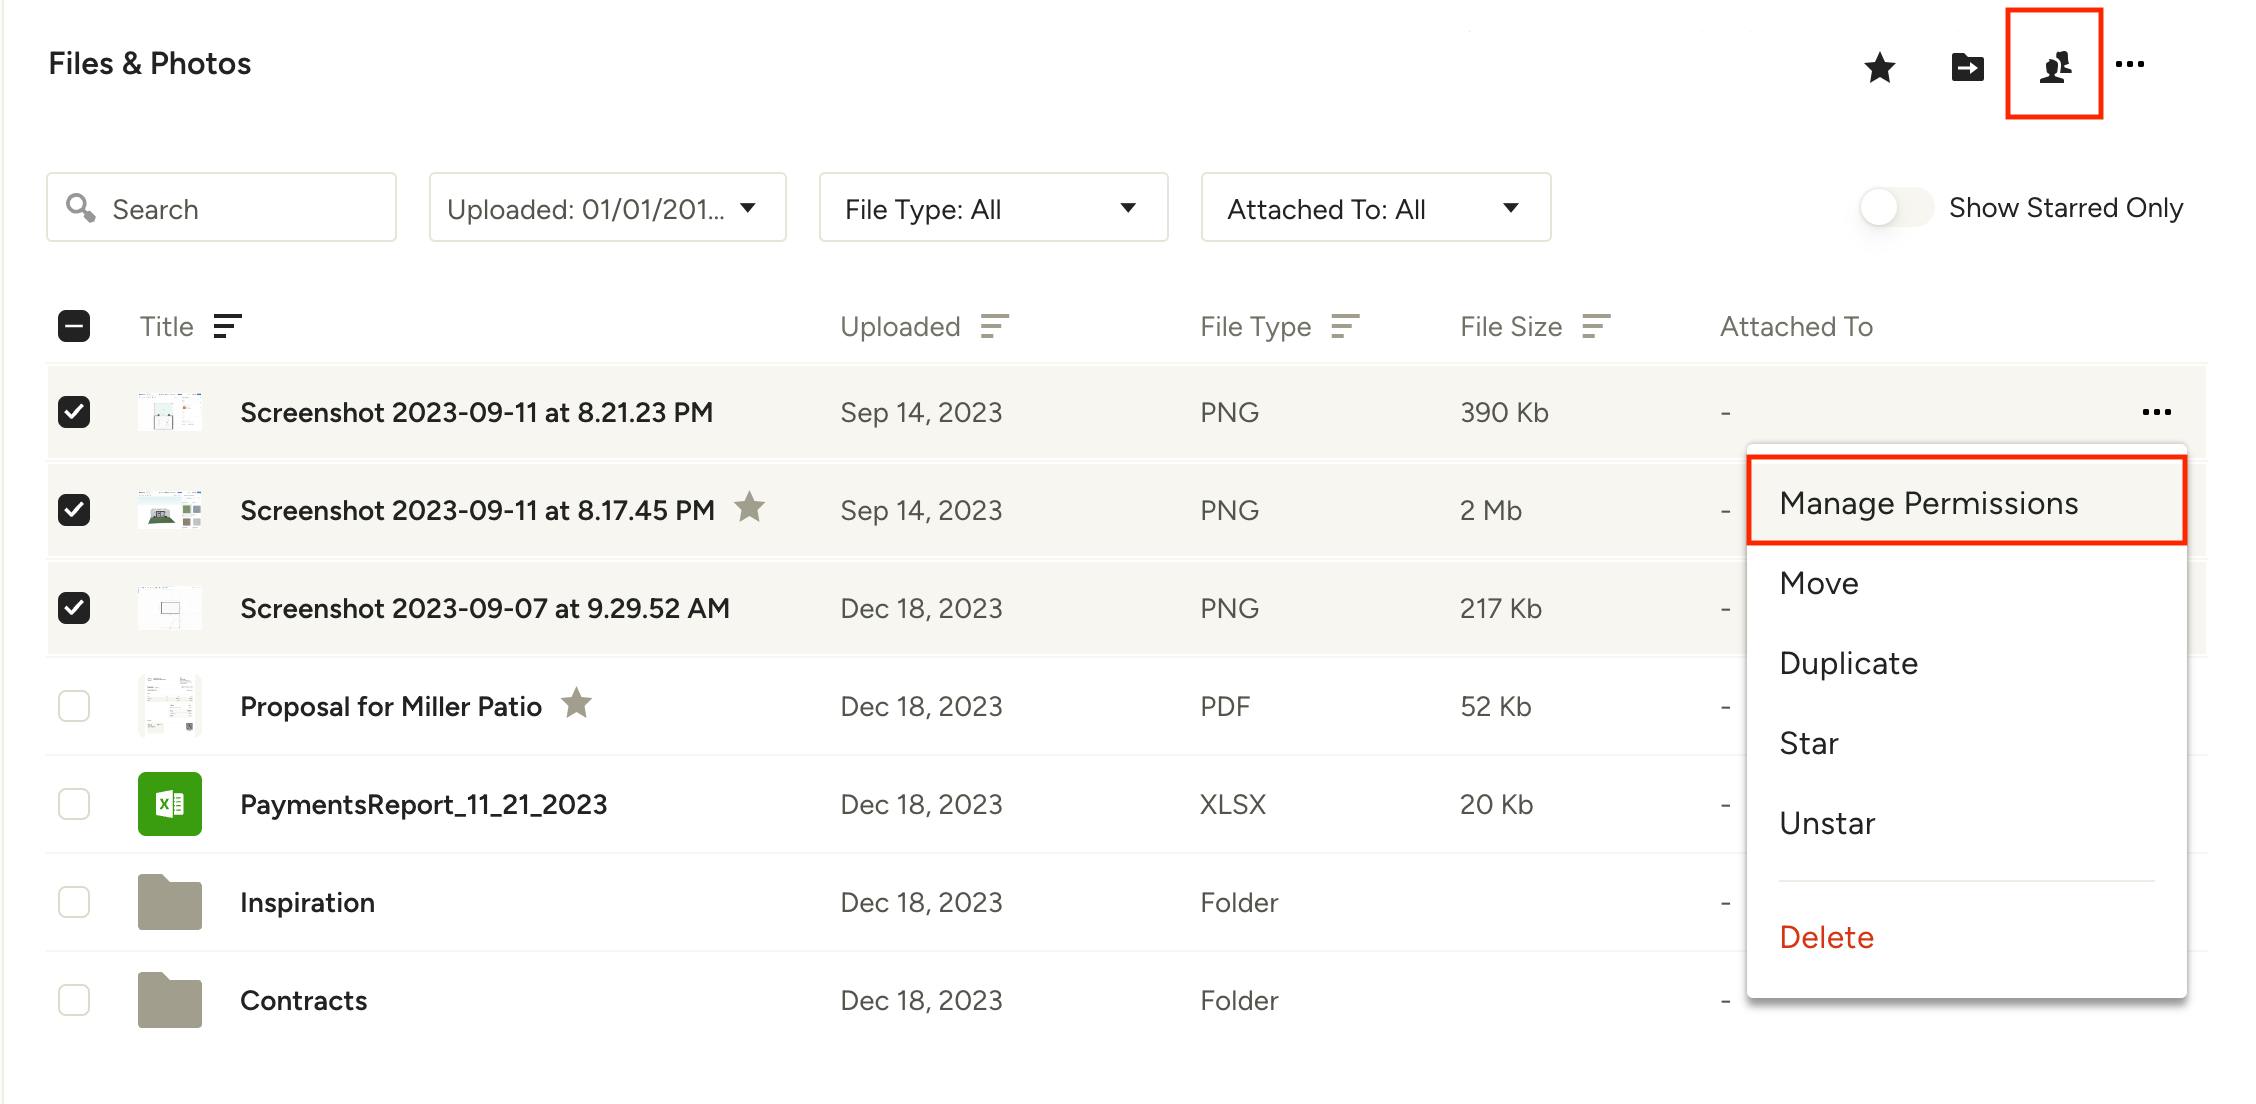
Manage file access
You can control who has permission to view specific files in a few ways. The first is to hover on a single file, right-click or click the three horizontal dots on the right, and choose Manage Permissions from the dropdown. You can also access these permissions by selecting the checkbox on a single file and clicking the team icon in the top right of the page.
Bulk Change File Permissions
This method is ideal for managing multiple files in one action. If you need to make bulk changes to file permissions, simply select the checkboxes to the left of the desired file names, right-click or click the three horizontal dots on the right, and choose Manage Permissions from the dropdown. You can also click the team icon in the top right.
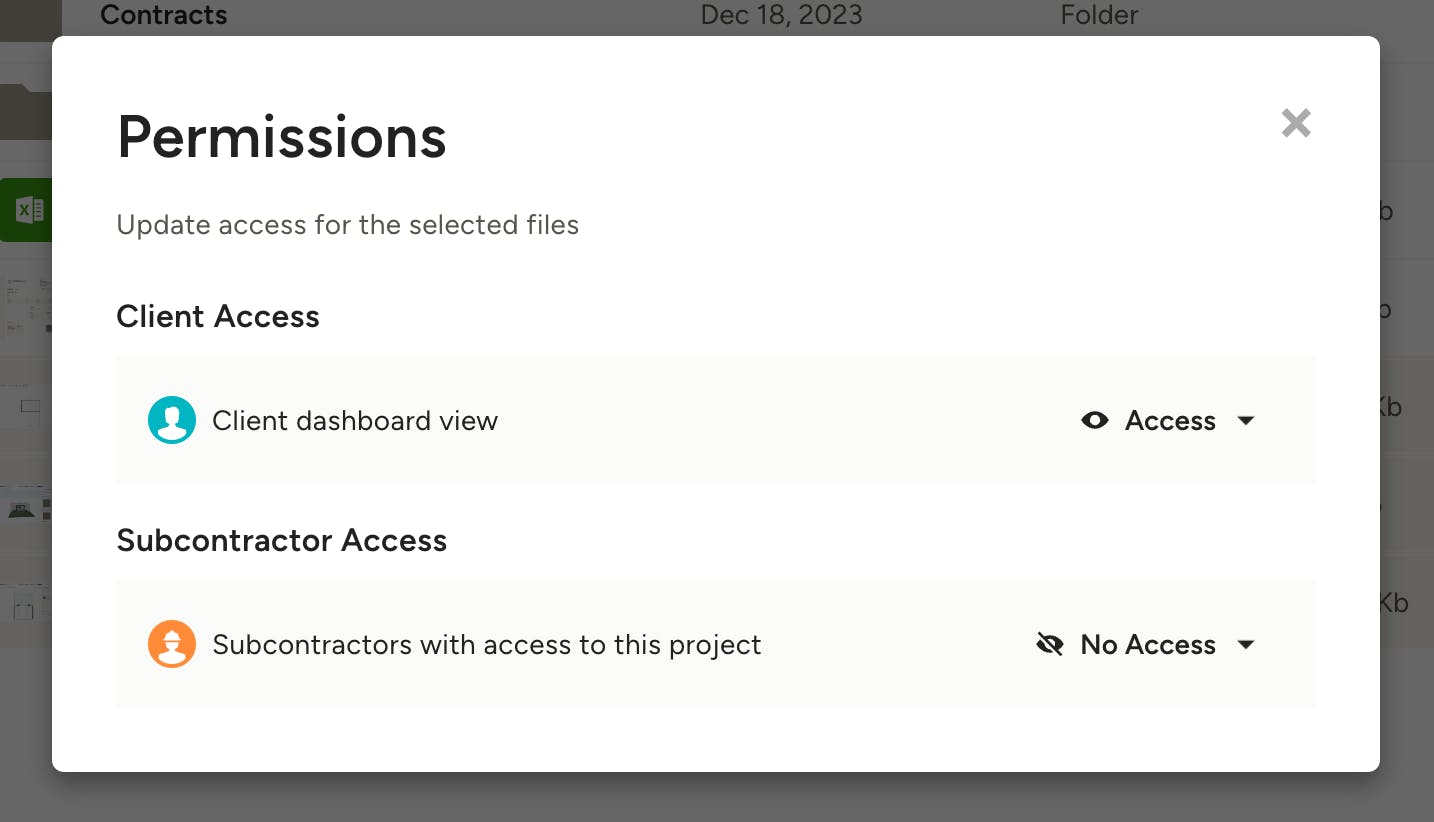
From here you can manage permissions for the client and subs/suppliers with current access to the project. This will apply the same permissions to all files selected.
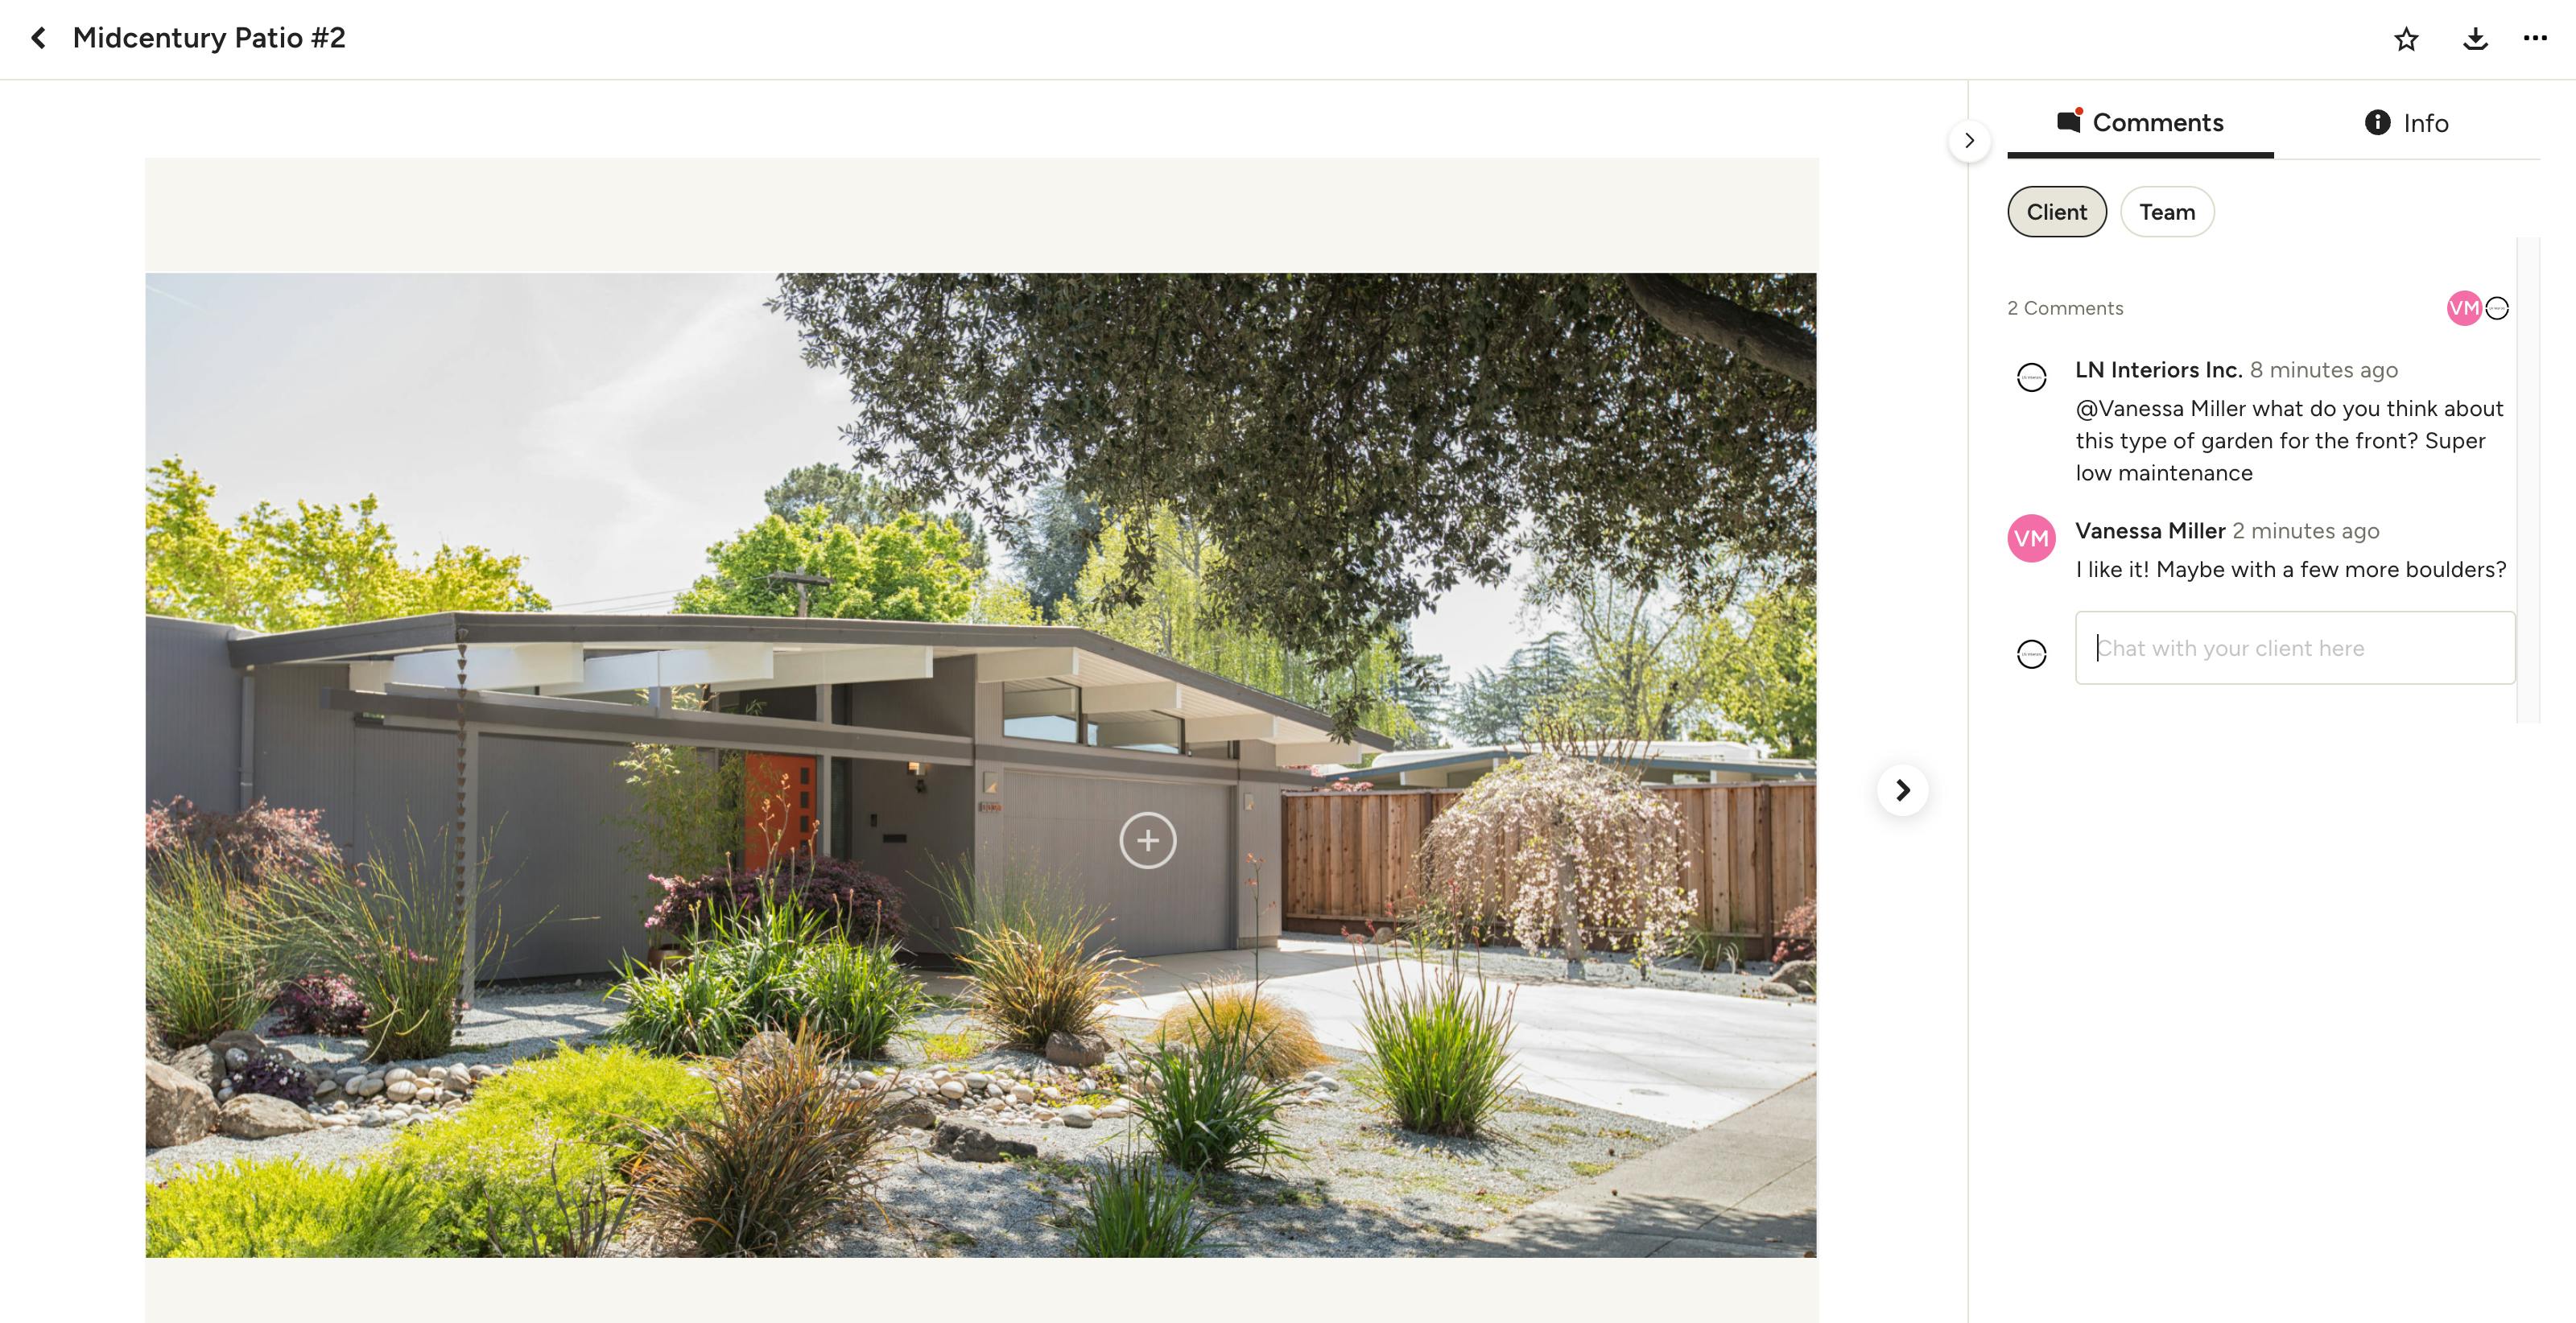
Commenting on files and photos
You can communicate with clients and team members directly on files and photos by using the comments feature. To leave a comment on a file follow these steps:
- Open the preview by clicking on the file title.
- On the righthand side of the preview you will see the Comments tab. Within that tab make sure you choose Client or Team, depending on who you wish to view your comments.
- Type your comment in the text box and click Submit when you're done.
- Your client, or team member, will receive a notification about the comment and be able to open the file to reply.
Pro tip: Mention a client or team member in a comment by typing '@' or clicking the '@' icon to the left of the textbox and selecting the desired person. This is helpful if you want to make sure a specific team member or client sees the comment, as they will also be notified.
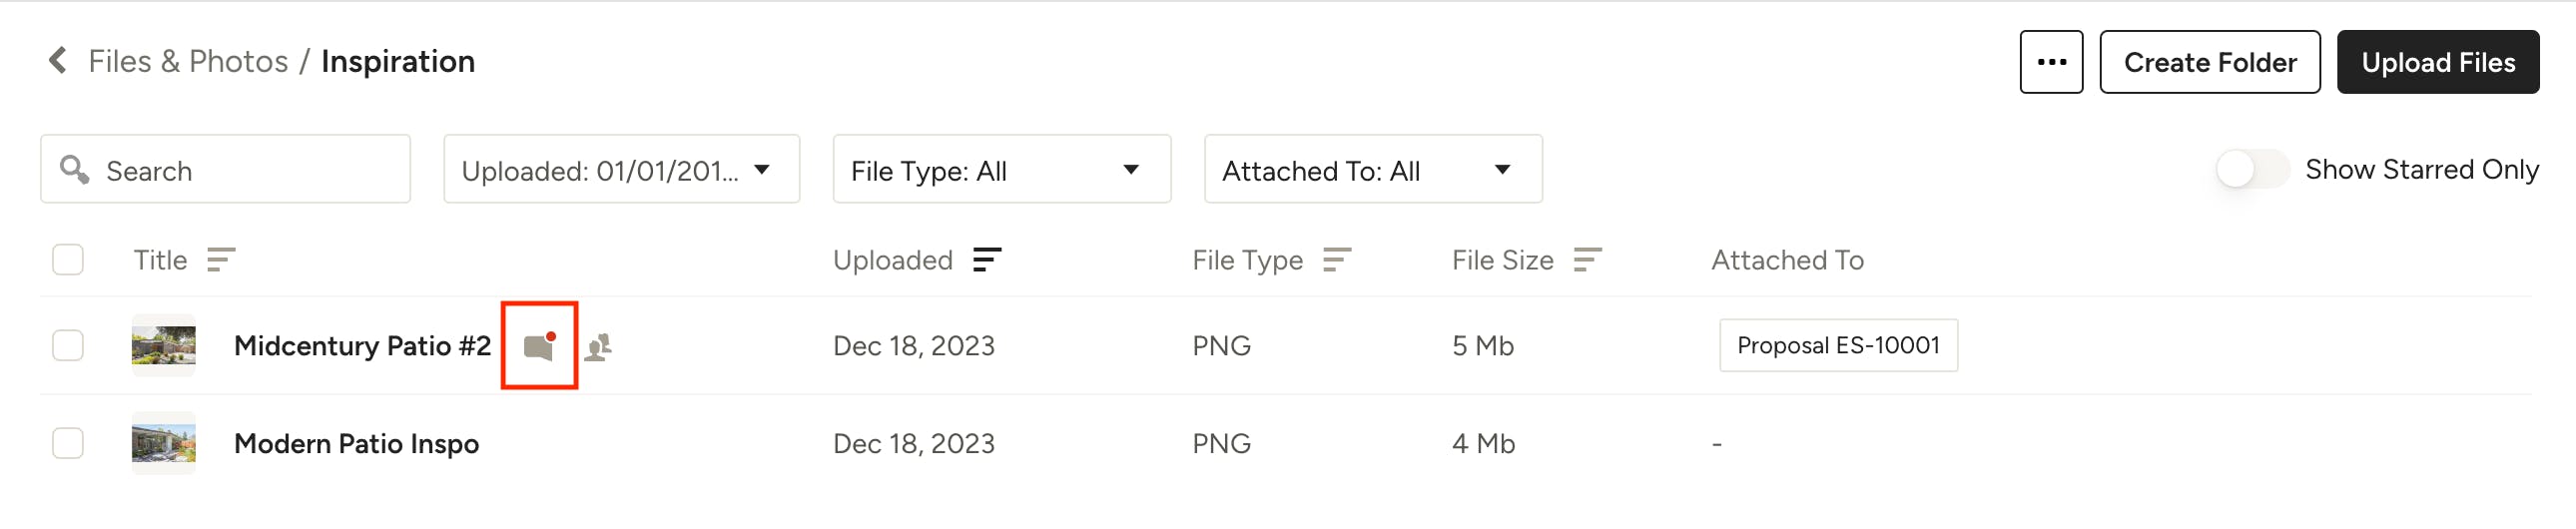
When a client or team member adds a comment to a file, you will be notified via email, as well as seeing a red notification indicator on the file title as shown in the image below.
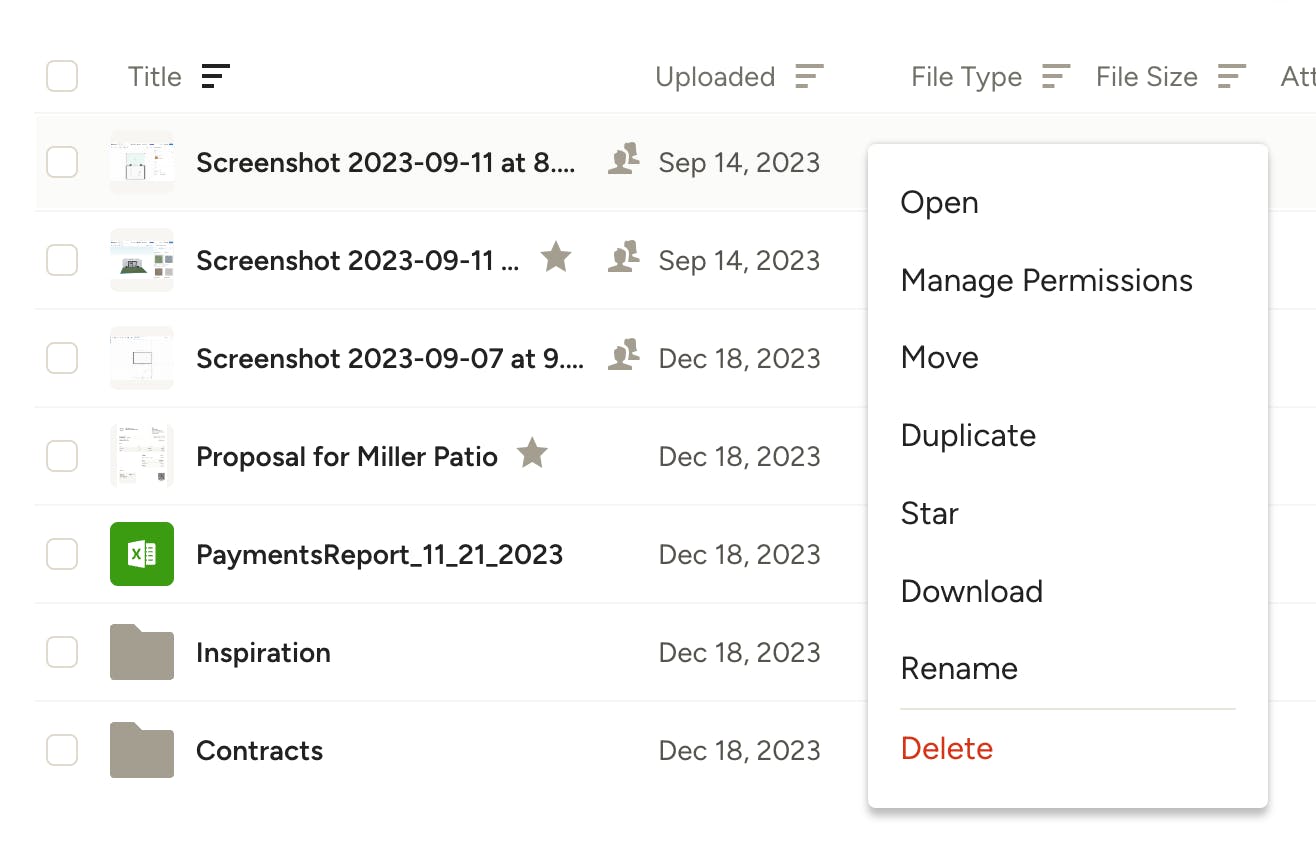
Access more actions
Right-click on a file for more actions, including opening the file, managing the file permissions of who can view it, moving the file to a different folder or out of a folder, duplicating the file, starring the file to your favourites, downloading the file to your computer, renaming the file, or deleting the file. To access these actions, you can also hover on the file and click the three horizontal dots on the right or select the checkbox on the left of the file name and select from the actions that appear in the upper-right.