How to Add an Image to the Clipper If You Can’t Clip It
Reasons for Clipping Issue
In certain situations, you might not be able to clip an image. While this can be frustrating, this is likely caused by these reasons:
1. The image quality is not good enough.
The Houzz Pro Clipper does not allow you to clip images smaller than 70px, since low-quality images won’t look good in your projects.
2. The vendor site does not allow clipping.
Some vendors don't allow the Clipper to read information from their website.
3. There's a magnifying glass or zoom tool while hovering over an image.
This common feature is handy to see zoomed-in details on images, but it can make clipping a bit more challenging.
If you run into these issues, don't worry! There are still several ways to successfully add an image to the Clipper.
1. Instant Image Clipping
If the Clipper icon is not appearing on the image you want to clip for some reason, you have the option to view all relevant images on the current page with one click.
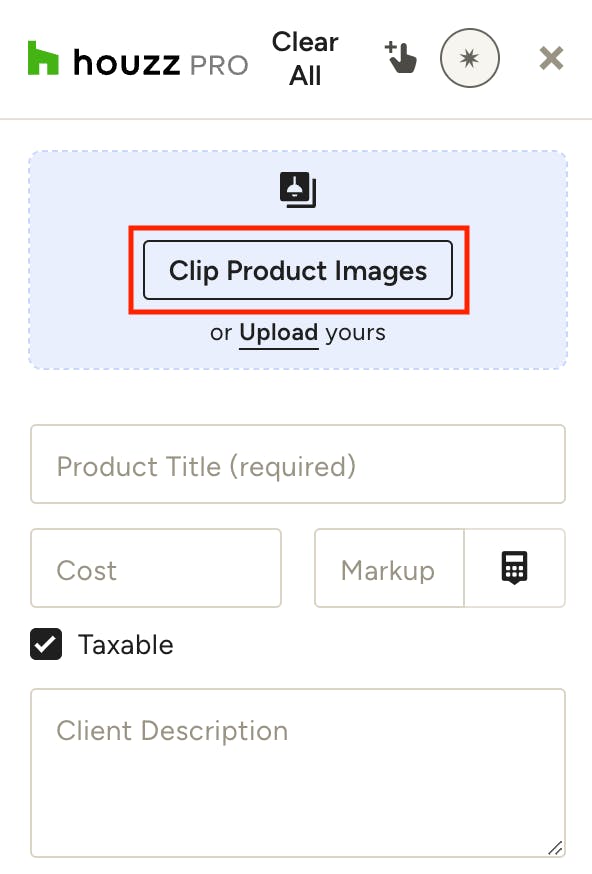
- Open the Clipper and click on the Clip Product Images button
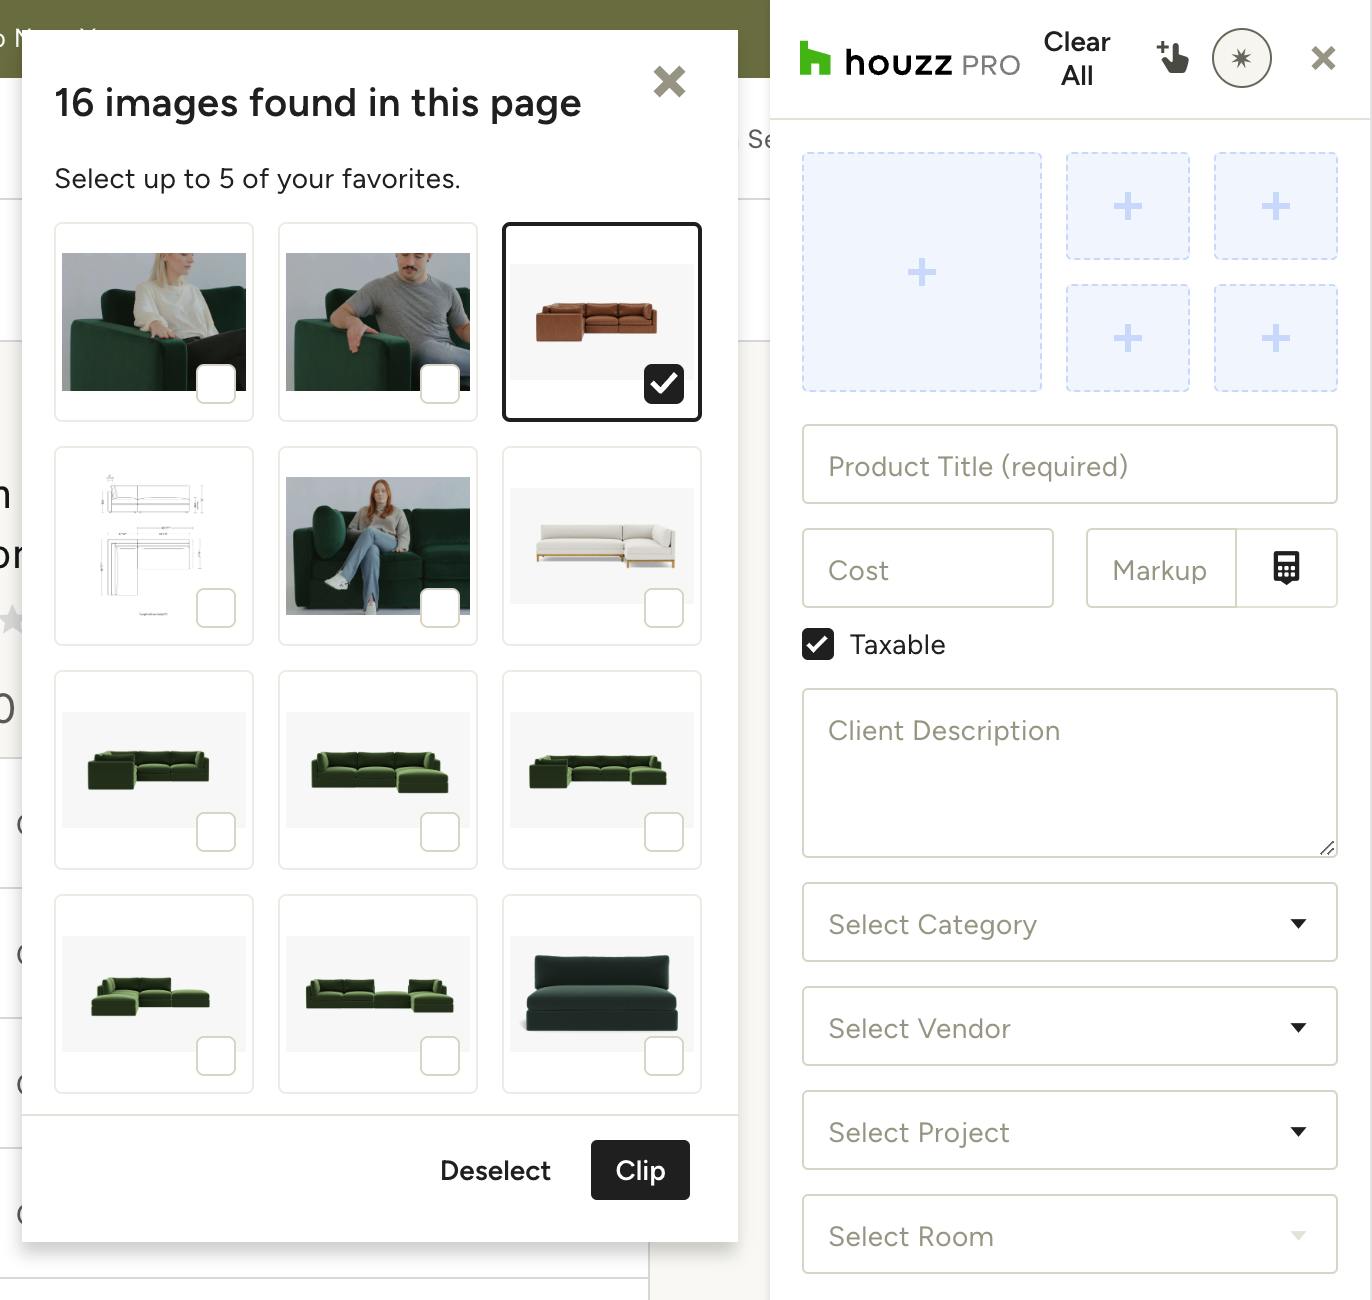
- The Clipper will find all relevant, clippable images on the current page. Select up to 5 to clip to the same product listing and click Clip.
Low resolution images will have an '!' icon on them. Clipping these may result in poor quality images on Mood Boards, Selection Boards and documents.
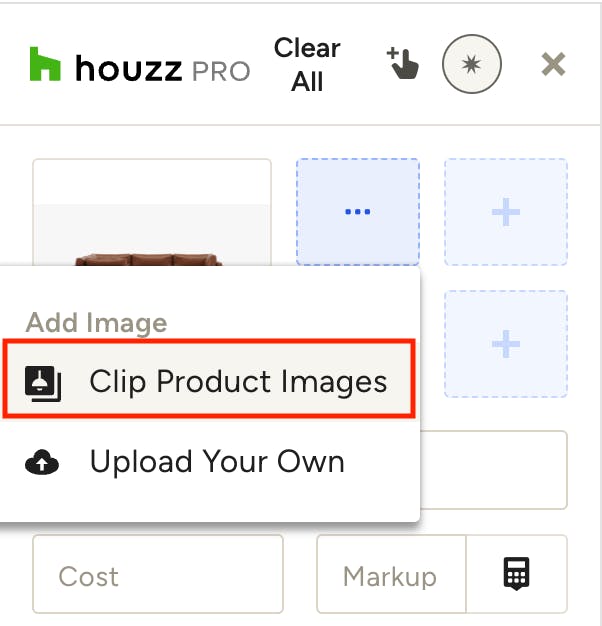
- To add more product images to the same listing once one or more have been added, click on the + icons and choose Clip Product Images from the menu to activate the quick select option again.
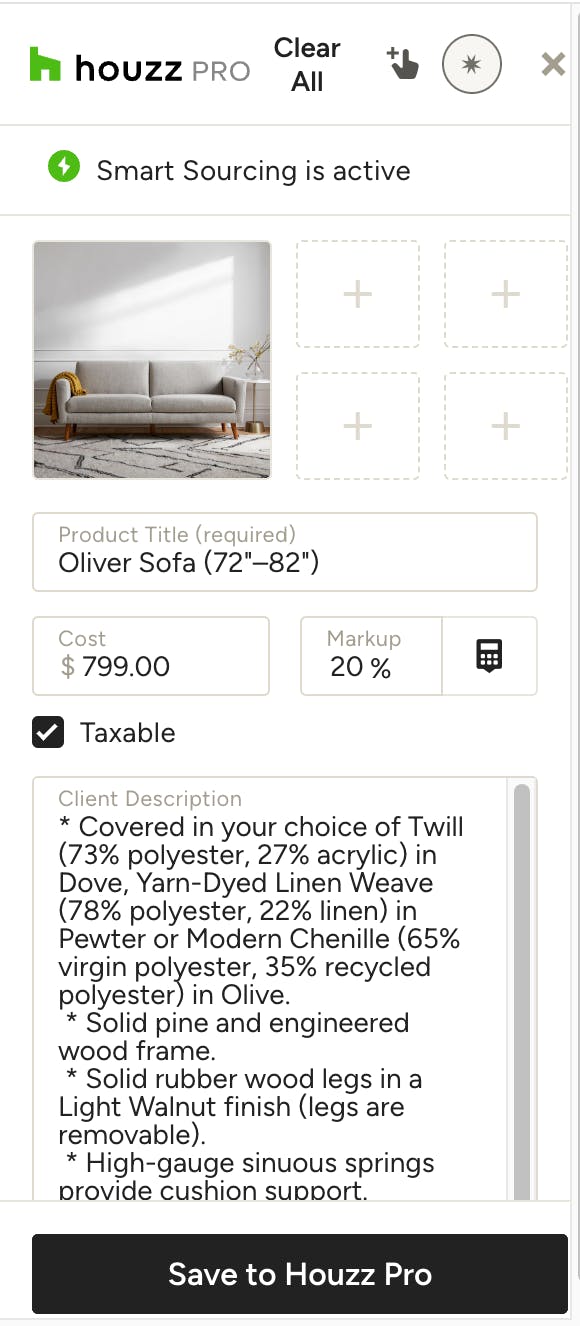
- Fill out any necessary product information, and click Save to Houzz Pro.
- You can now use the product in your projects.
2. Right Click to Save to Clipper
When you find a specific product image you would like to clip:
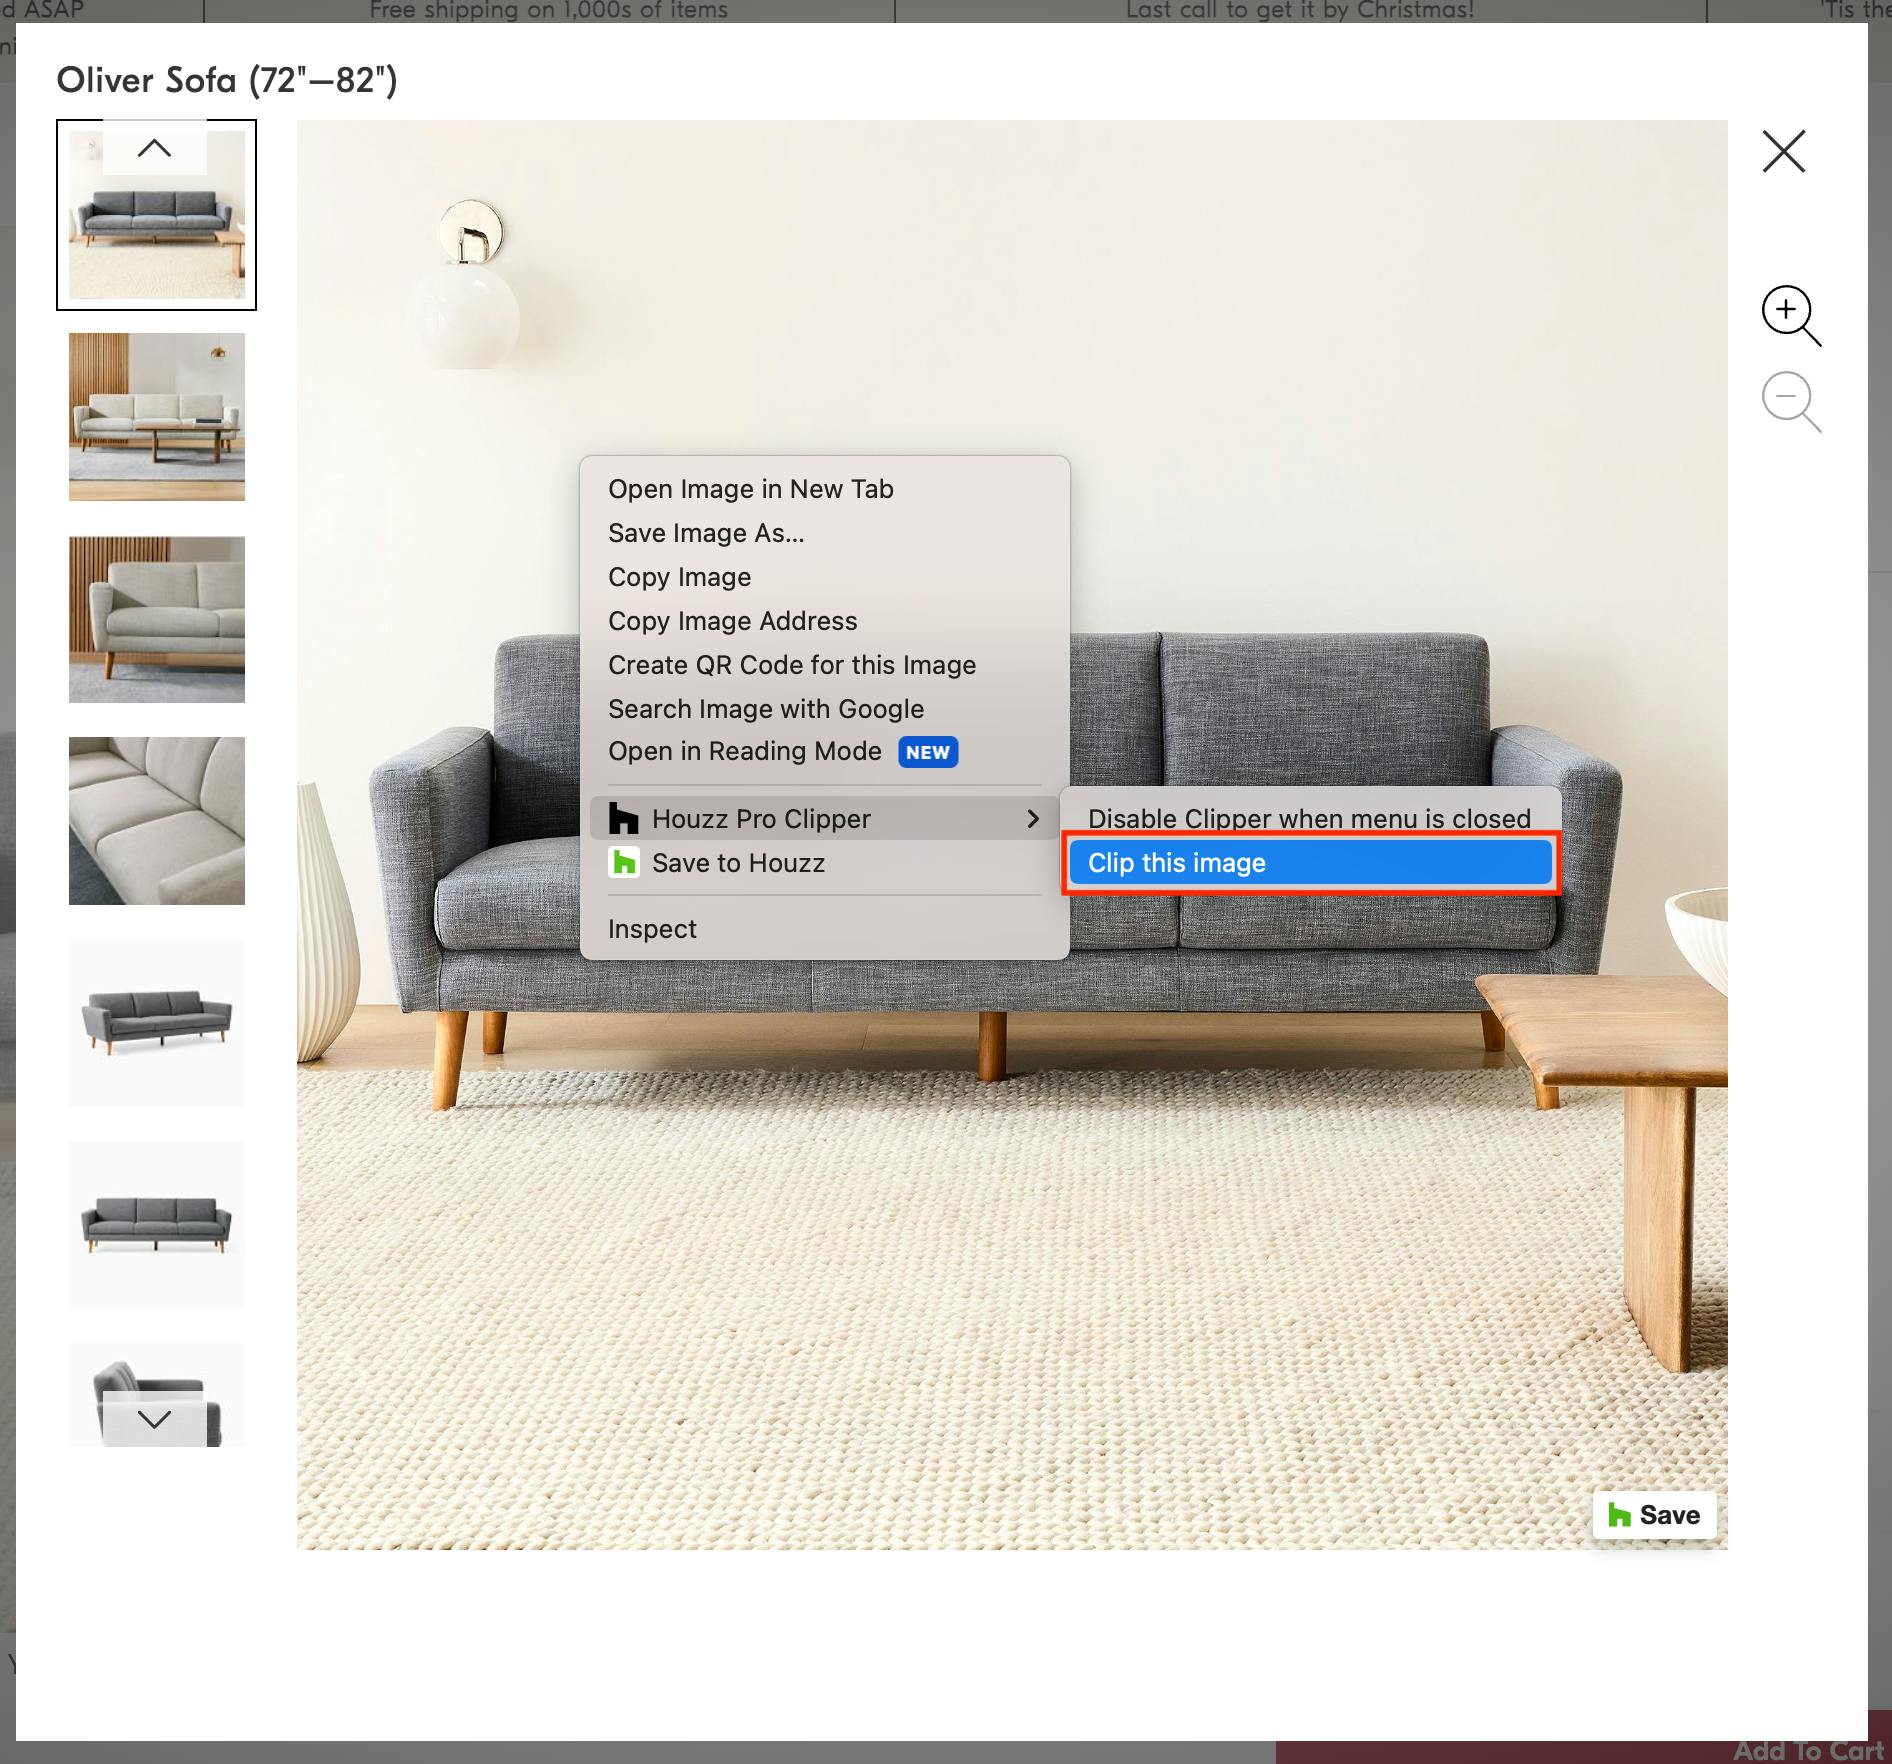
- Right click on the image. For some websites, you might need to double click the image to bring up a larger photo view, or even right click the thumbnail image in the left menu.
- Find the Houzz Pro Clipper option in the menu. Hover over it and select the Clip this Image option.
- This will activate the Clipper — you can then manually fill out any necessary product information, or use the Smart Sourcing to autofill information when available. Once the information is complete, click Save to Houzz Pro.
- You can now use the product in your projects.
3. Save to Computer and Upload
If you would prefer to save the image on your computer instead and upload manually, you can do this as well. When you find a product you would like to clip:
- Right click the image and save it to your computer with a name you will easily remember.
- Open the Clipper — the product details will be empty to start, so you will need to manually update the content. First, select the square with the + symbol to add an image (or multiple images).
- Select the file you previously saved. Fill out any necessary product information, and click Save to Houzz Pro.
- You can now use the product in your projects.
4. Screenshot and Upload
A final option is to take a screenshot of the product and upload manually. When you find a product you would like to clip:
- Take a screenshot of the image on your computer.
- For Mac users: Press Command+Shift+4. Drag to select the area of the screen you want to capture.
- For Windows users: Search for “snipping tool” in your taskbar. Use the Snipping Tool to create a screenshot.
- Open the Clipper and select the square with the + symbol to add an image (or multiple images).
- Select the screenshot. Fill out any necessary product information, and click Save to Houzz Pro.
- You can now use the product in your projects.