How to Use the Parts and Categories Library
The Parts and Categories Library is a collection of all the items you’ve used or saved on Houzz Pro. Use your library as a tool to keep all your items organised throughout your projects.
Accessing the parts and categories library
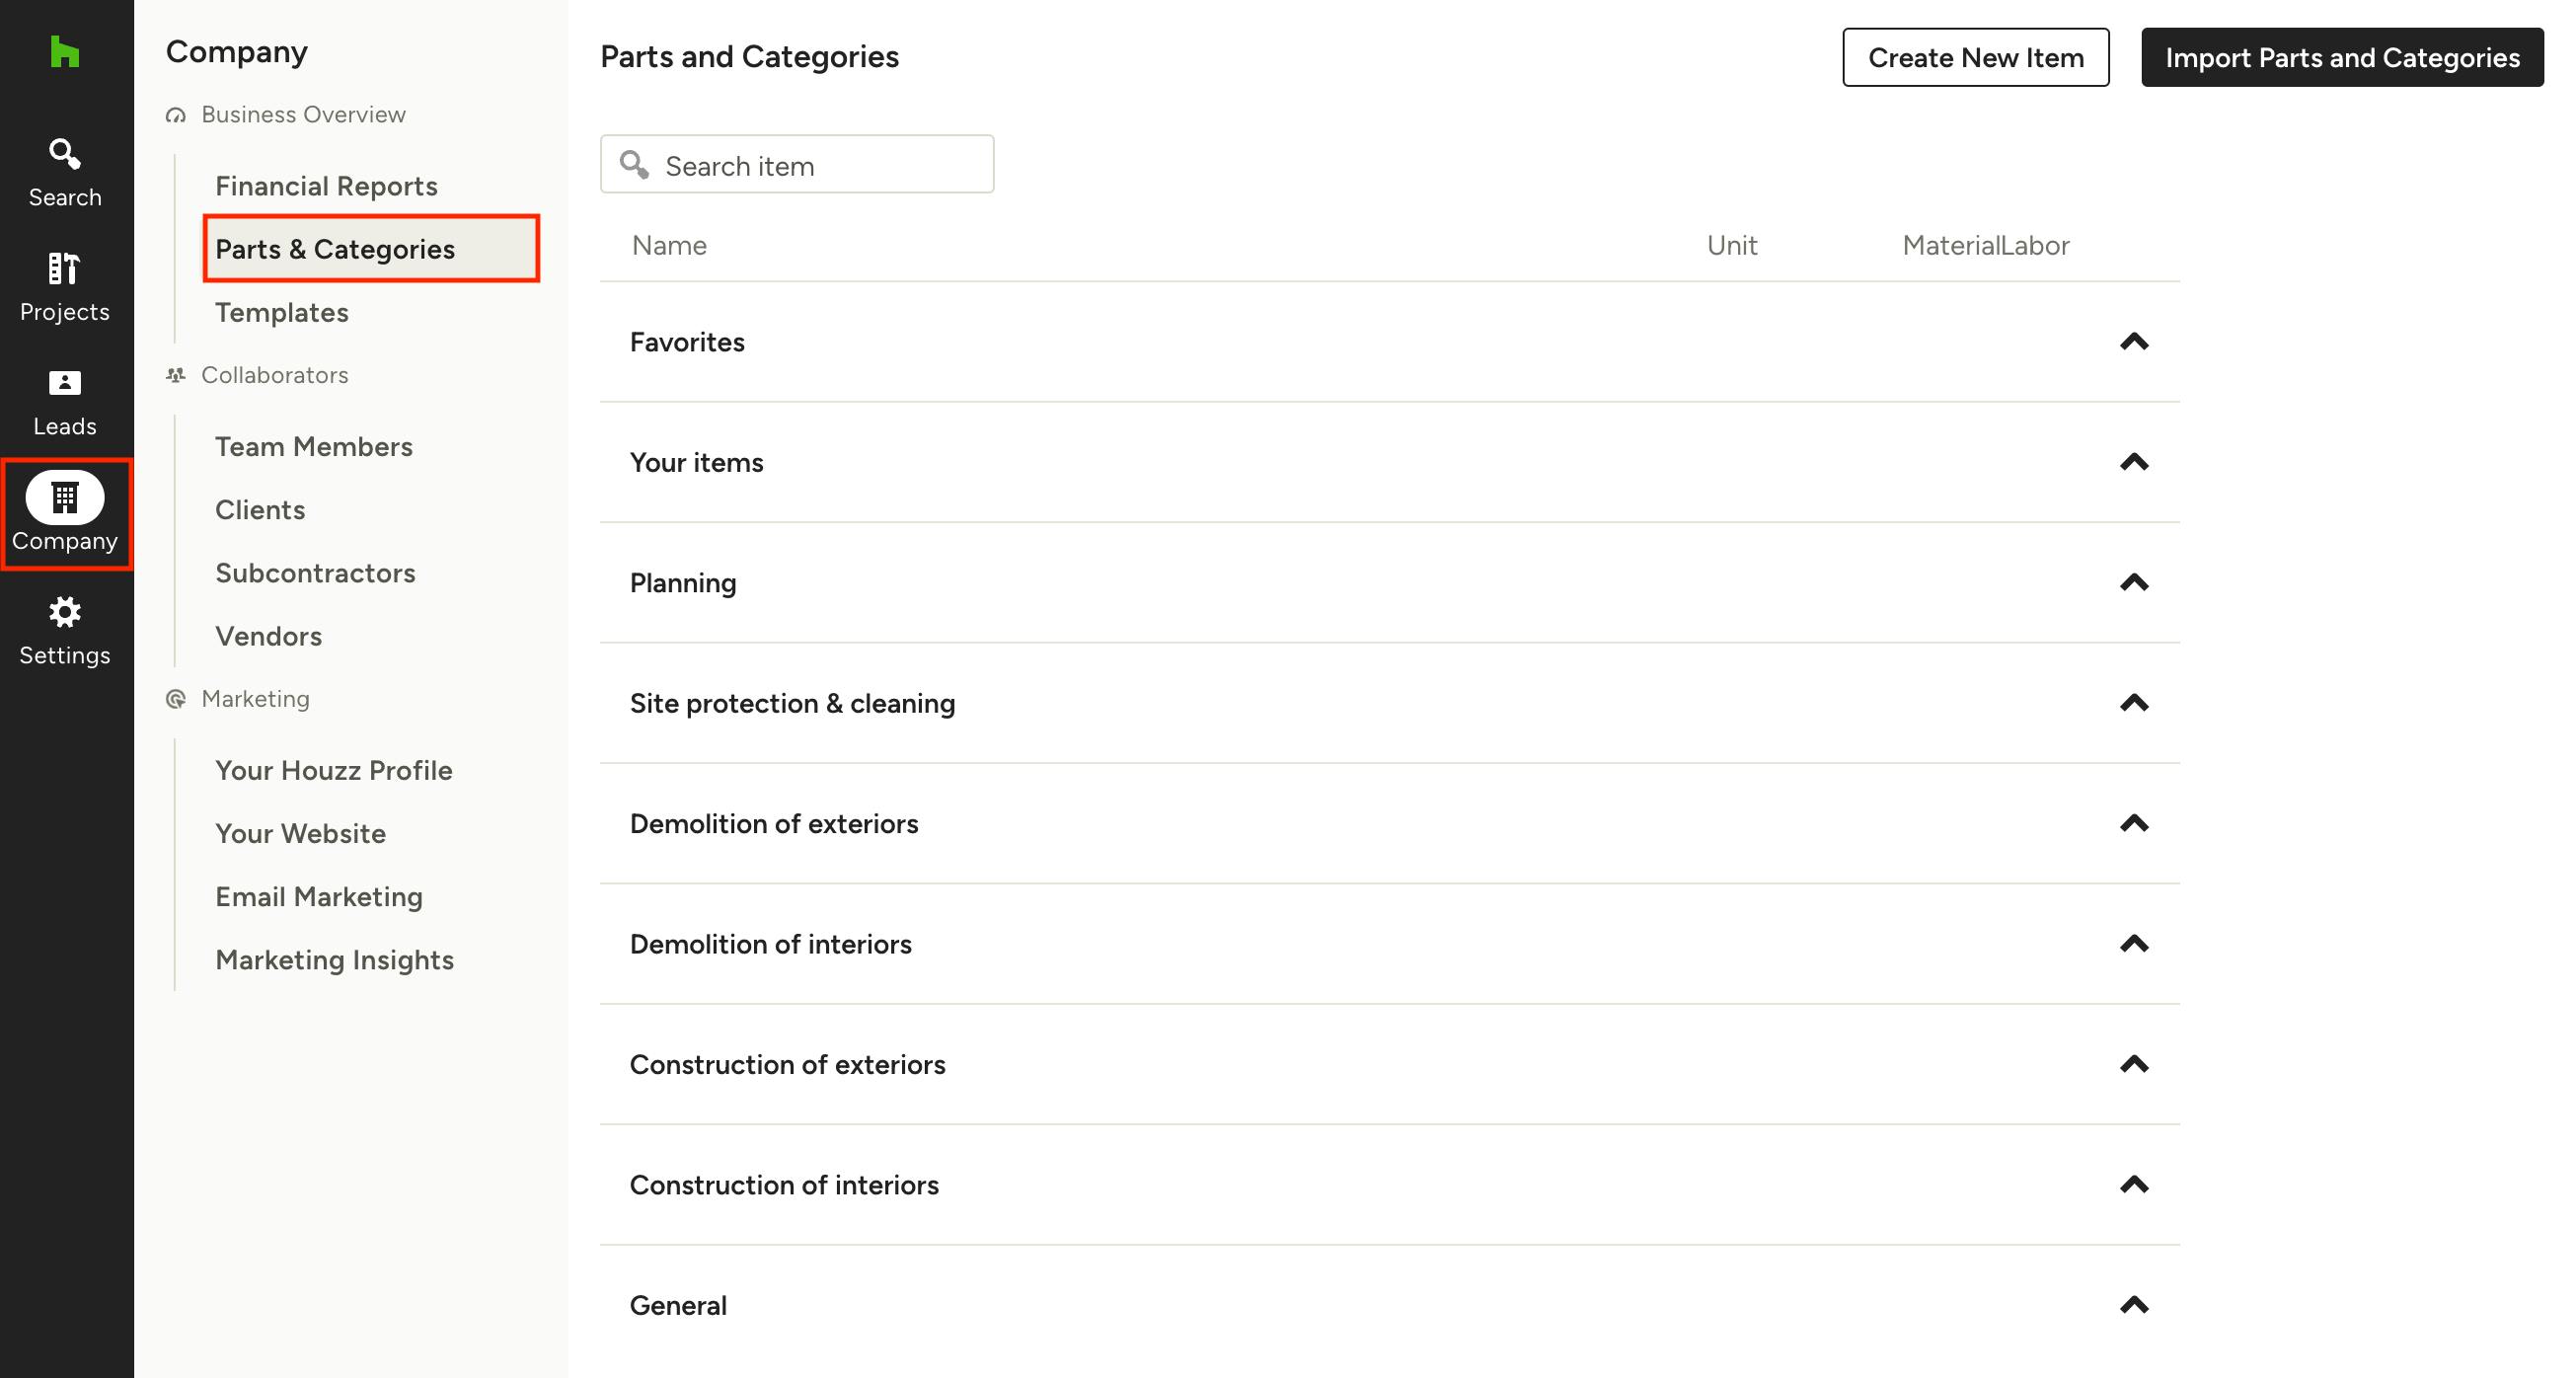
You can access your library by going to the Parts and Categories section, found under the Business Overview section within the Company menu in the left navigation.
Note that if you're looking for your items that were saved via the Clipper tool, you will need to be in a document, Selections Board or Mood Board to access your Selections Library. Learn more in the Accessing Clipped Items section below.
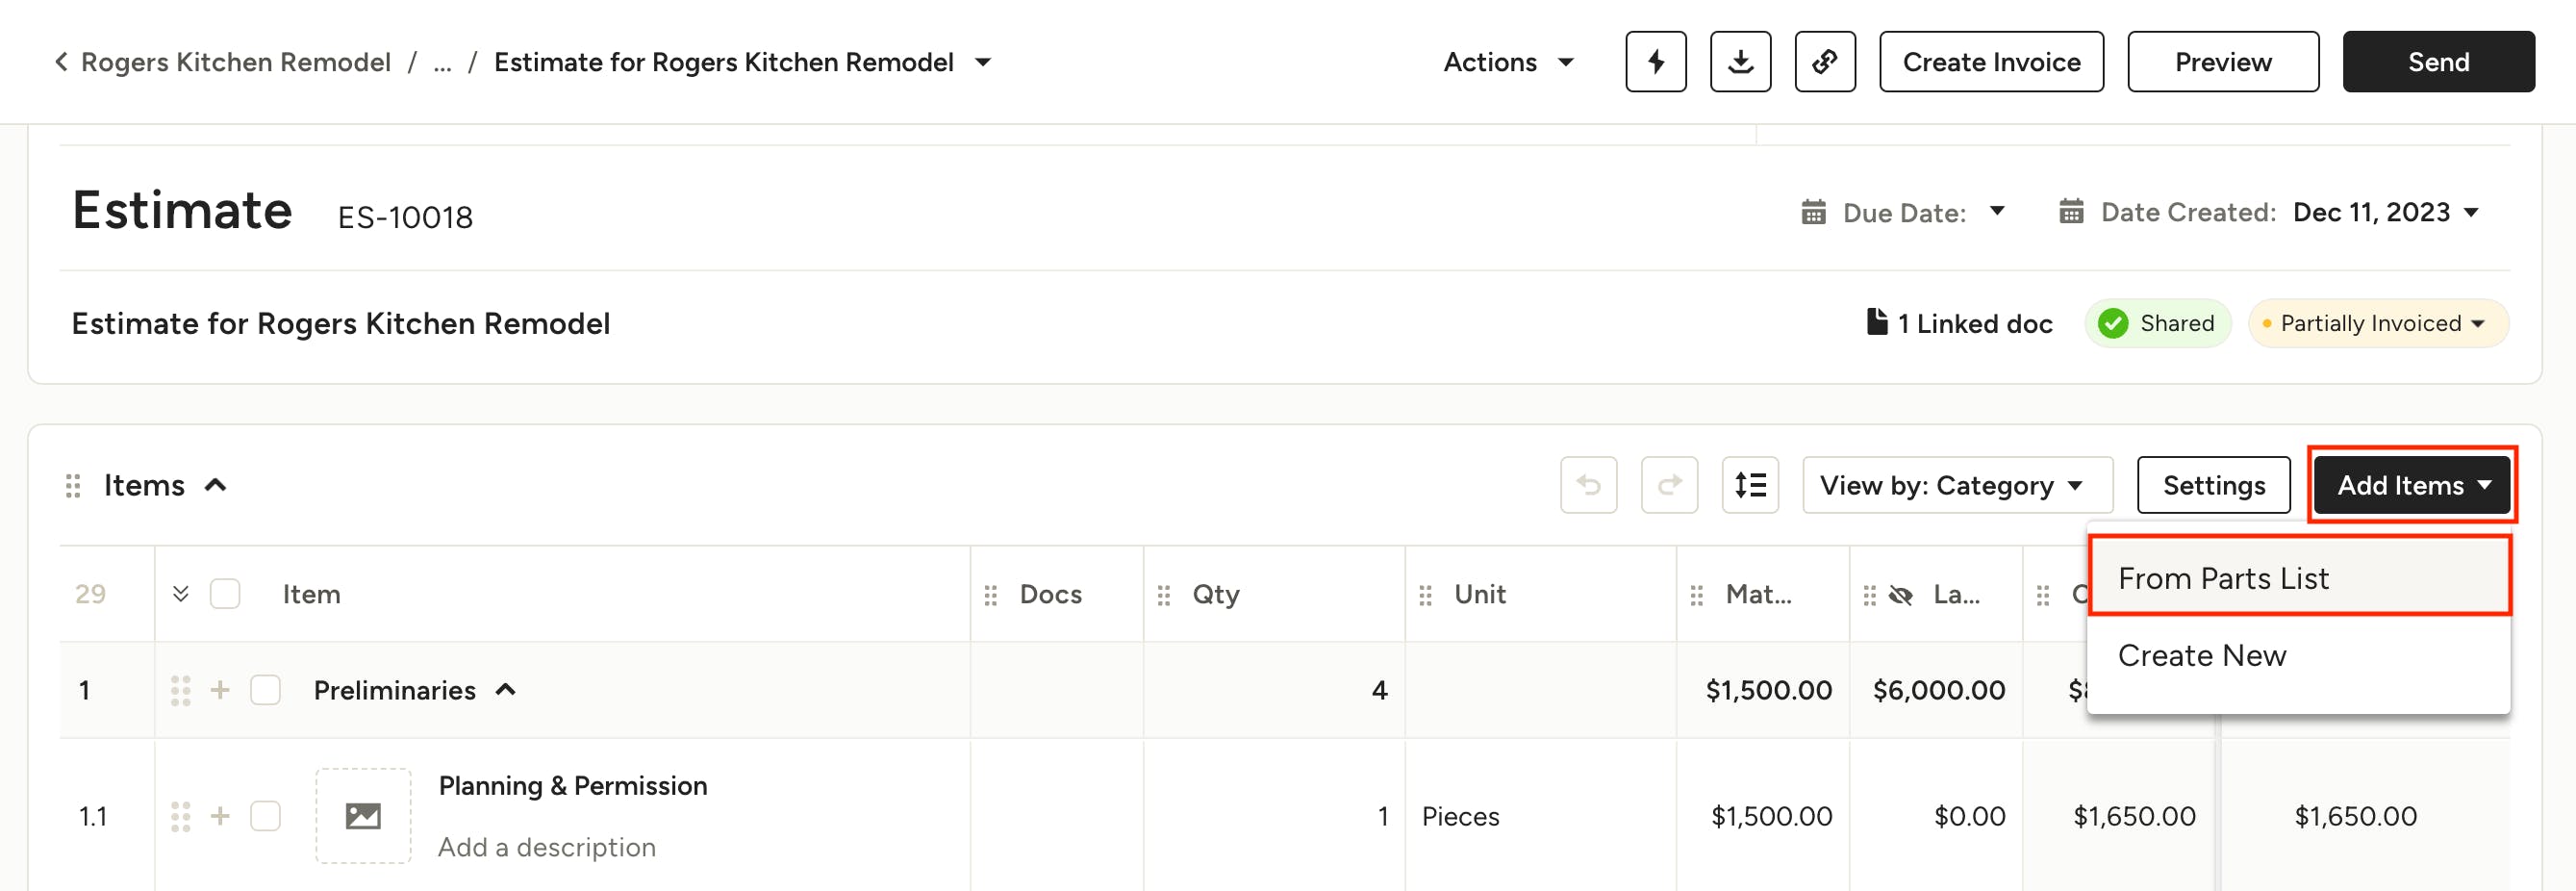
To access your parts and categories library from documents, such as estimates and invoices, click the Add items button then click From Parts List. Here you'll see various categories of items from which you can select, including Your Items (any parts you have manually added).
Adding products and categories
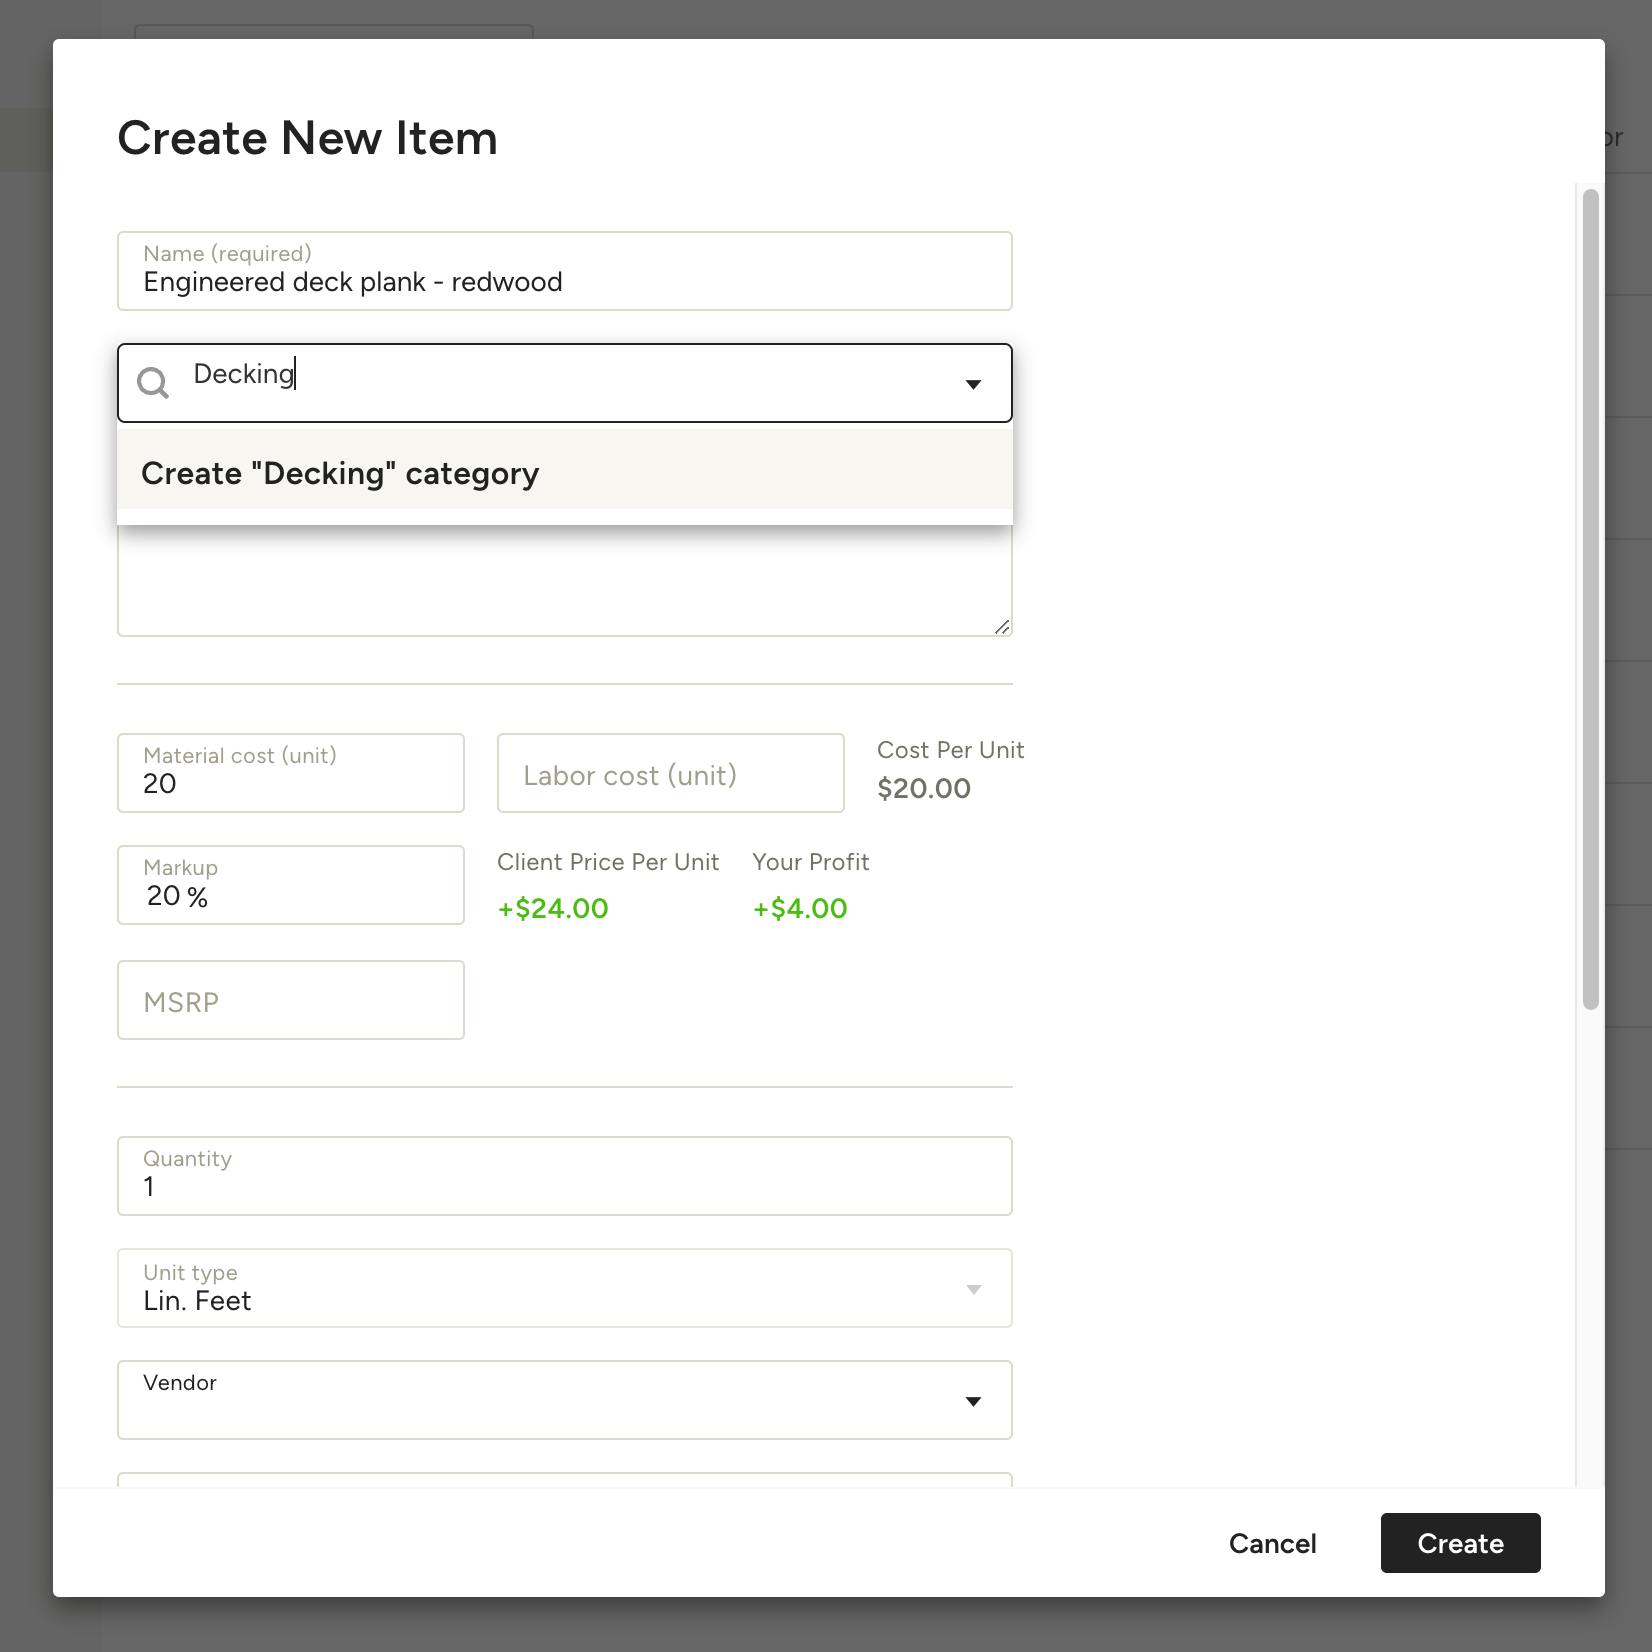
To add products and categories to the Library, click the Create New Item button at the top of the Parts and Categories page and fill in the relevant details. Click the Create button when you're done and you will find your newly added item under Your Items in the category you assigned it to.
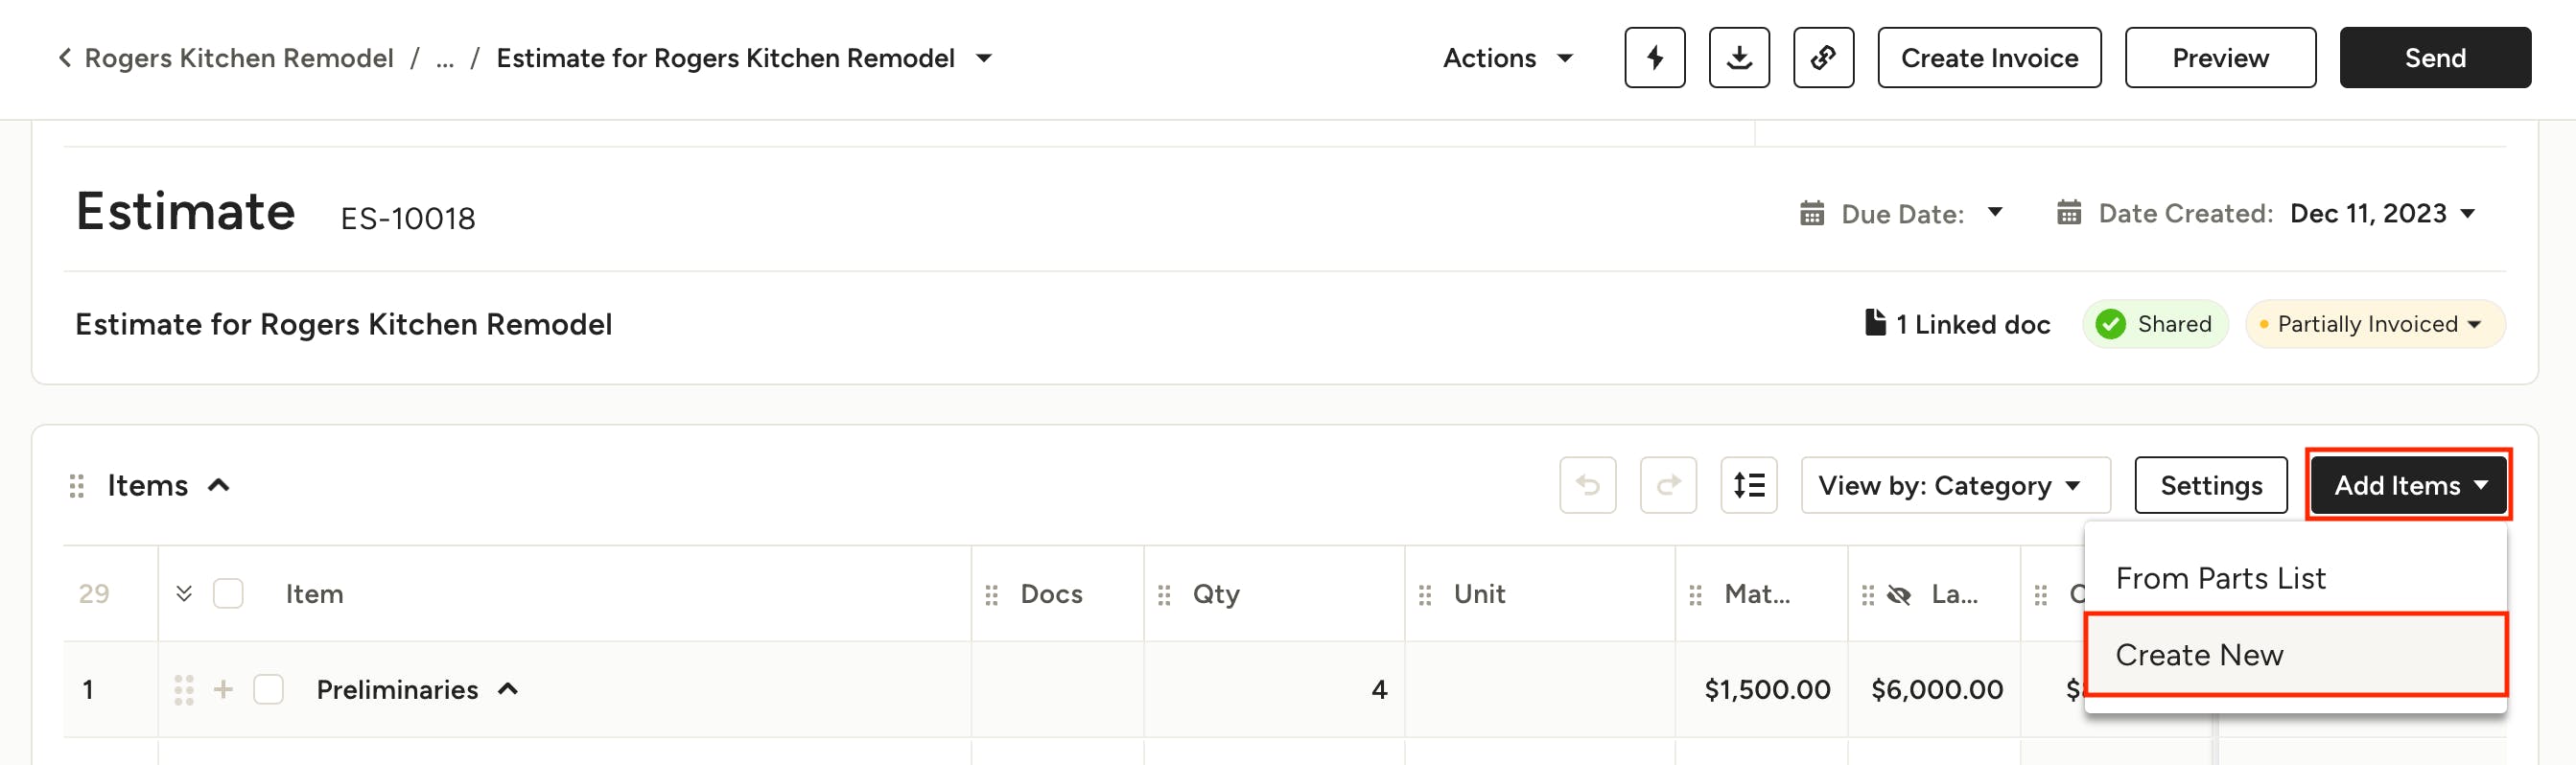
To add a new item directly from within a document simply click Add Items > Create New, or Add Items > From Parts List > New Item.
You can also add a product in just a few clicks by clipping it with the Houzz Pro Clipper Tool. To learn more about where to access your clipped items and how to use them, check out the sections below.
Import your own library
If you already have a library of items you want to use in Houzz Pro, you can easily import the whole list. Check out How to Import Your Own Library of Items to learn how.
Editing parts and categories
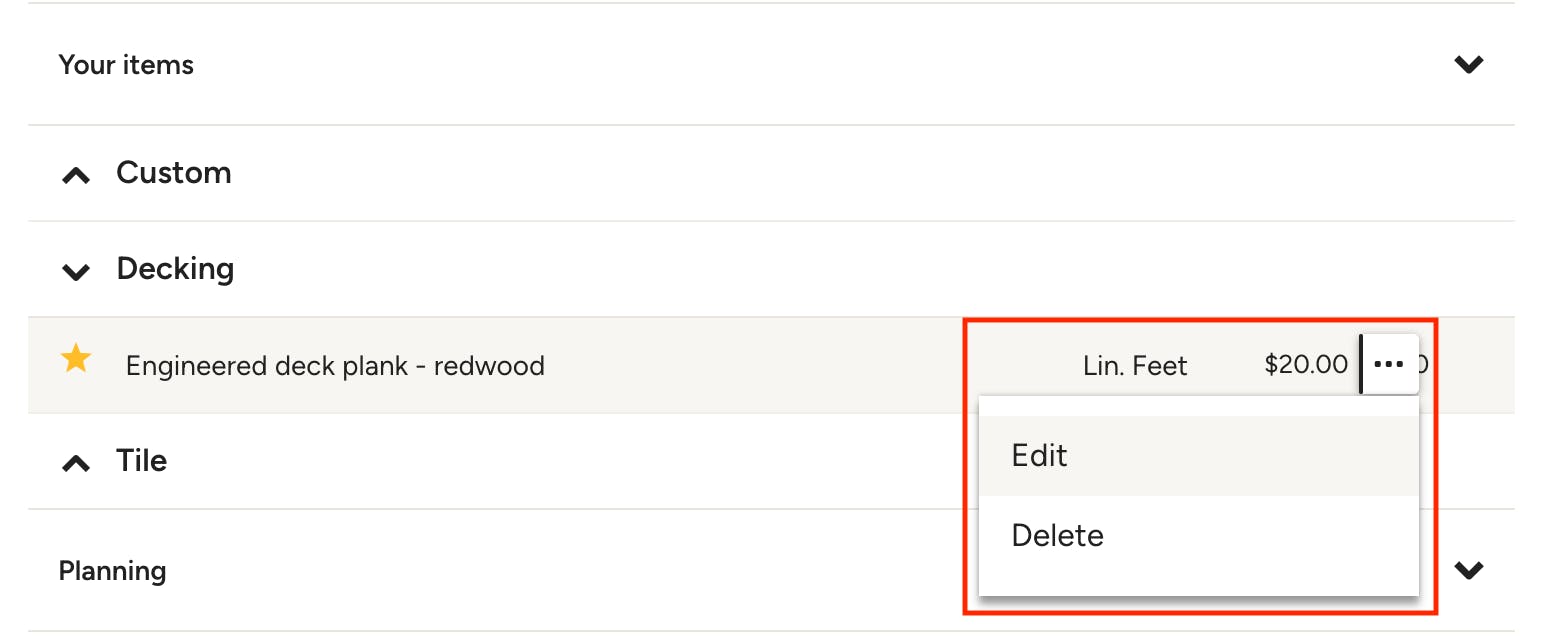
You can edit items that are listed under Your Items. From the Parts and Categories page, click on the three dots to the right of an item and select Edit to edit the details, or Delete to remove the item from your list. You can use the same steps to edit a category name within Your Items.

You can also edit or delete Library items from within a document by clicking Add Items > From Parts list, then clicking the three dots to the right of an item and selecting Edit or Delete. You can use the same steps to edit a category name within Your Items.
Adding items to Favourites
For quick access to your most used items you can use the Favourites feature. This will group the items you have marked as favourites into a separate section for easy access anywhere your Library is available.
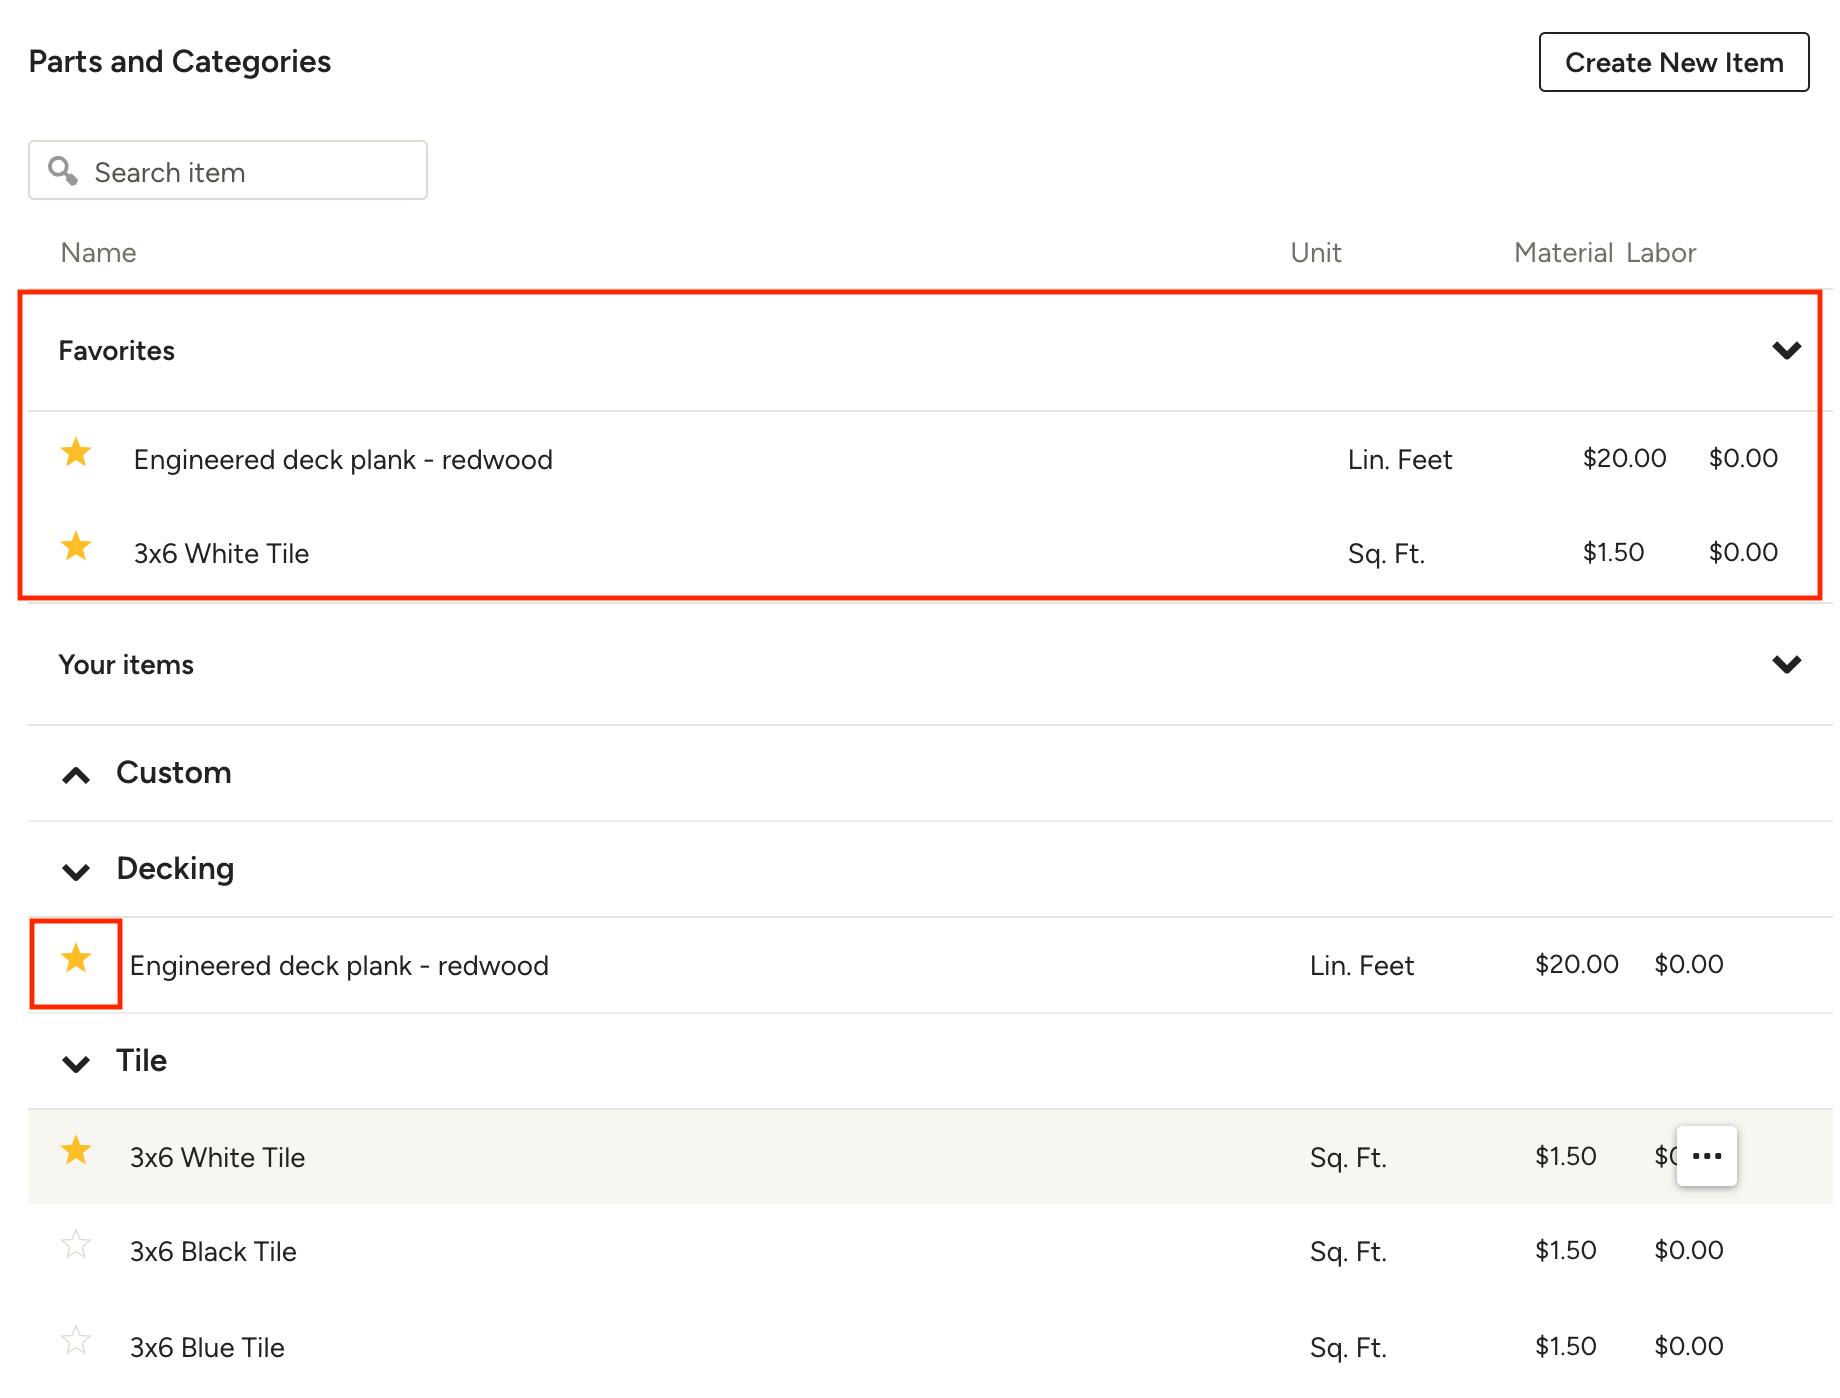
To mark an item as a favourite within the Parts and Categories page, simply click the star icon to the left of it. You'll now find the item listed under the Favourites section at the top. To remove an item from your Favourites, click the star to deselect it.
Accessing and using clipped items
When you clip items to use in your projects, you'll find those listed under your Selections Library, which is accessible through documents, Selections Boards and Mood Boards.
Selections library in selection boards
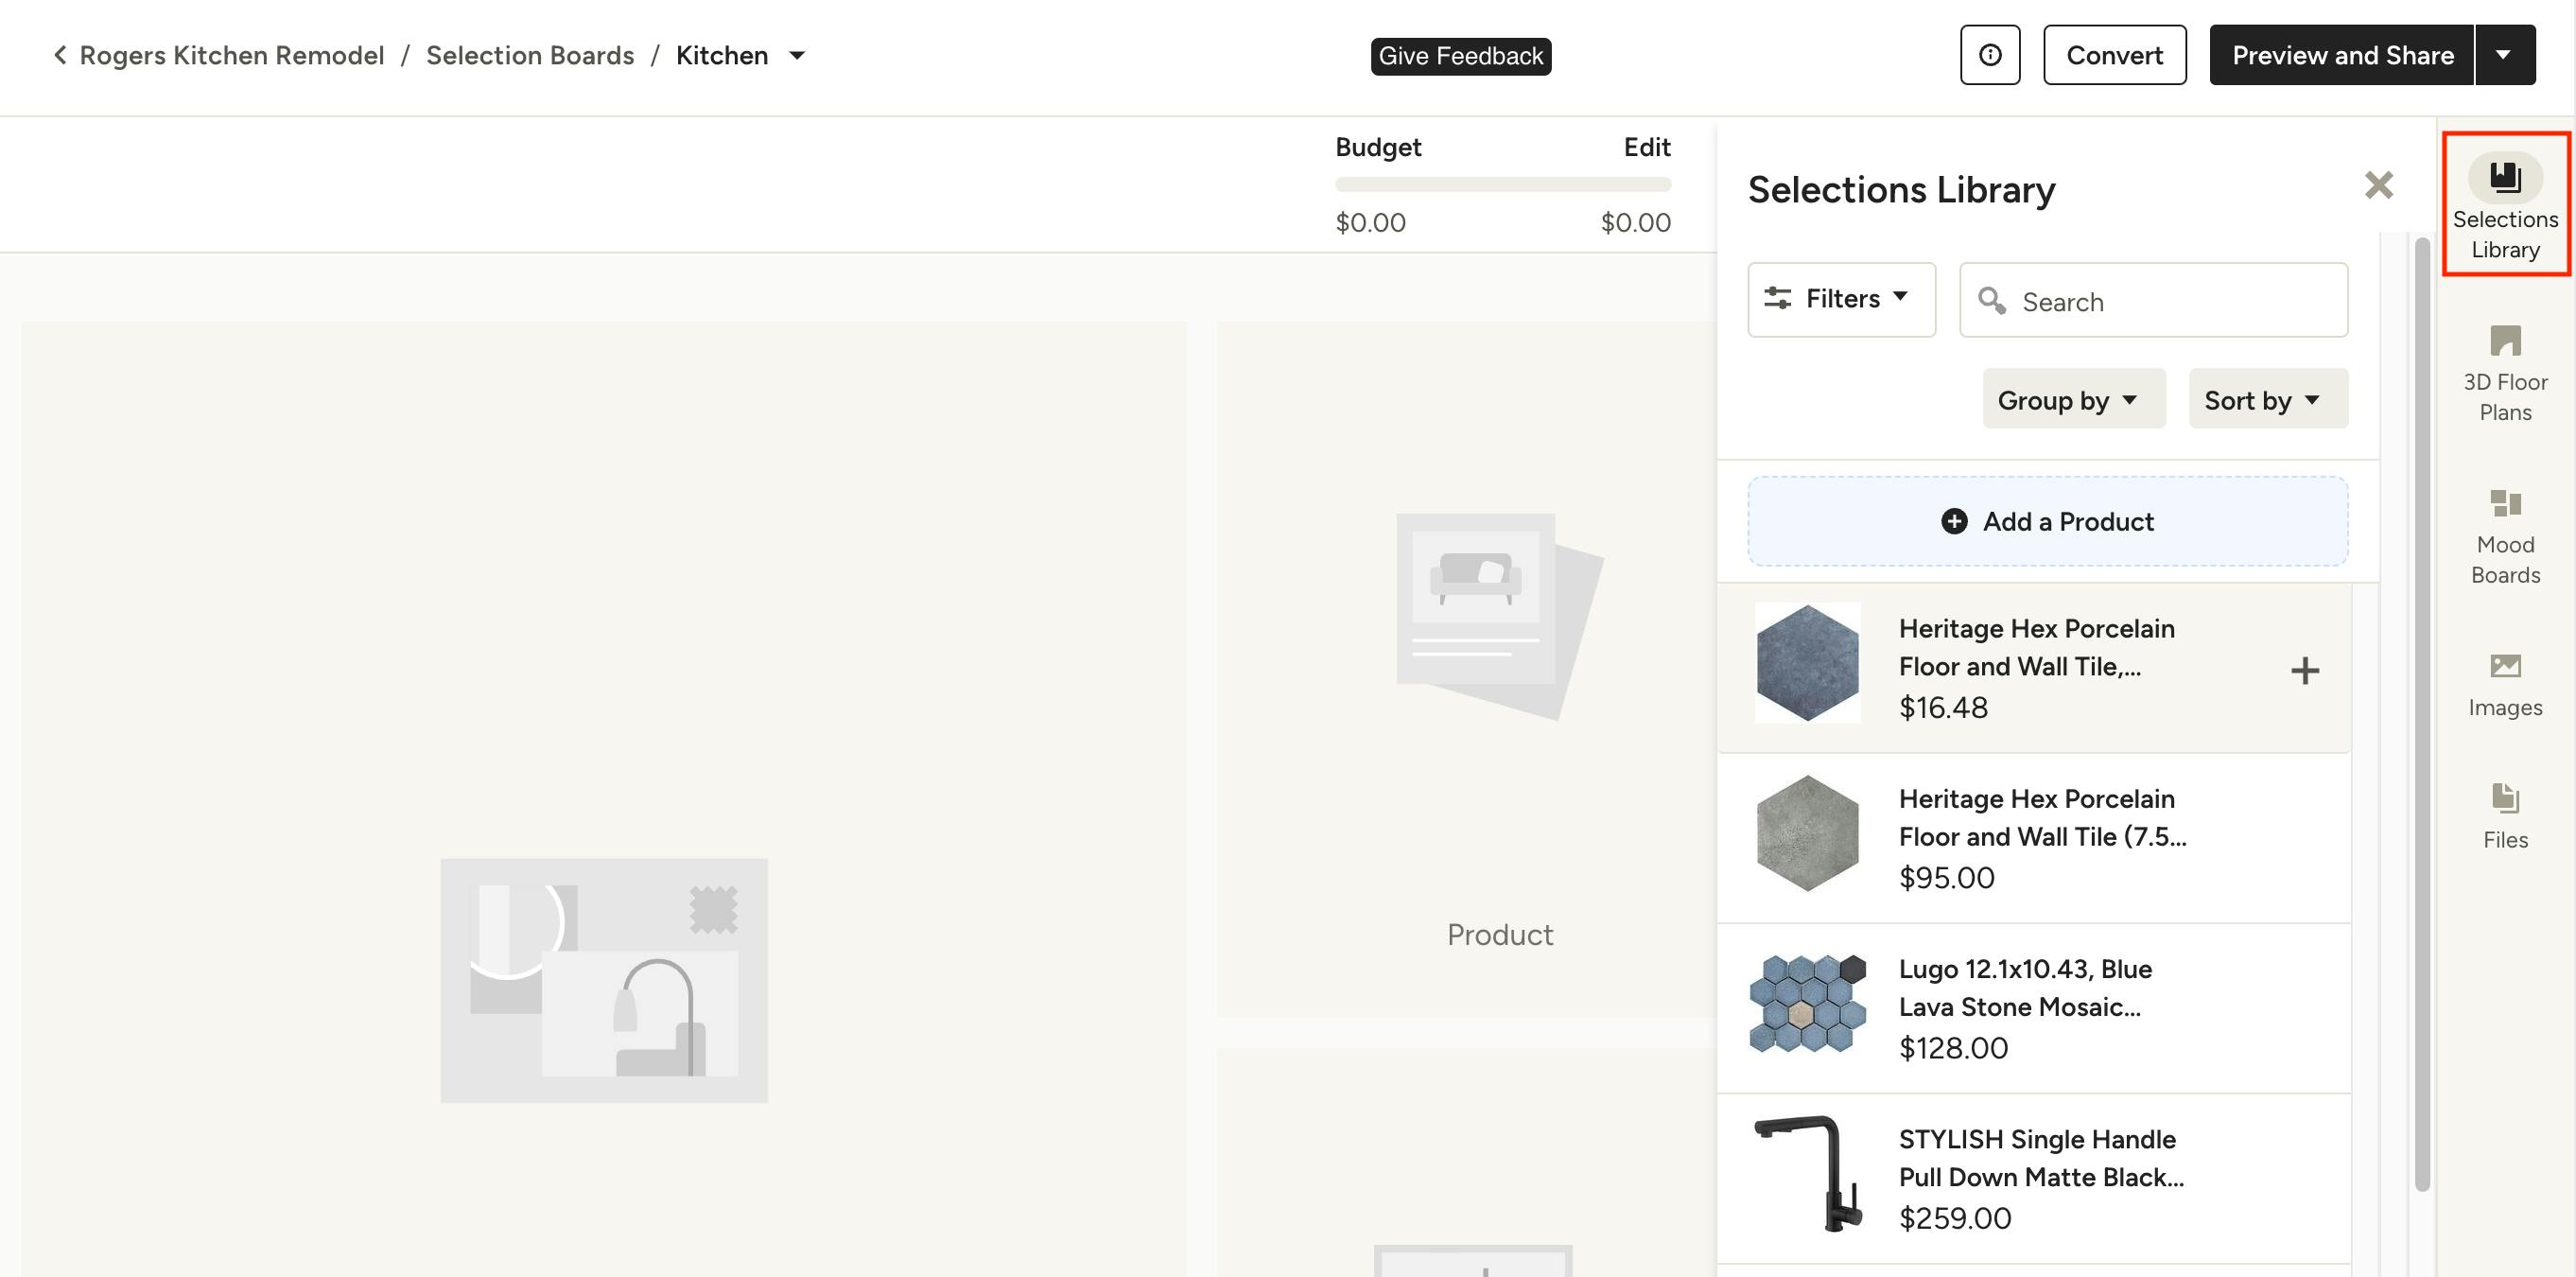
Within a selections board, click Selections Library from the right panel. From here you will be able to add any of your clipped items to the board.
Selections library in mood boards
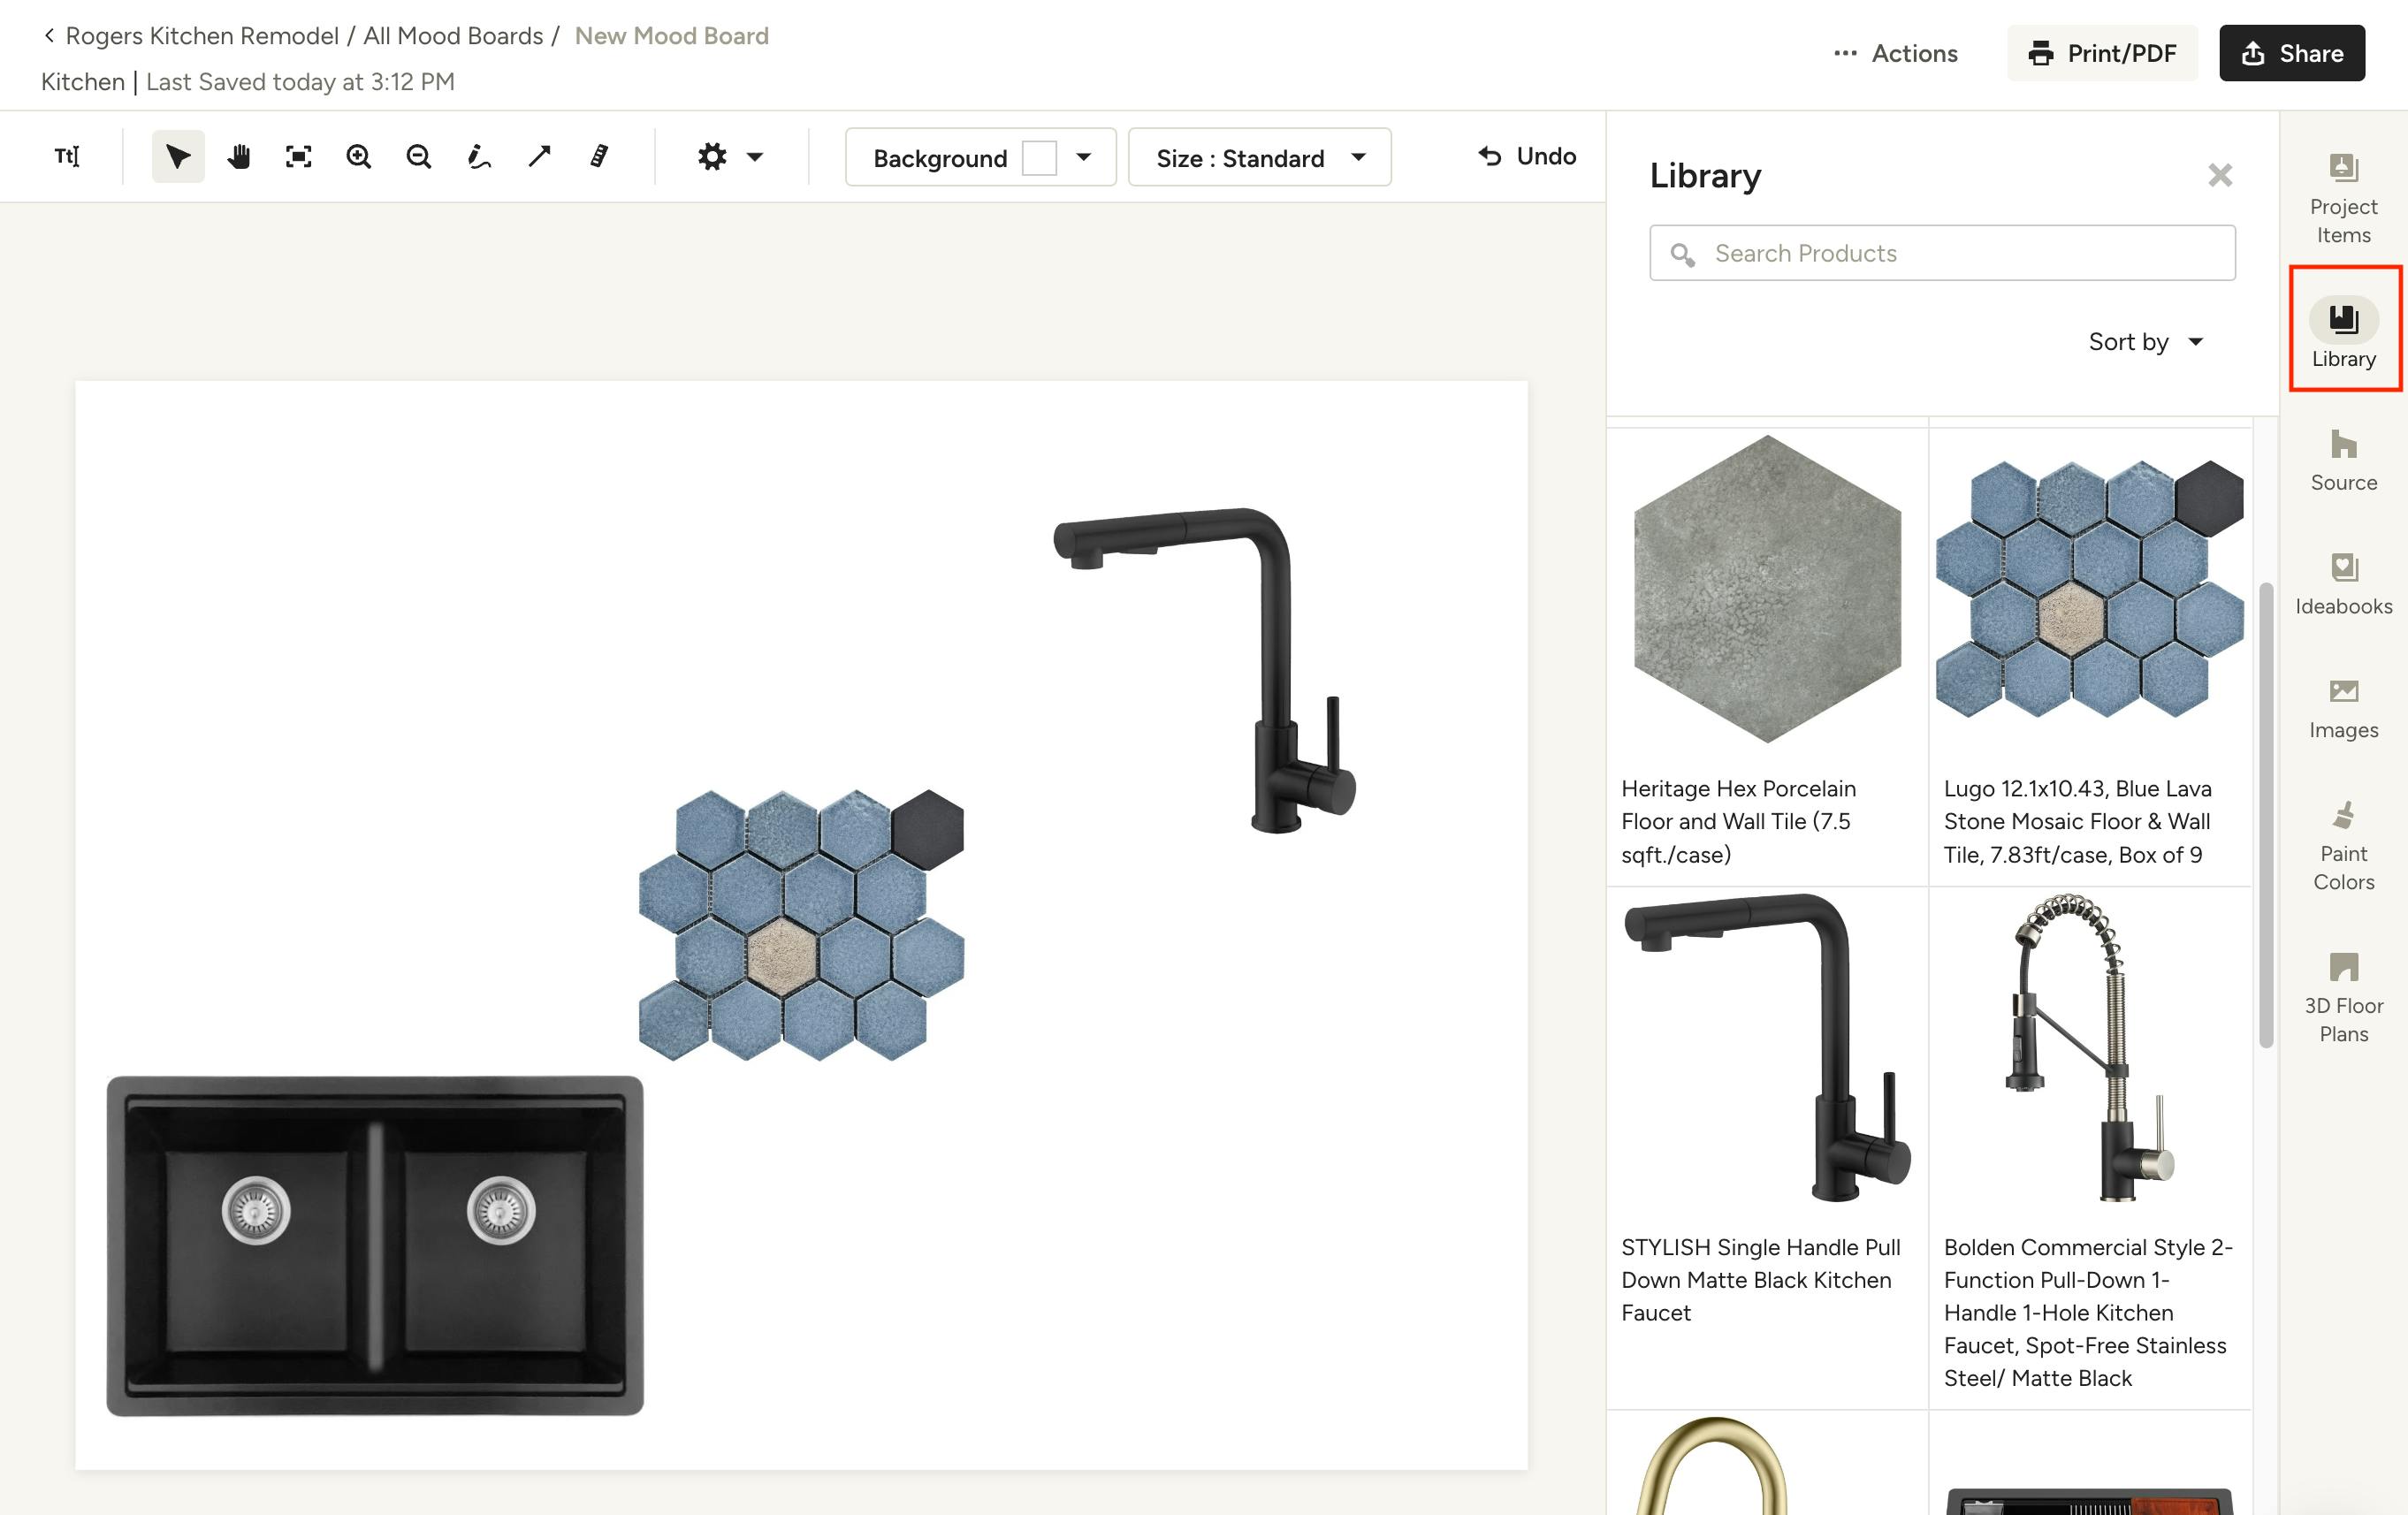
Within a mood board, click Library from the right panel. From here you will be able to add any of your clipped items to the board.
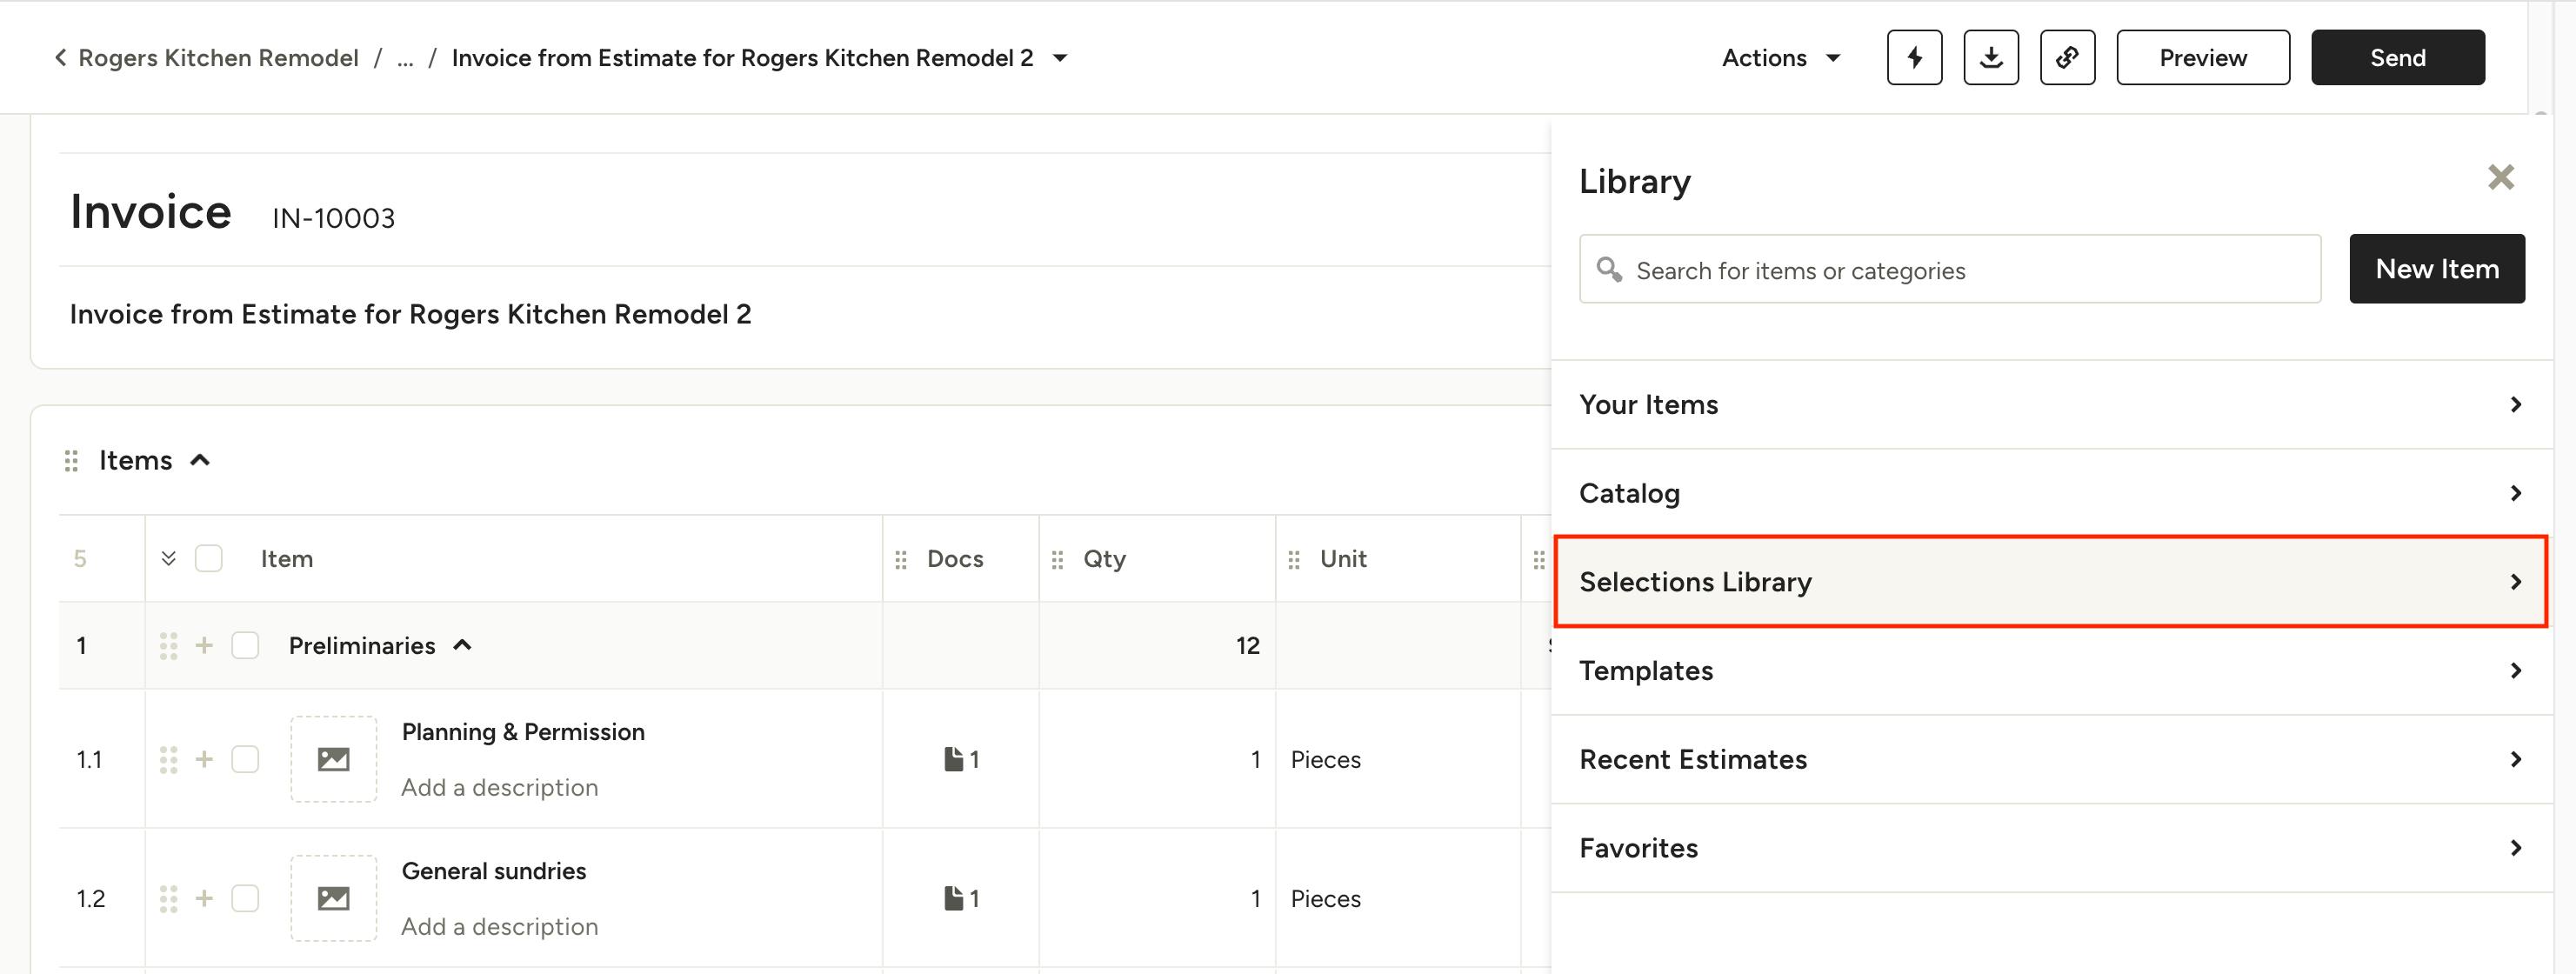
Selections library in documents
Within a document, such as an estimate or invoice, click Add Items > From Parts list > Selections Library. From here you will be able expand the categories and add any of your clipped items to the document.

Editing and deleting clipped items
To edit or delete a clipped item from your Selections Library, you must be within a document or selections board.
From within a document
Navigate to your Selections Library by clicking Add Items > From Parts list > Selections Library. Next to the item you wish to edit or delete, click the three dots to the right and select the action you wish to take from the menu.
Note that editing/deleting a Selections Library item in the side panel of a document will update the library entry for that item as well. Future use of the library item will reflect any changes you make here.
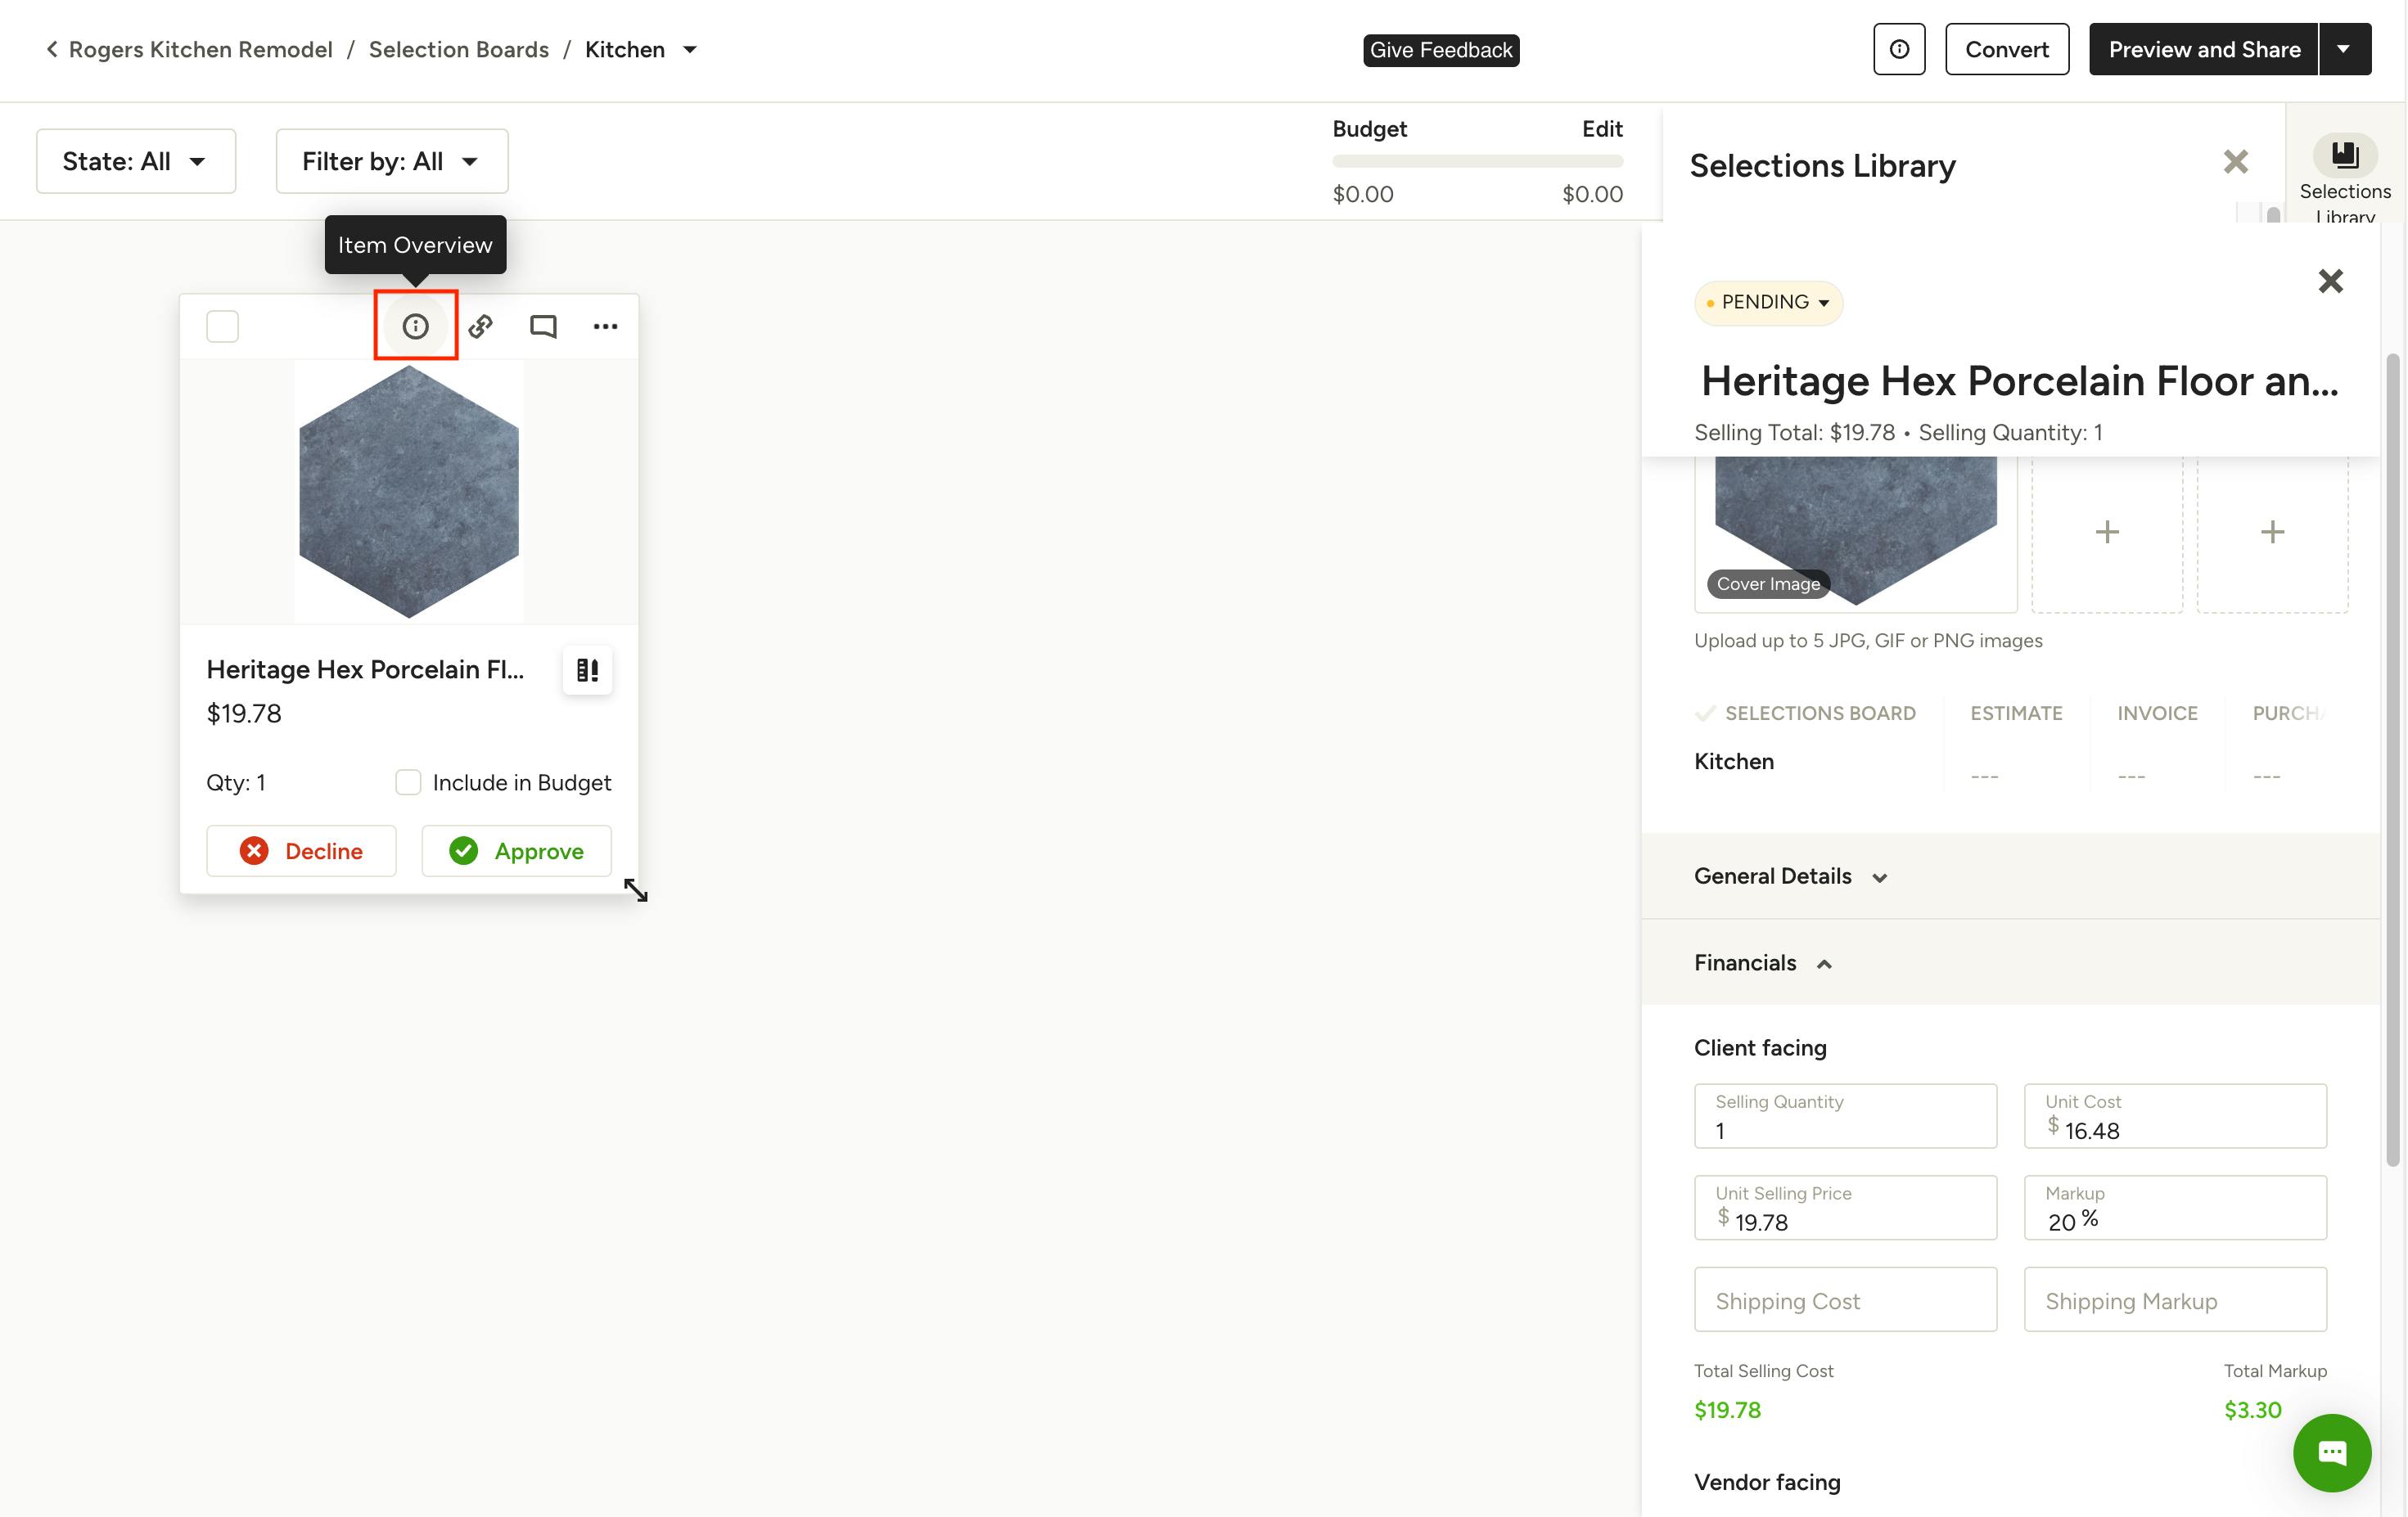
From within a selections board
Once a clipped item has been added to a board you can edit it by clicking the "i" icon to open the Item Overview to the right. From here you can edit the necessary details.
Note that editing/deleting an item via selections board will only update that item for the specific project you are in. It will not update the item in your library for future use.