How to Use Selections in Houzz Pro

The Houzz Pro Selections Tool is a workspace and presentation tool to help you manage your projects’ design processes from initial ideation to final product selection.
With each selections board, you can manage all your product and material selections, track the project budget, create full room views to present your vision to clients, and stay updated with changes.
Your selection boards can pull in your clipped products, materials, finishes, fixtures, appliances, mood boards, 3D floor plans, and files in an organised way to present to your client.
Your Selections Tracker, previously known as Project Tracker, can also be found in the Selections Tool area of your projects. Just click on the Tracker tab at the top of the page to access this one-stop-shop for all the details and status of every product and service in your project, including which documents they’re connected to, such as boards, invoices or purchase orders.
Creating Selection Boards
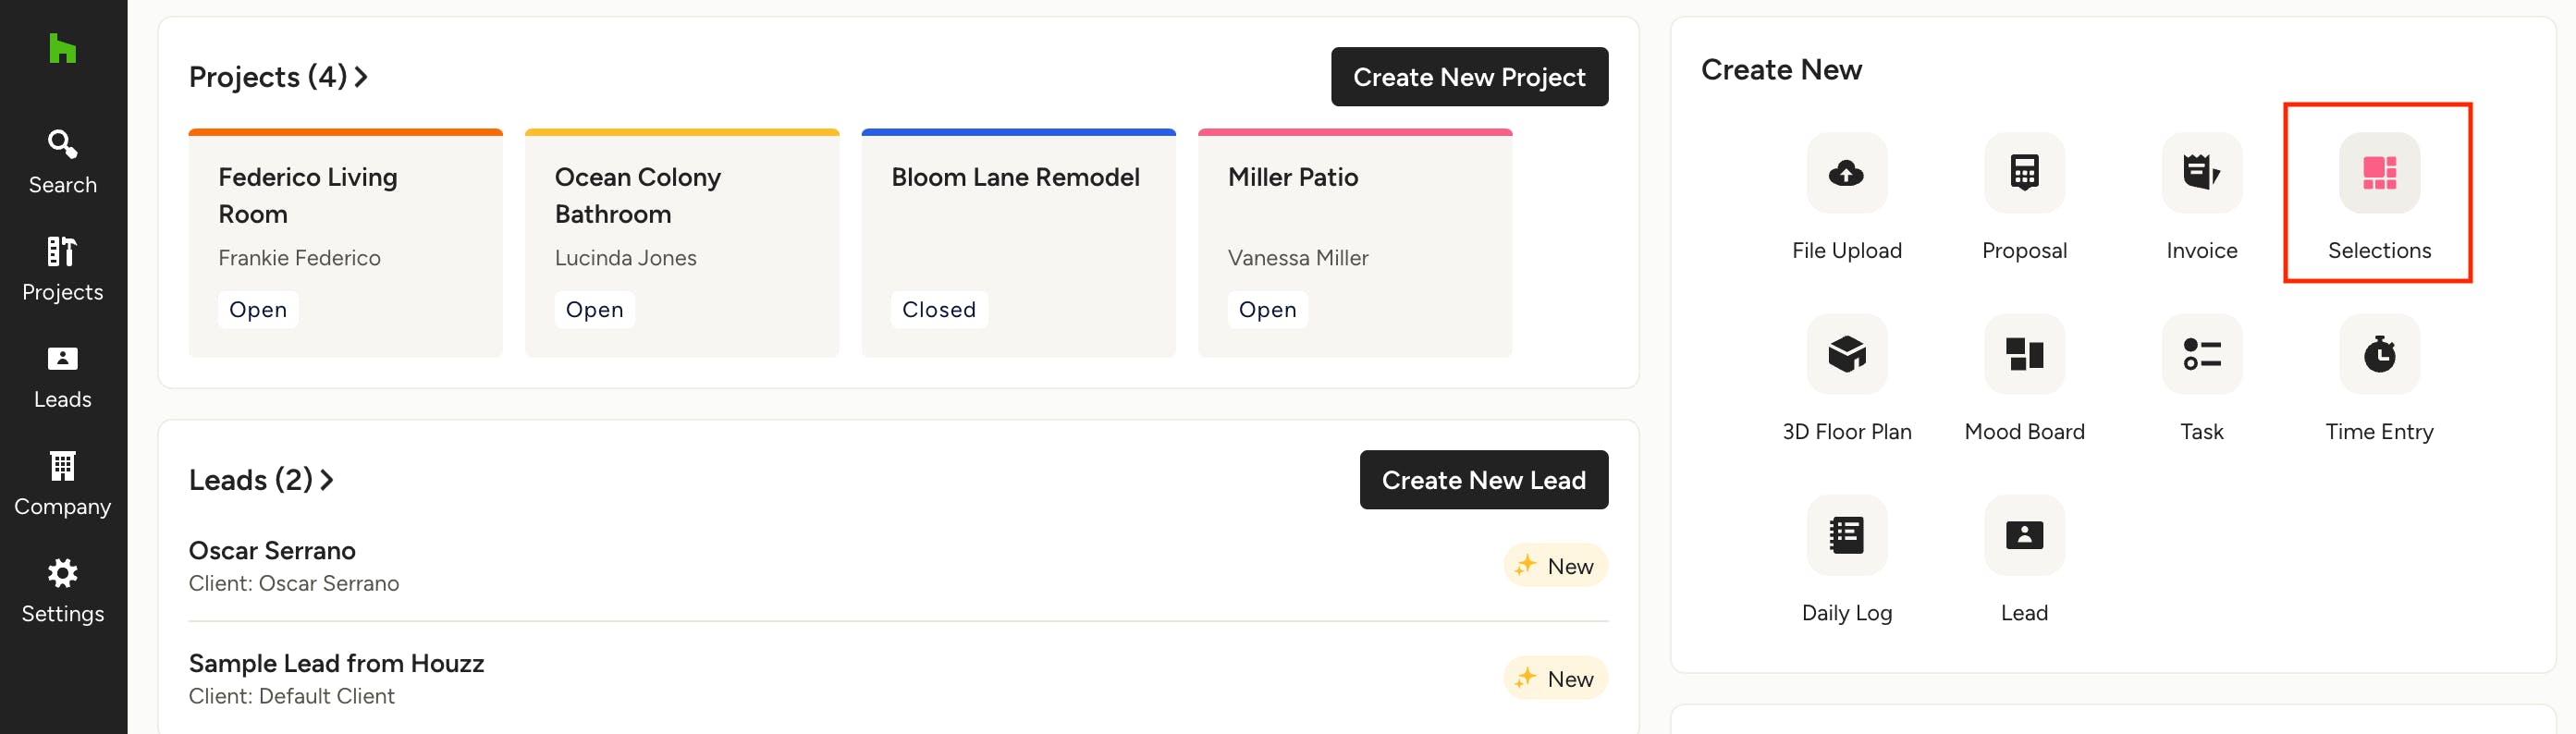
From your Houzz Pro homepage, click the Selections icon in the Create New section. Fill in the relevant information and you're ready to start making selections! You can also click here to access all your selection boards across all projects.
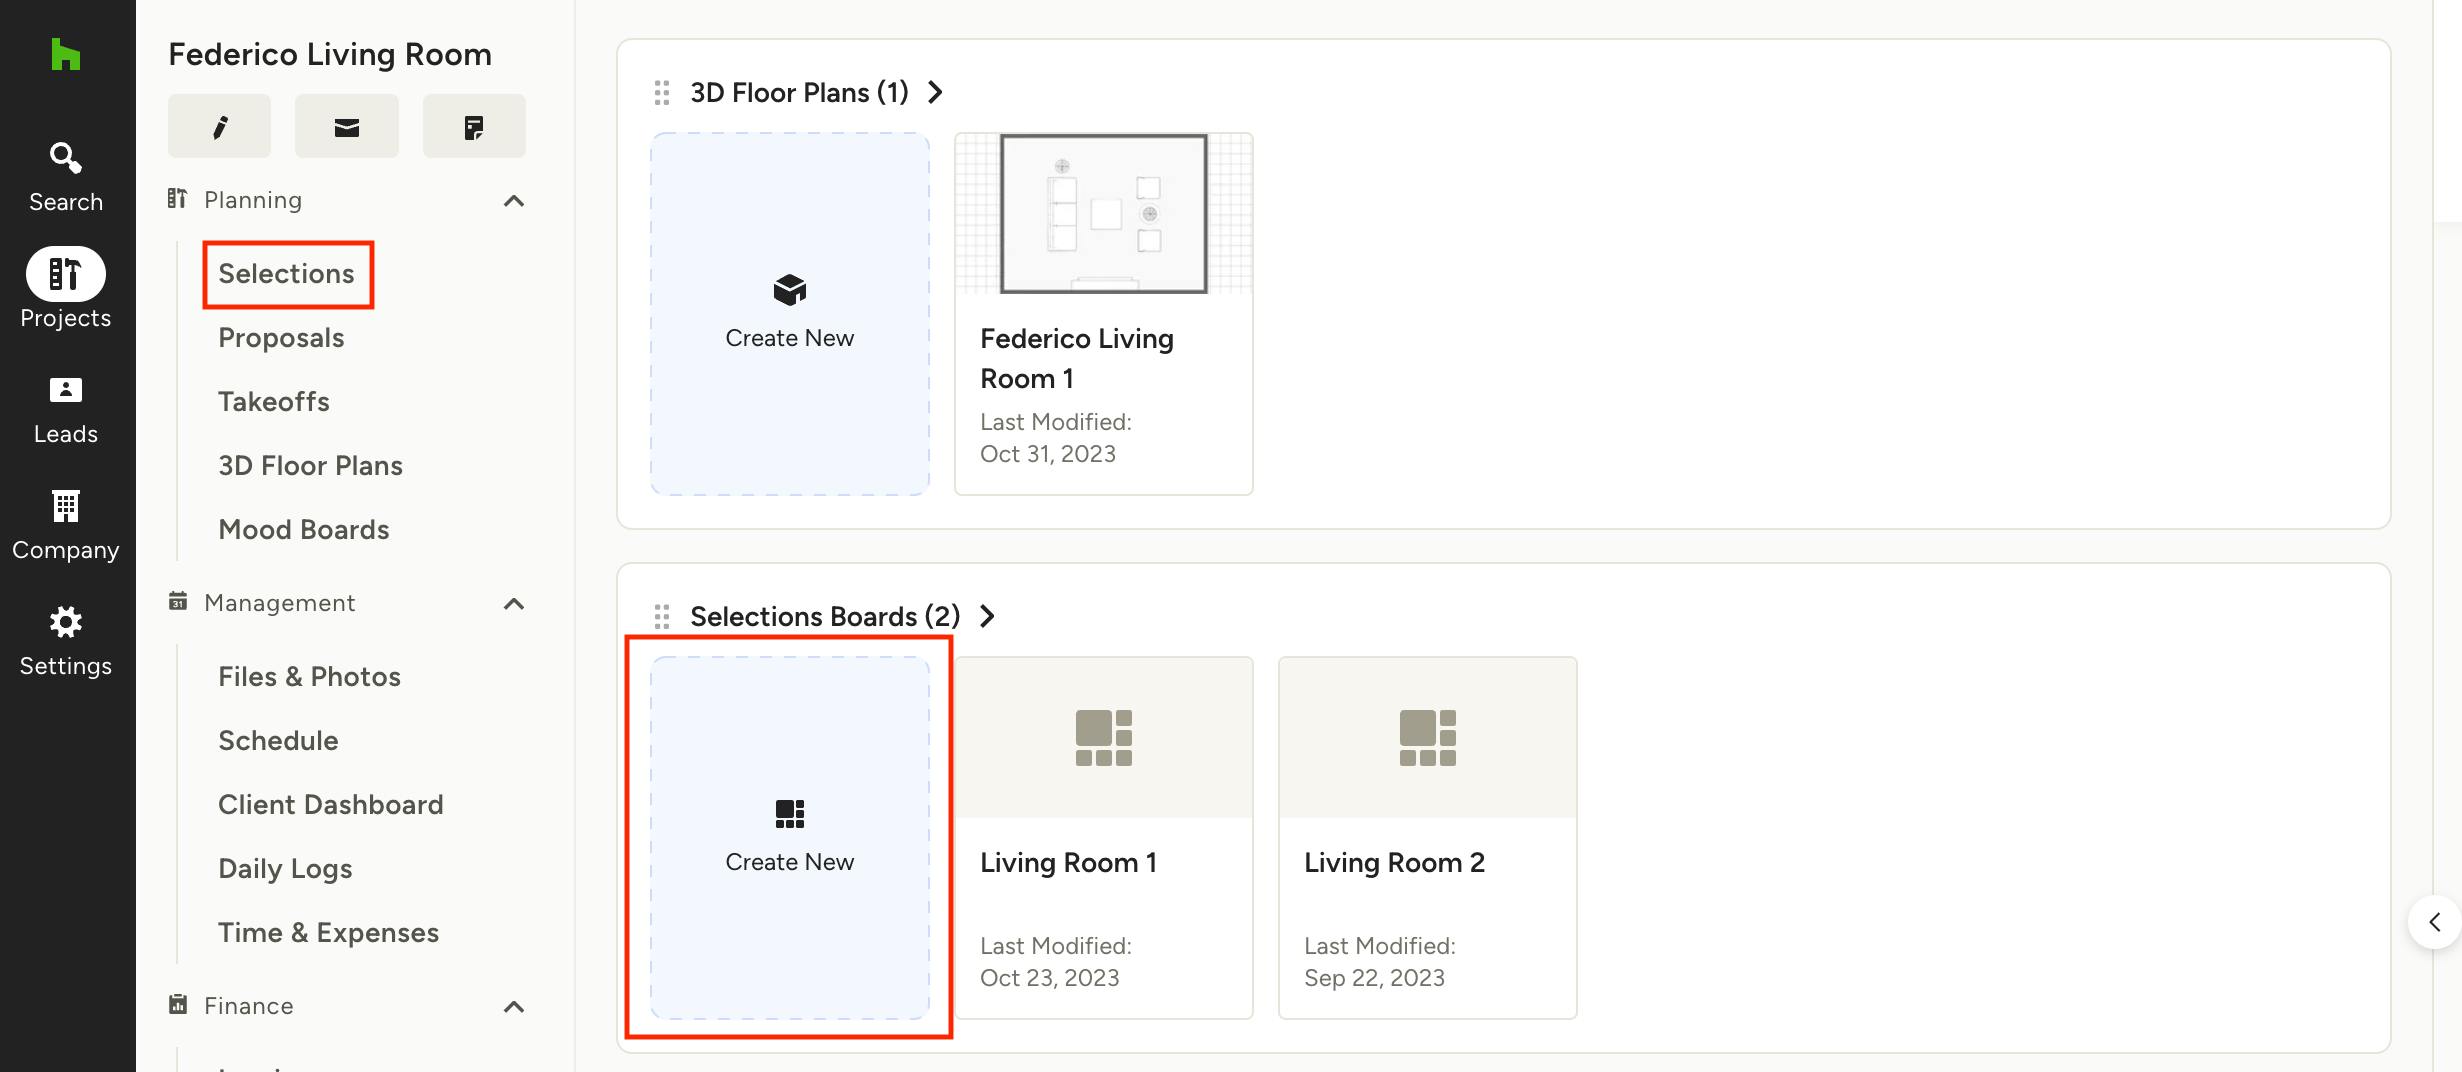
To create a selections board in a specific project, open the desired project and click Selections from the left menu or chose Create New from the Selections Boards tile. Fill in the relevant information and start making those selections!

Adding Items
From the right side panel, you can pull in your sourced and clipped products, like furniture, materials, finishes and fixtures, from your library, as well as 3D floor plans, mood boards, images and files to display on your selections board in an organised way to professionally present to your client. The quickest way to add an item is to drag and drop from the side panel on any selections board.
There are three ways to add items to your selection boards:
1. Click: By clicking on an item in the side panel, it will be added to the beginning of your board.
2. Click, drag, and drop: If you click and drag an item from the side panel, you can place it at a specific position on your board by dropping it where you desire.
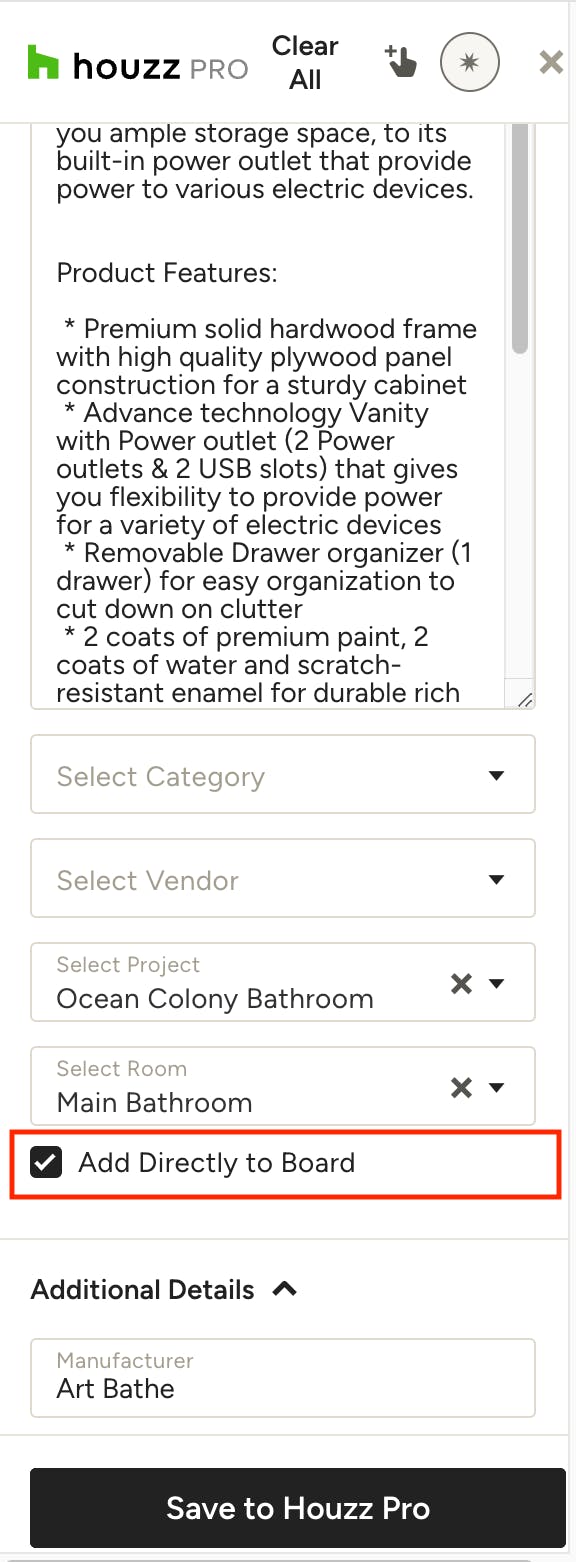
3. Directly from Clipper: When you clip an item via our Clipper Tool and select the room you want it added to, a checkbox will appear that says "Add Directly to Board". Check this off before saving and the item will automatically appear in the board the next time you open it.
Note: this checkbox is only applicable to new experience projects and will appear only if the selected project is a new experience project.
Here is a breakdown of all the different types of items that can be added to your selection boards from the right panel:
Your Project Items: This is auto-organised for you. Every time you use the Houzz Pro Clipper and assign the clipped product to a specific project, the product will appear here. Same goes for manually uploaded products into your Houzz Pro library – as soon as you assign it to your respective project, it will appear within the Project Items of that project’s selections board. From there, you can drag and drop the item onto your board and all of the item details are included — no need to source, price, or look up those details again.
Your Library: Here you will find all products and services that are saved within your Houzz Pro Library. Thanks to a search bar as well as filter, grouping and sorting options, you’ll quickly find anything that you’re looking for.
3D Floor Plans: All project-related floor plans that you’ve created for your client can be found in this tab, under “Assigned to…”. You can also add floor plans that are not specifically assigned to this project, under the tab “Unassigned”.
Mood Boards: Under the Mood Boards tab, within "Assigned to...", you can find all the project-related mood boards that you have created for your client. Additionally, you can also add mood boards that are not specifically assigned to a project under the "Unassigned" tab.
Images: Easily upload images from your computer, or your project images, onto your board, simply by clicking Add New within the Images tab.
Files: If you want to add documents, Terms & Conditions, install guides or other files to your selections board, you can find these in the Files tab.
Rearrange and Resize Items
You can rearrange and resize items to spotlight your suggestions and visually organise it the way you want. To rearrange items on your board, click on the top part of the item and drag it to the desired spot on.
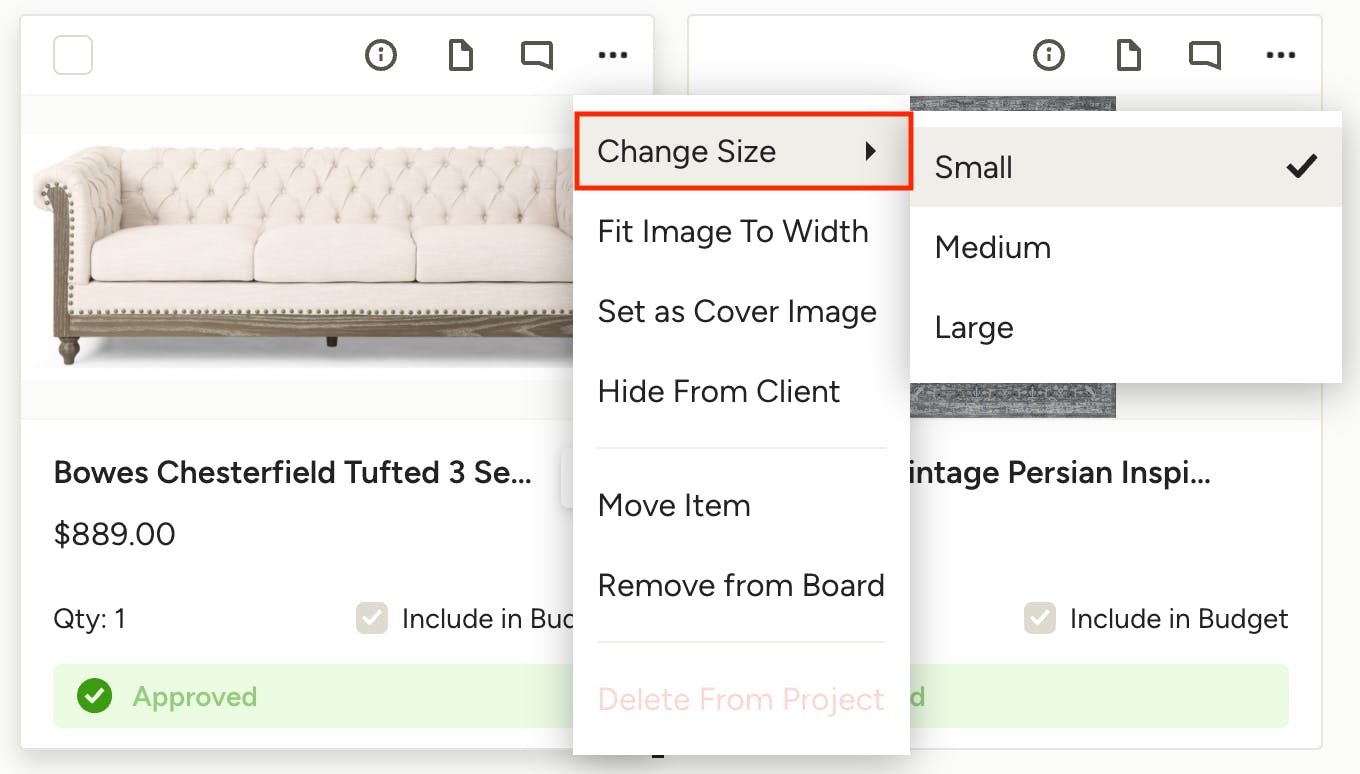
To resize an item, click on the three dots in the right corner, mouse over Change Size in the menu and select the new size you want. You can set items to be small, medium or large.
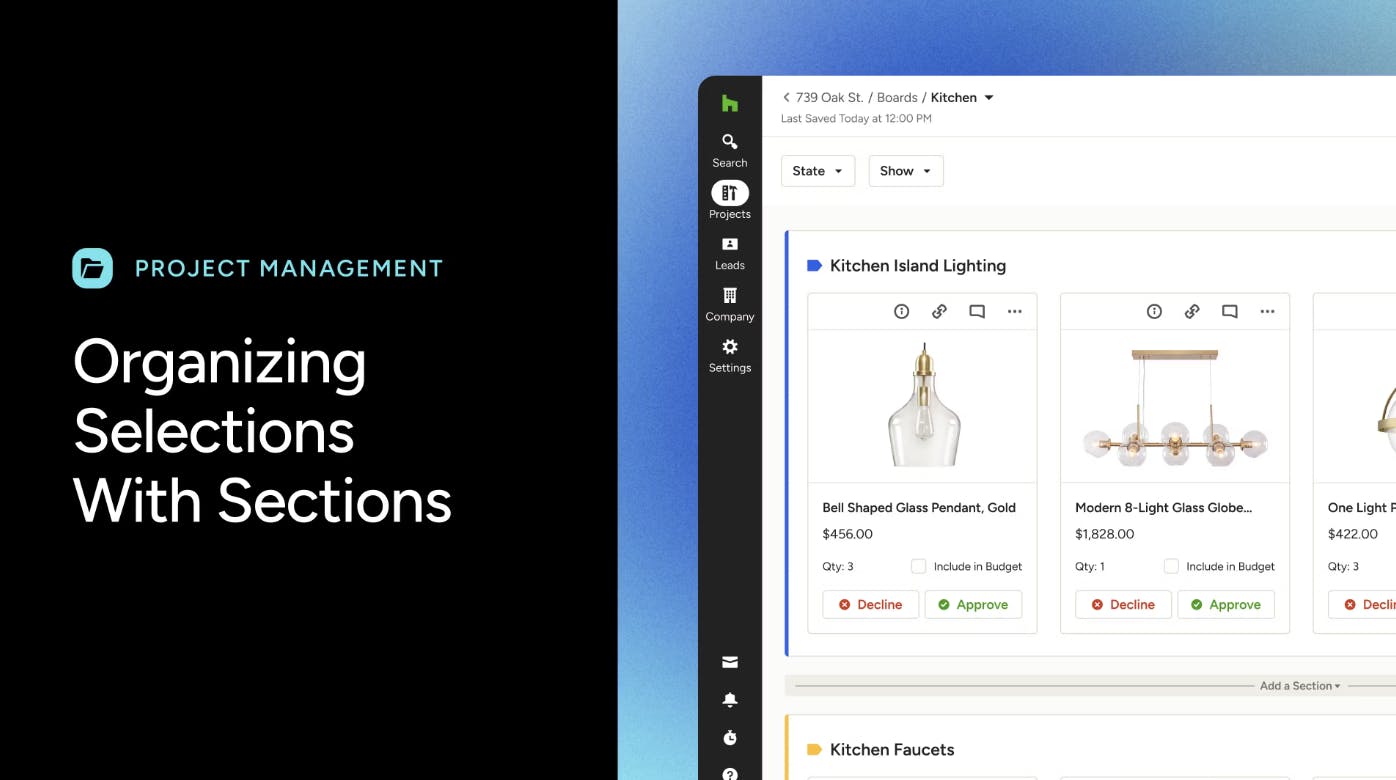
Organise Items by Sections
Quickly organise your selections board by creating sections. This feature helps you to group items together however you see fit, whether by furniture type, fixture options or any other method you may have. You can use these sections to help present the board to your client in a way that helps them easily visualise which selections need to be made. Watch this video or read the step-by-step instructions below to learn how to create sections on your boards.
To create a section, follow these steps:
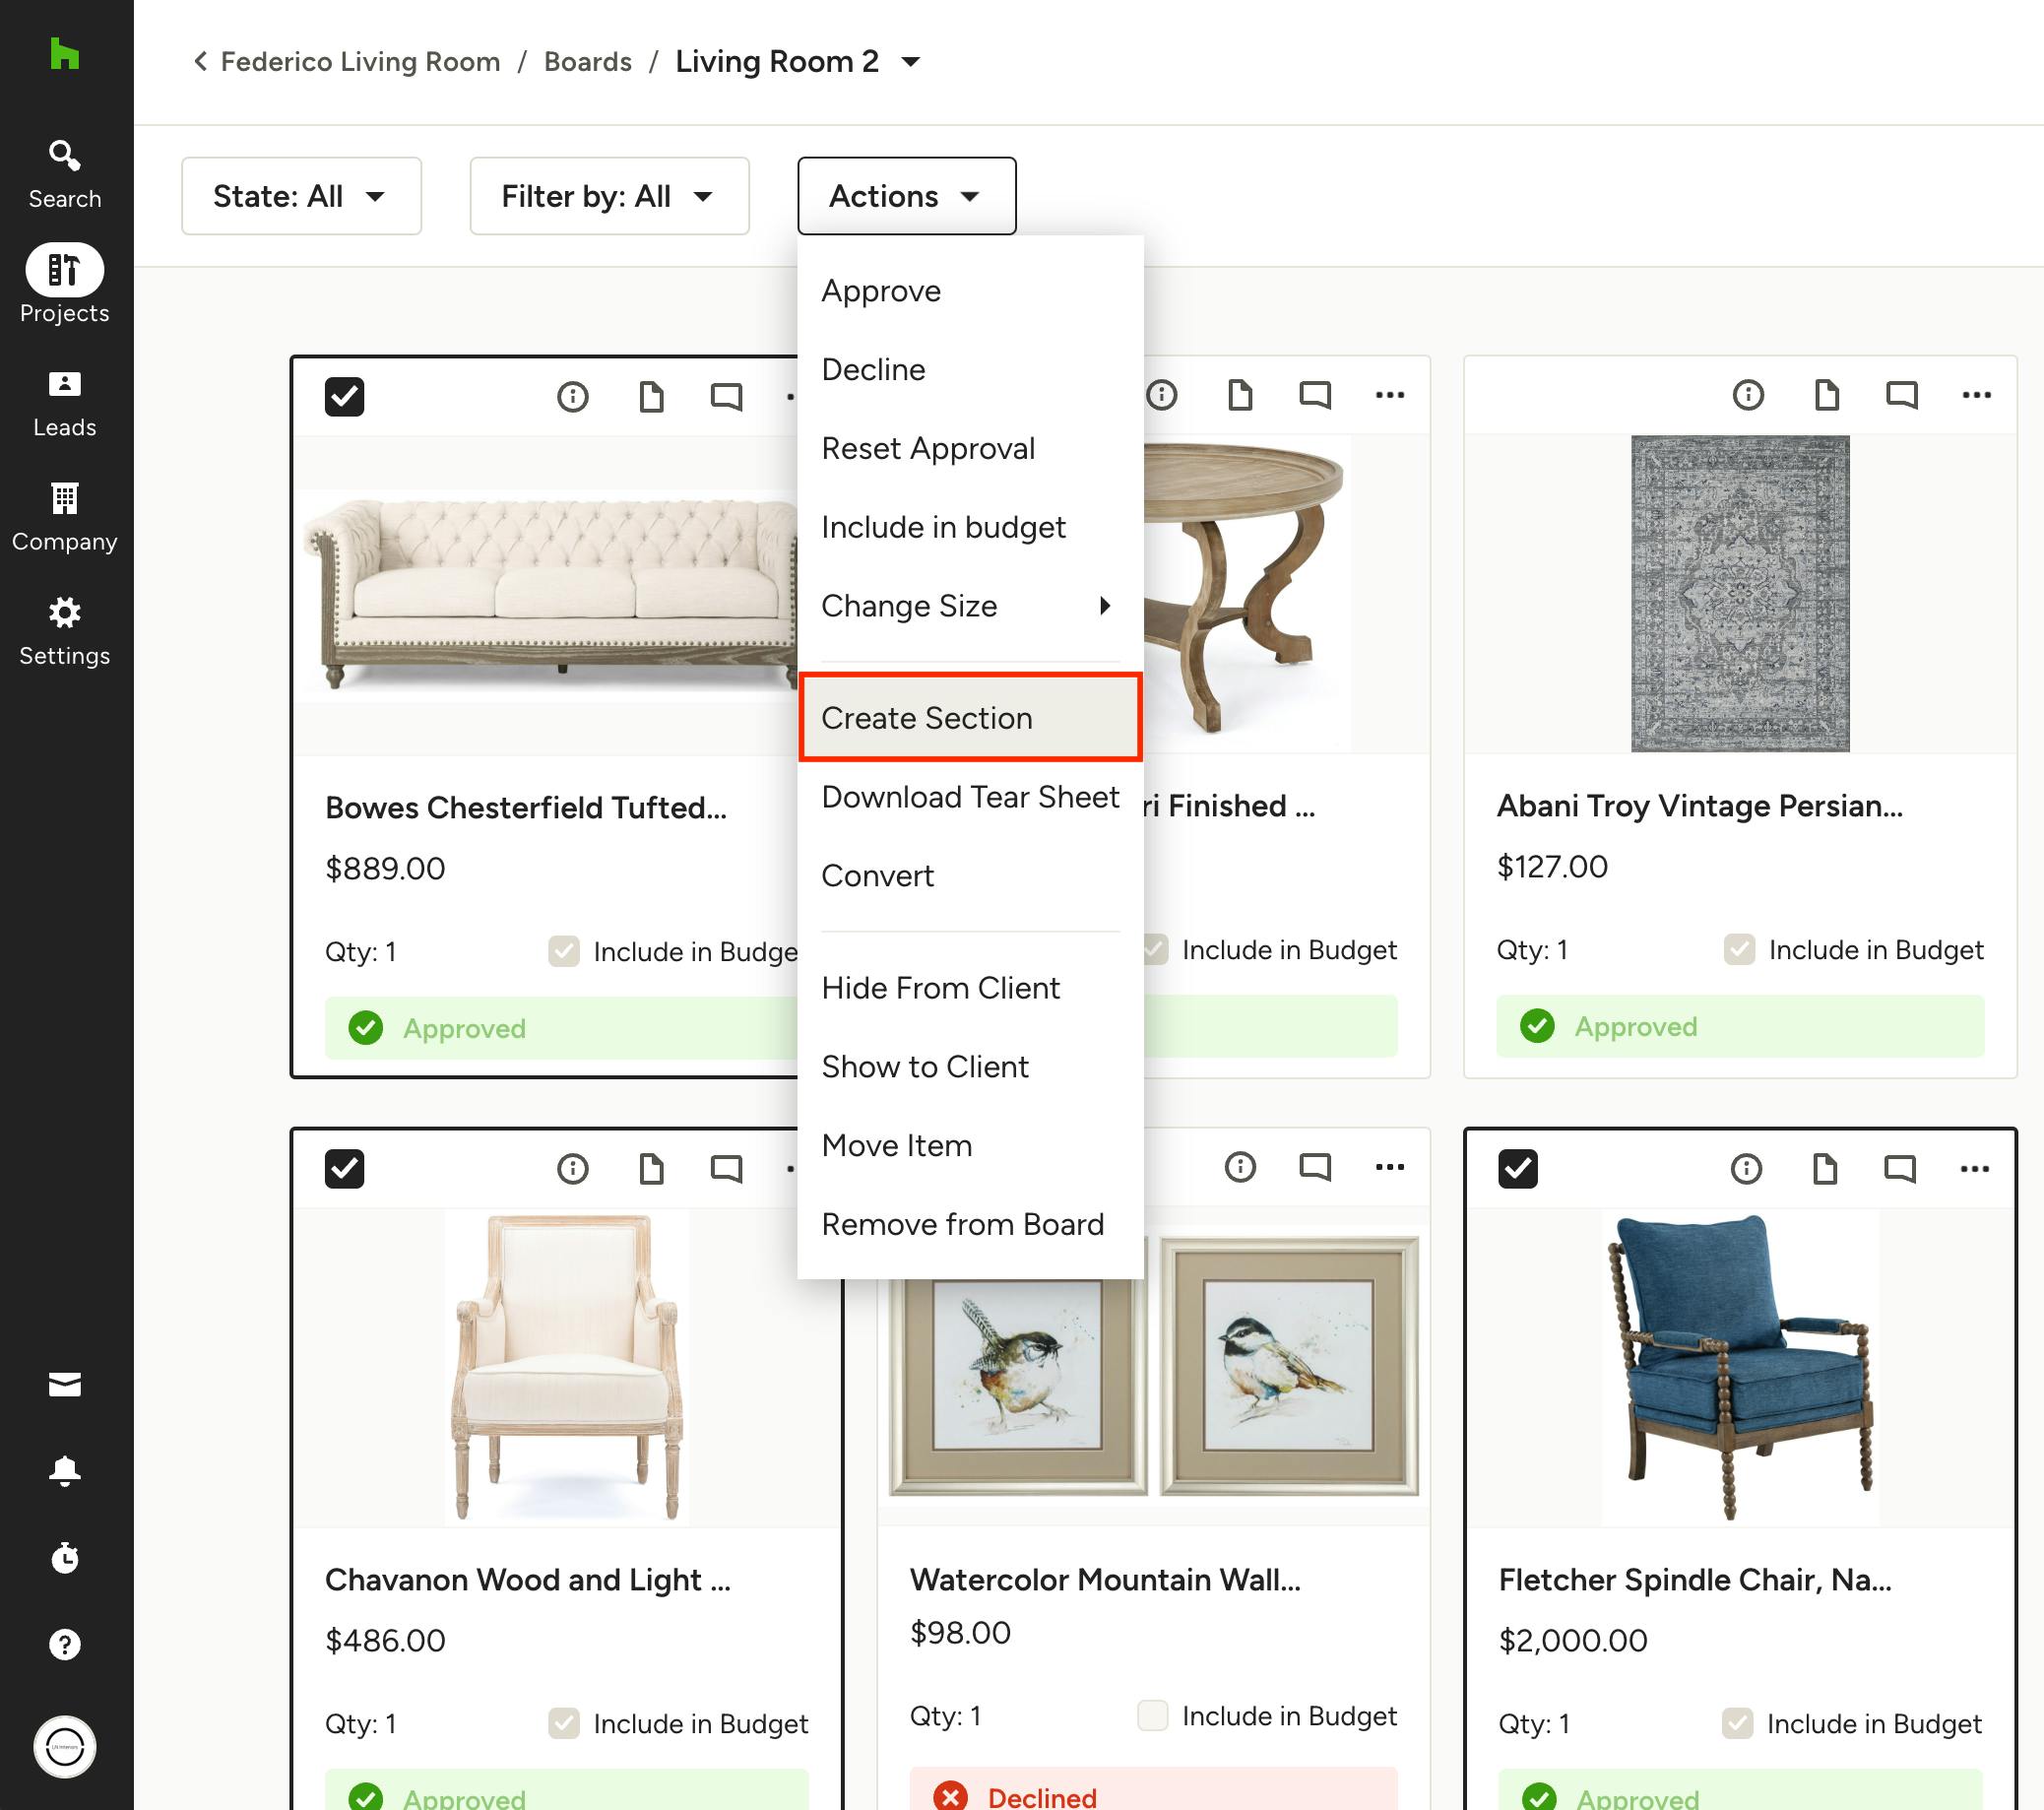
1. Select the items you want grouped into the section by clicking the checkbox in the upper left of each one
2. Click Create Section from the Actions dropdown
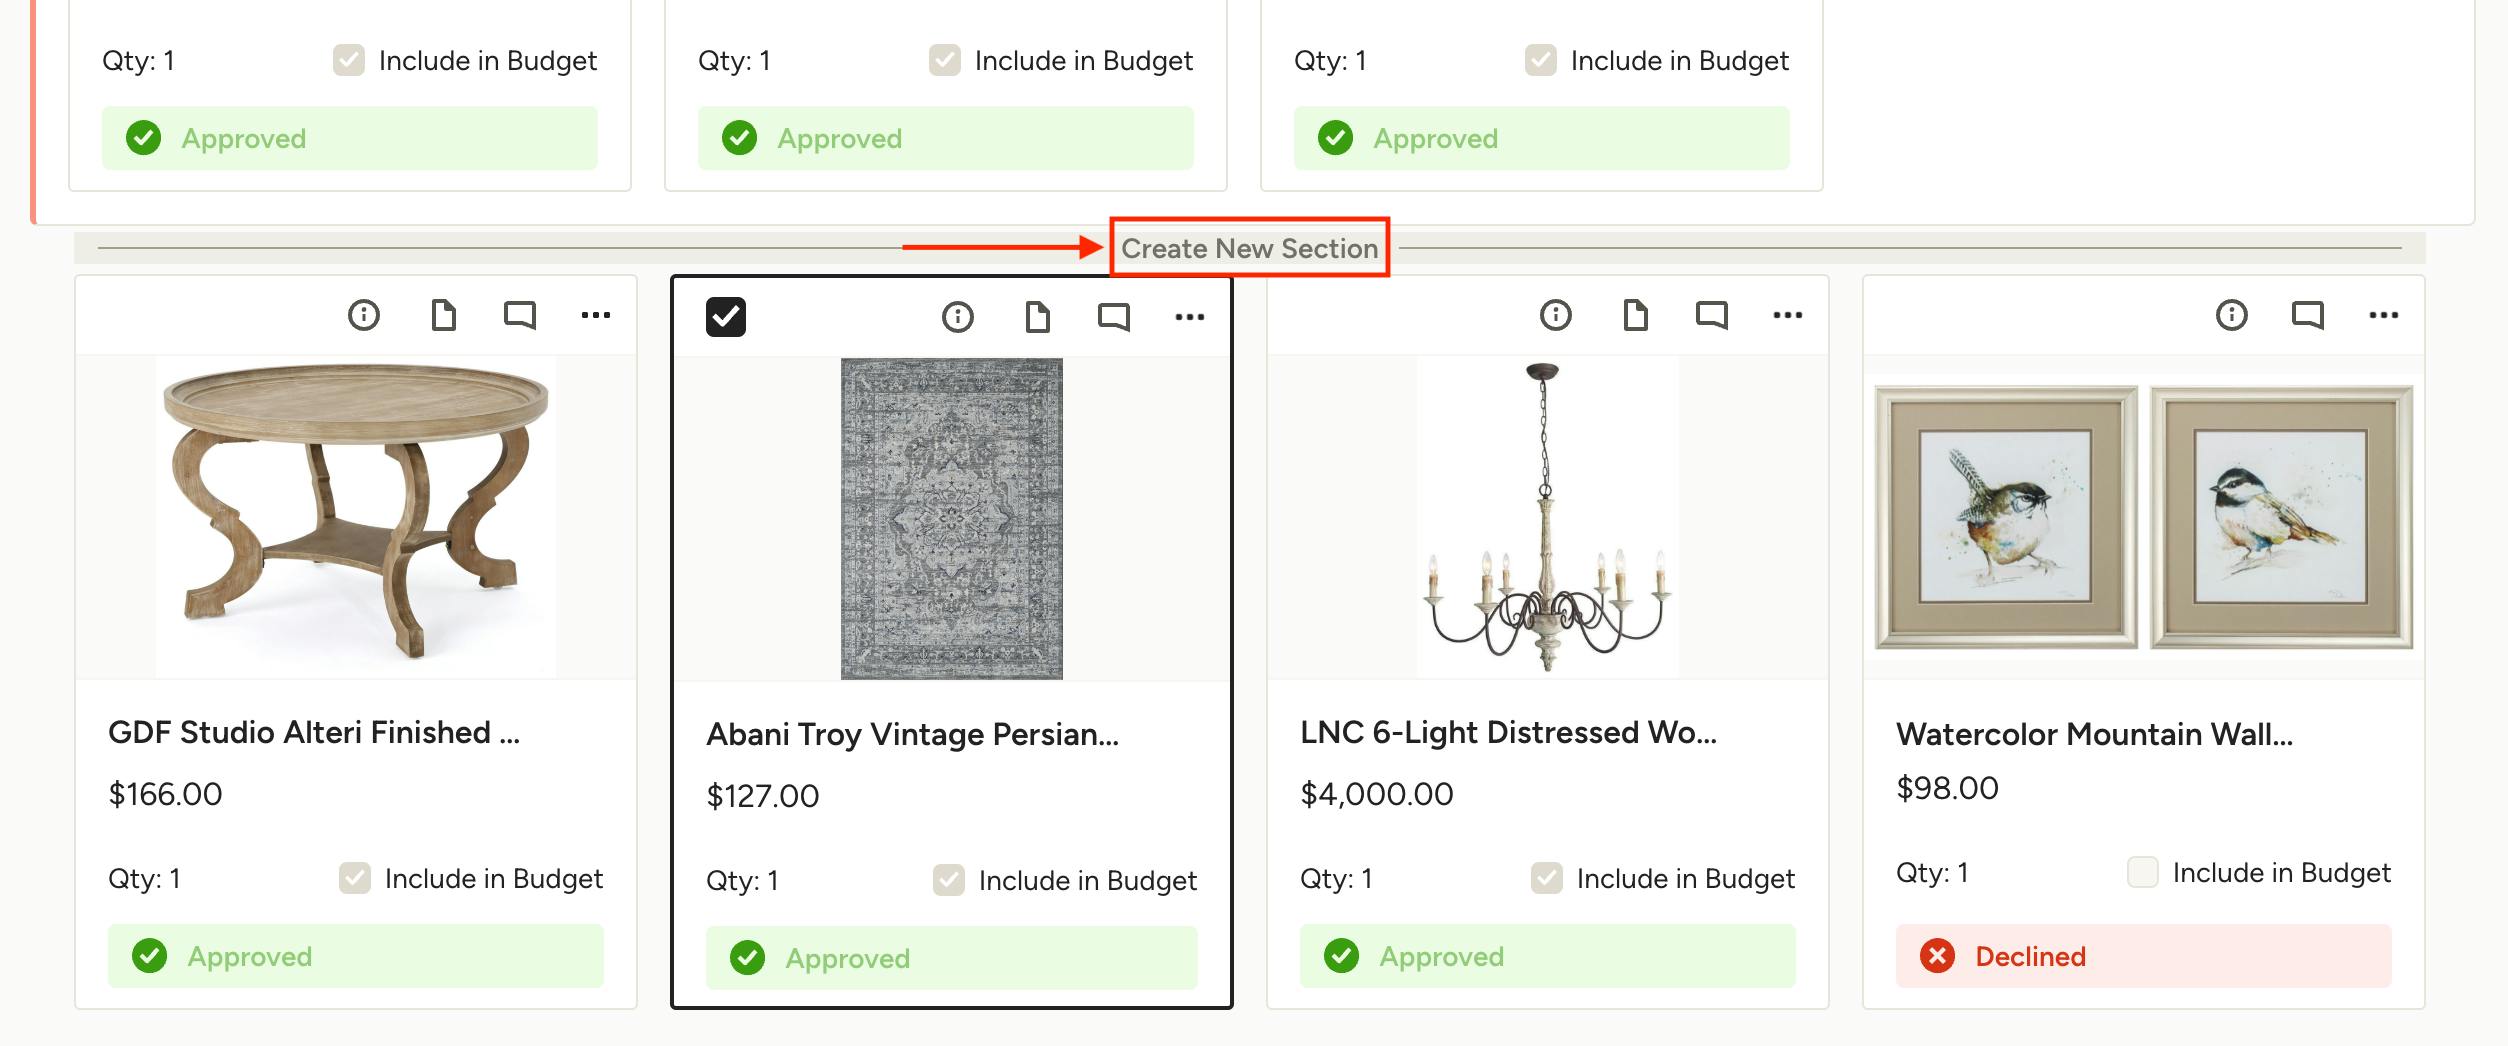
You can also quick-create a new section by placing your cursor between any row of items and clicking on the Create New Section option that appears. From here you can drag and drop items into the new section.
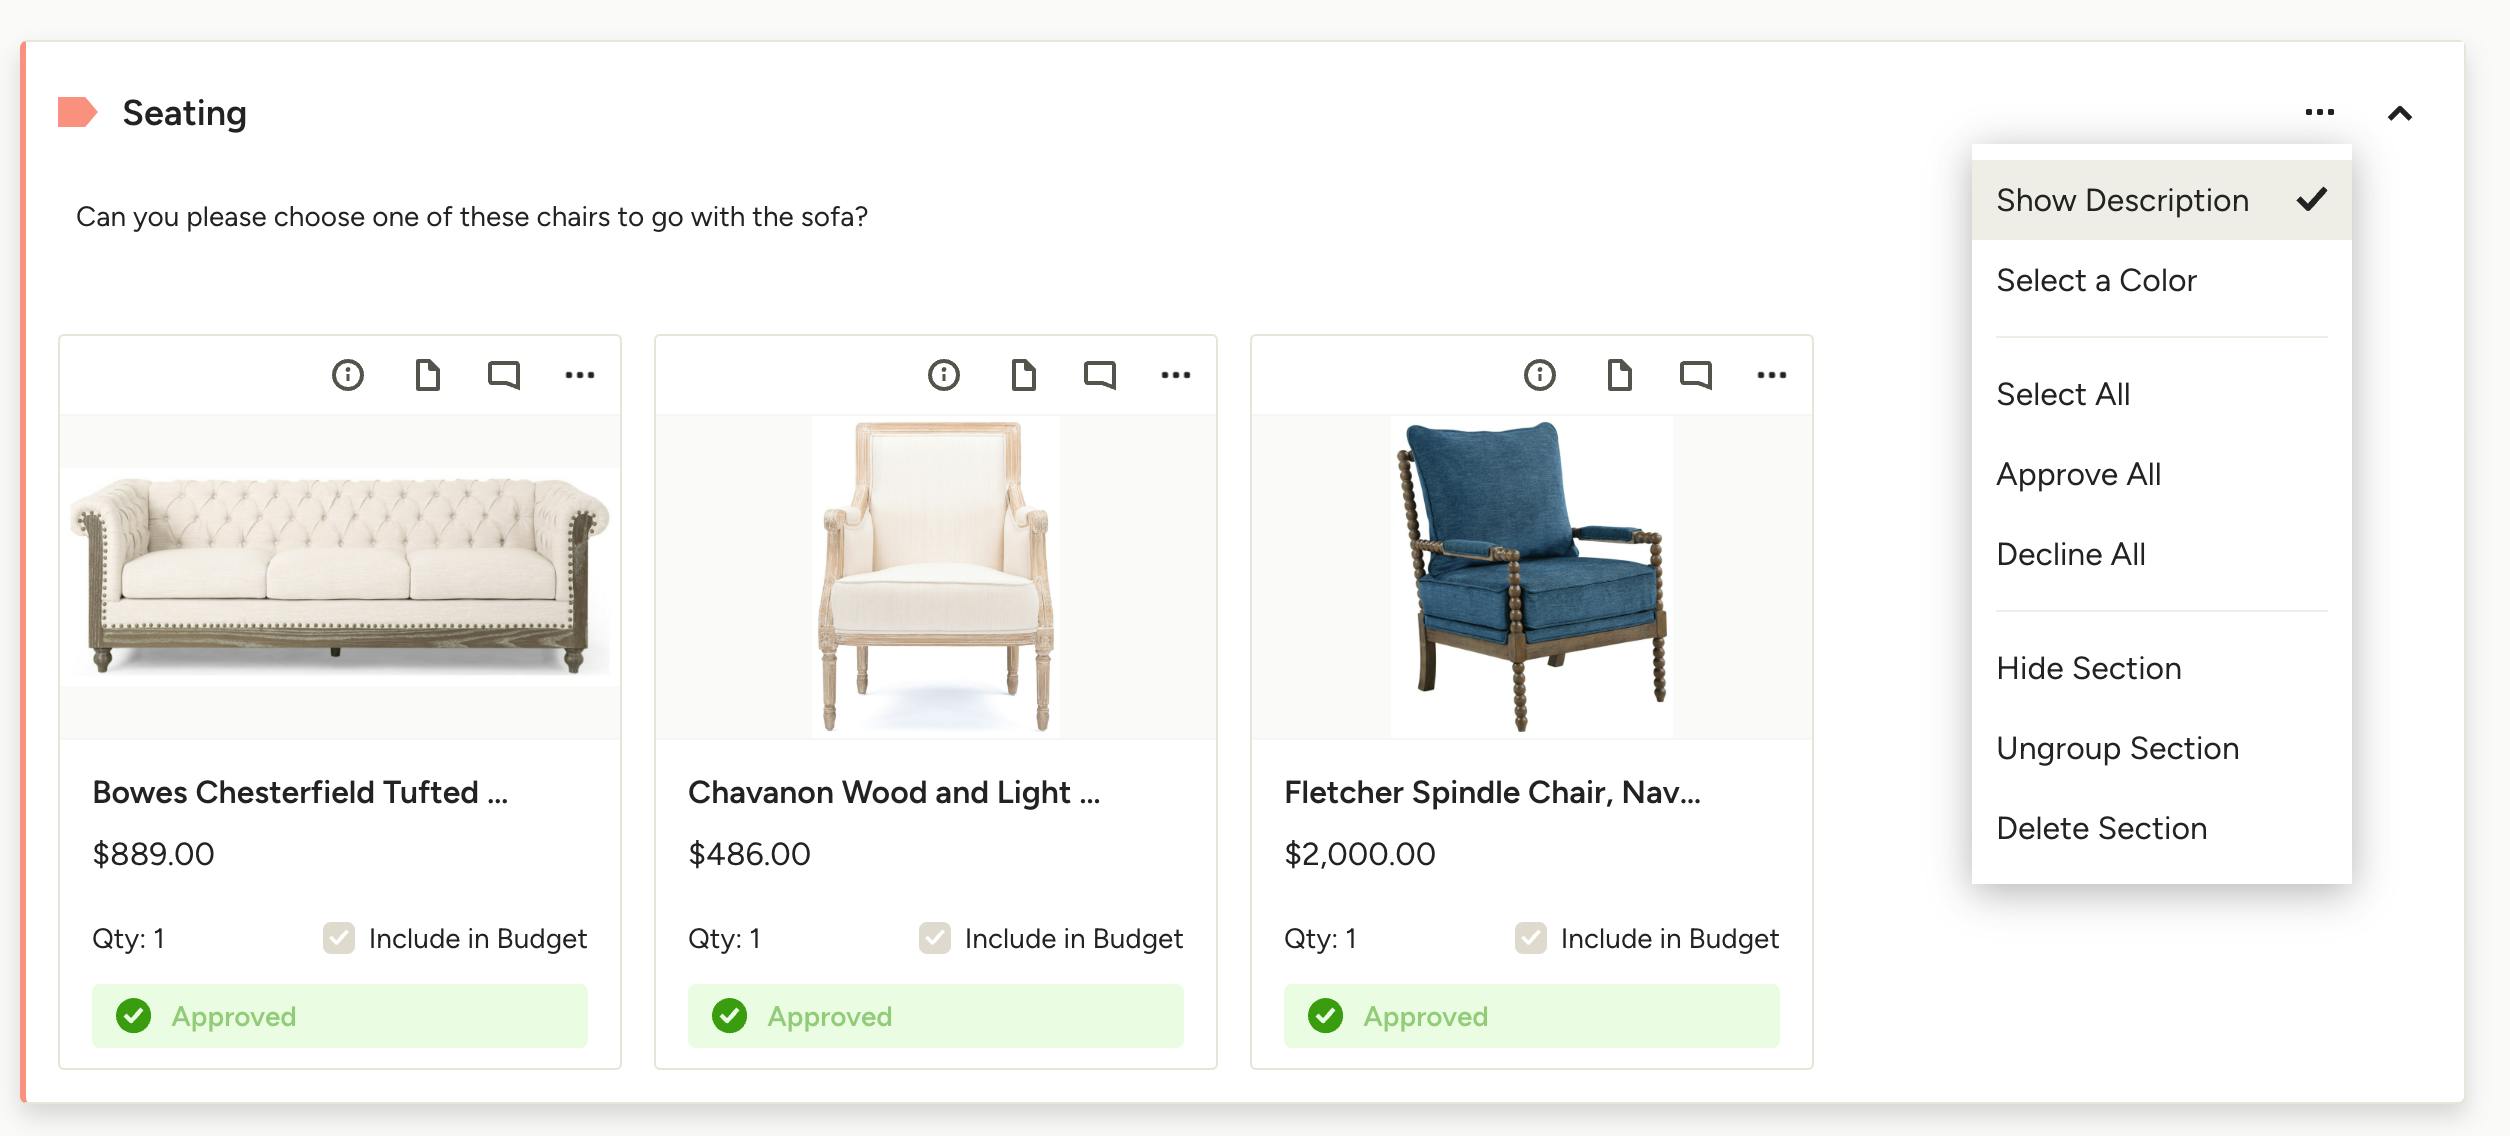
3. Name your section in the text field at the top and click the checkmark to confirm. You can also add a description or question for the client in the field below.
4. Select a colour for the section to help it stand out. Click the three dots in the top right of the section to pick a colour. You can also show/hide the description and choose from other actions within this menu.
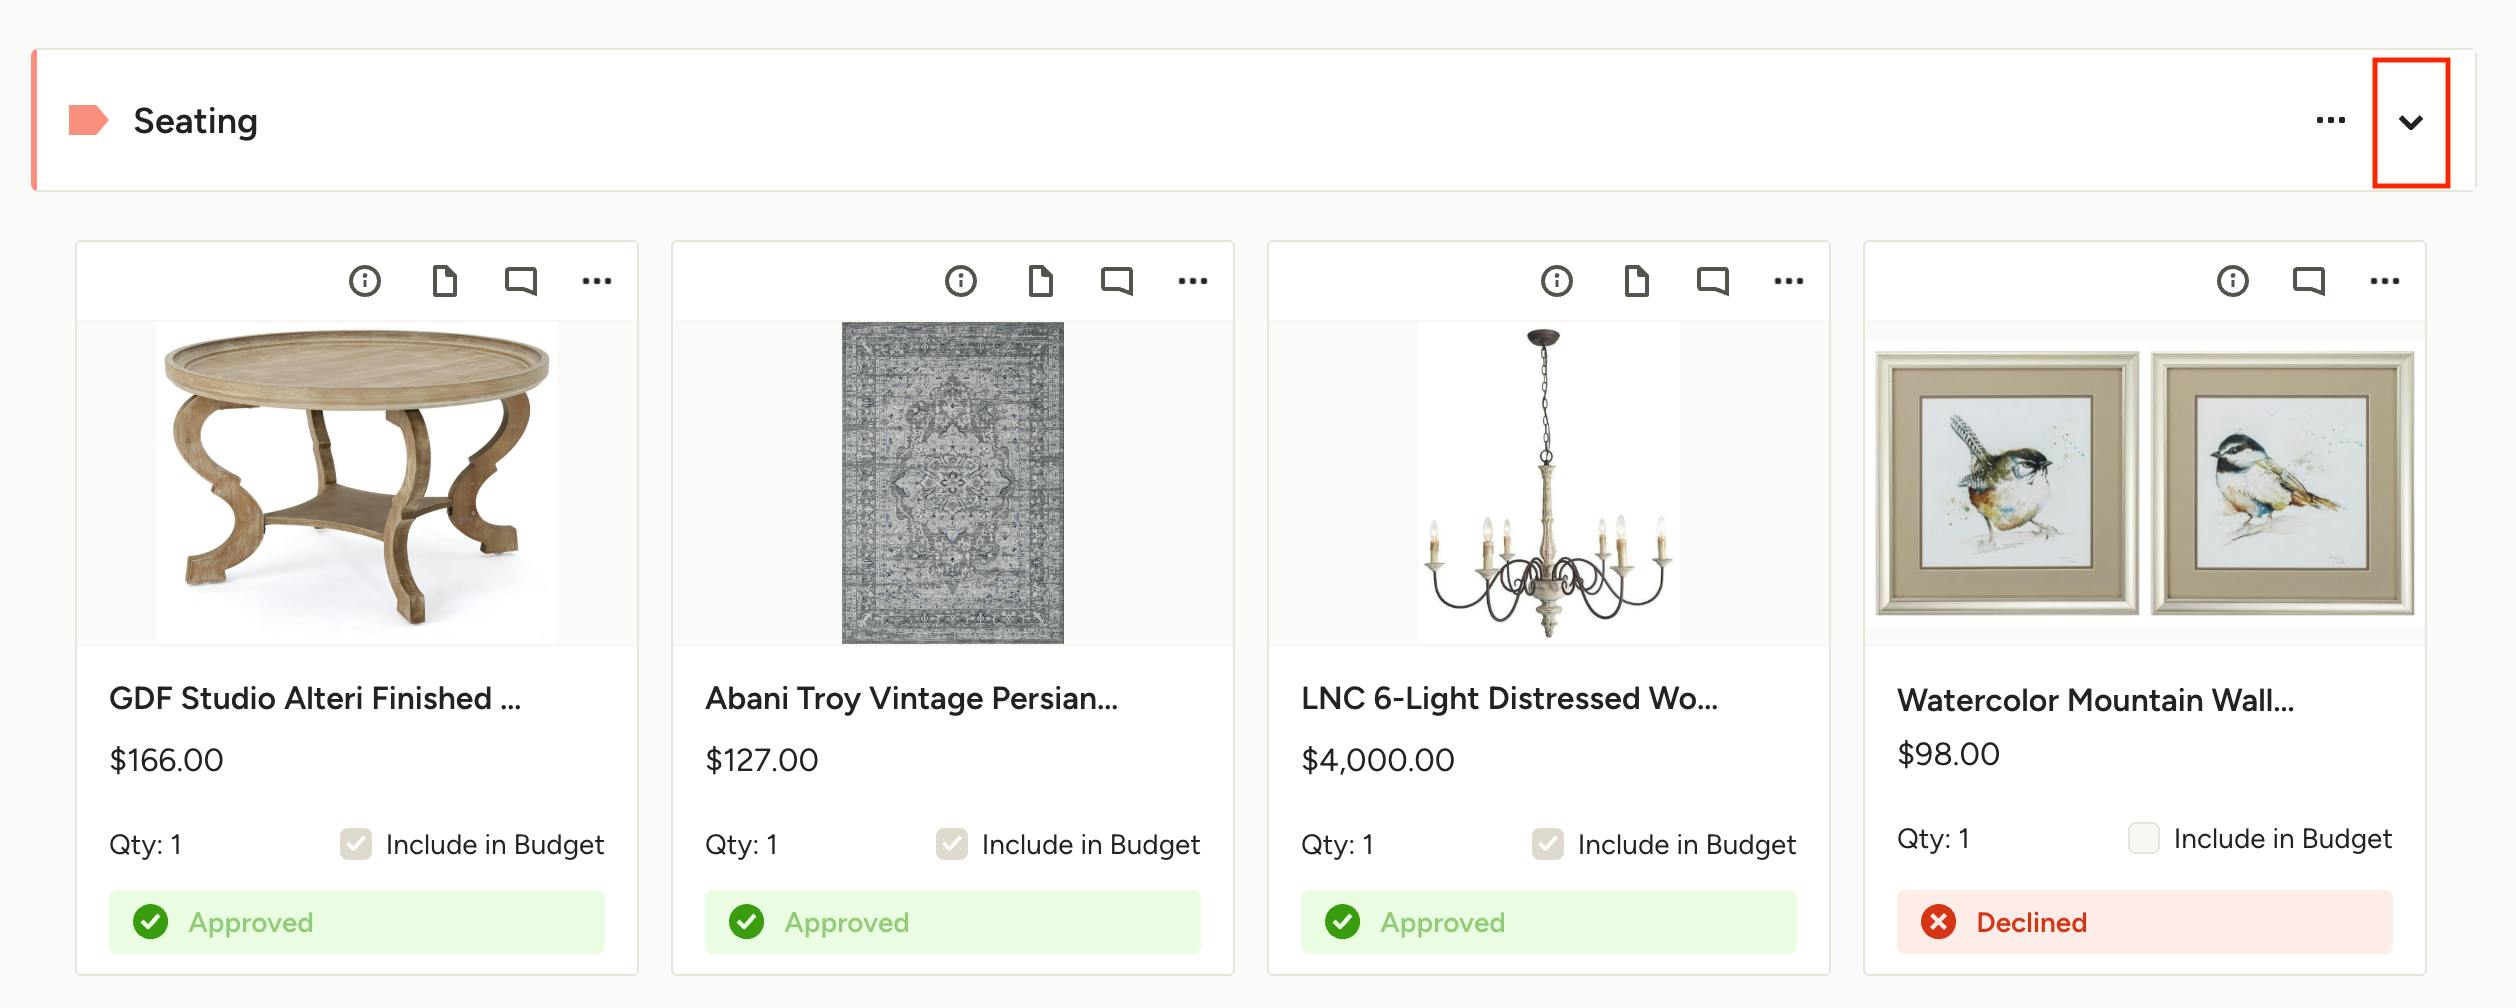
Pro tip: Collapse one or more sections to help you or the client focus on certain selections without having to hide or remove items. Use the arrow in the top right to expand or collapse the section.
How to Remove or Hide Items
Whenever you're not fully satisfied with an item, or sense that your clients feel the same, we recommend getting rid of that item. You can do so by removing or hiding an item.
Removing Items
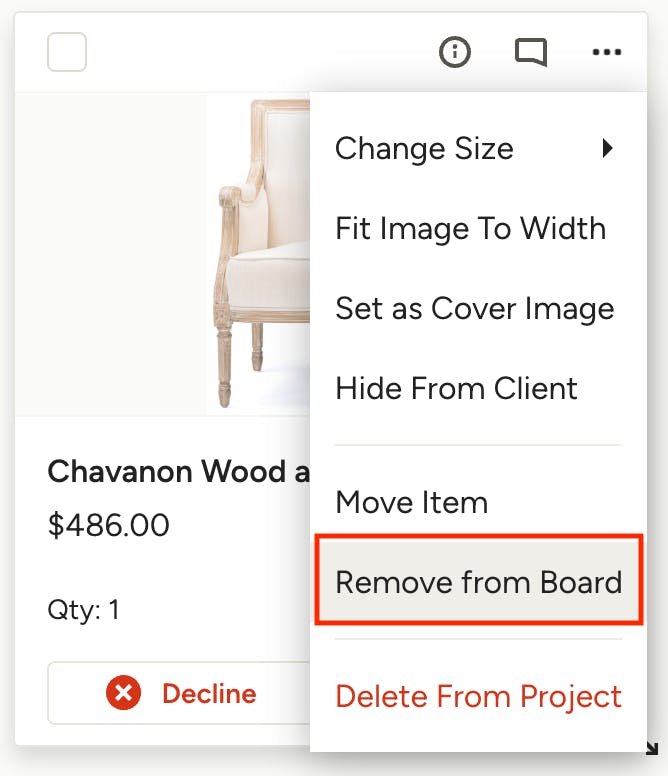
To completely remove an item from your board click the three dots above the item and then select Remove From Board. Once removed, it will no longer appear on the board, allowing you to focus on what's left. If you want to bring it back later on, simply go to your Project Items on the right panel where the item is stored for you.
Hiding Items
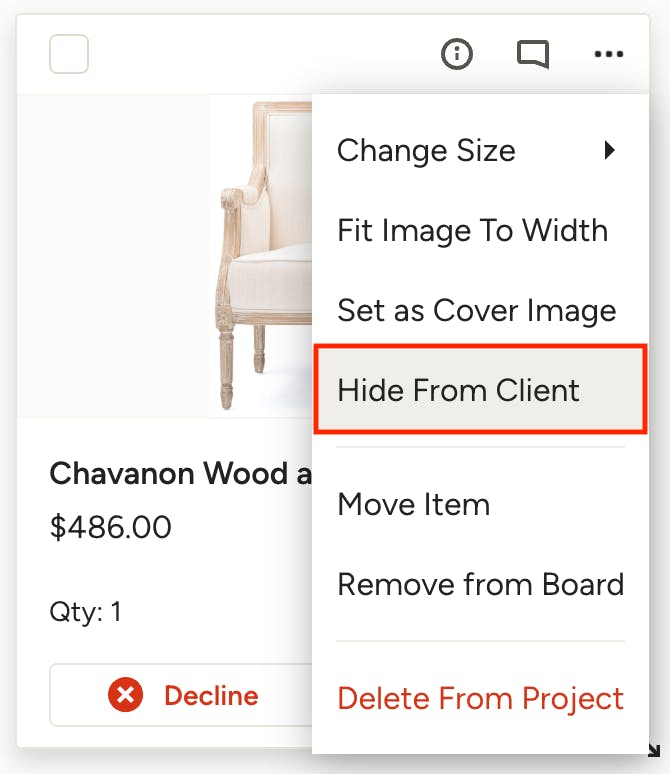
Sometimes removing an item can feel a bit too permanent. If that's the case, trying hiding it instead — this will place the item in a separate section called "Hidden Items" at the very bottom of your selections board and will only be visible to you, the pro. To hide an item, click the three dots next to it and select the Hide From Client option.
Bringing Back Hidden Items
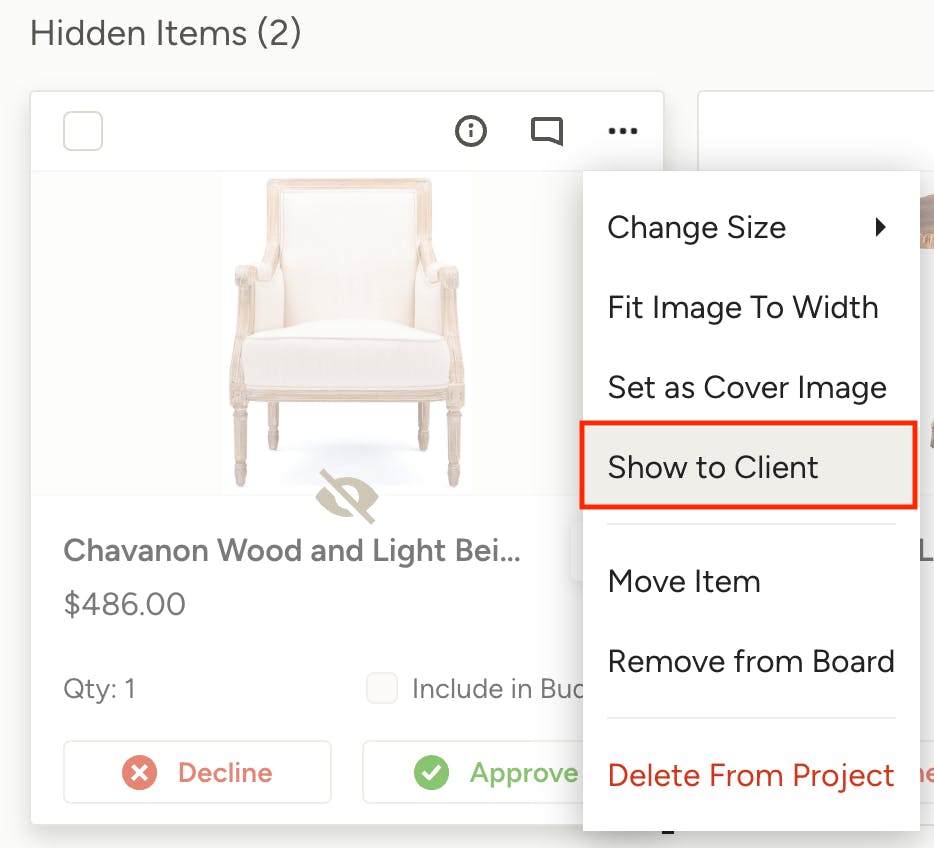
Your client can't stop thinking about that sofa she initially voted against weeks ago and wants to see it again? Simply bring it back from the Hidden Items section by clicking Show to Client through the three dots. When you restore items from the hidden list, not only does the picture come back, but all item details and comments ever made on the item do too – no work is lost!
Deleting Items from Project
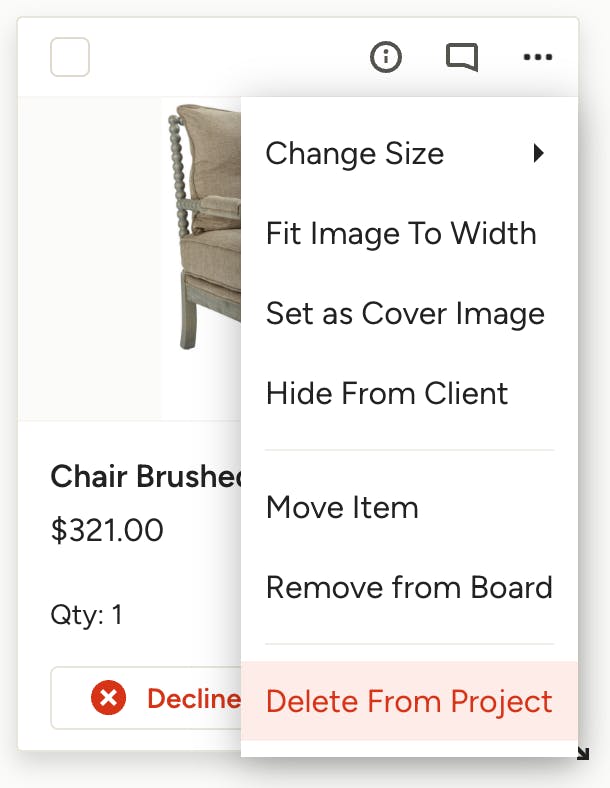
No longer want an item on the board and don't want to continue to see it in your Project Items list? To delete an item from the project altogether, click the three dots next to it and select the Delete From Project option. You will be asked to confirm that you want to delete this item. This action will permanently remove the item from your Selections Board, Tracker, and Project Items panel. You can still access the item from your main Product Library if you decide you want it later on.
Track the Project Budget
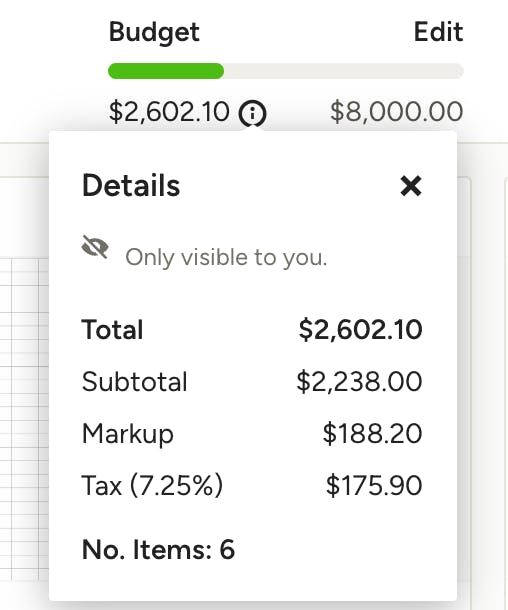
Manage budget expectations with ease. In the upper right corner of each selections board, you’ll see a budget bar. Just click Edit to add in the room’s budget and select whether taxes and shipping costs are included in the total. As items are approved, the budget bar fills in accordingly. Clicking on the Information icon will show you the detailed breakdown of your budget; this detail is only visible to you, not the client.
The budget total is only viewable to your clients if you give them permission in the Preview and Share screen.
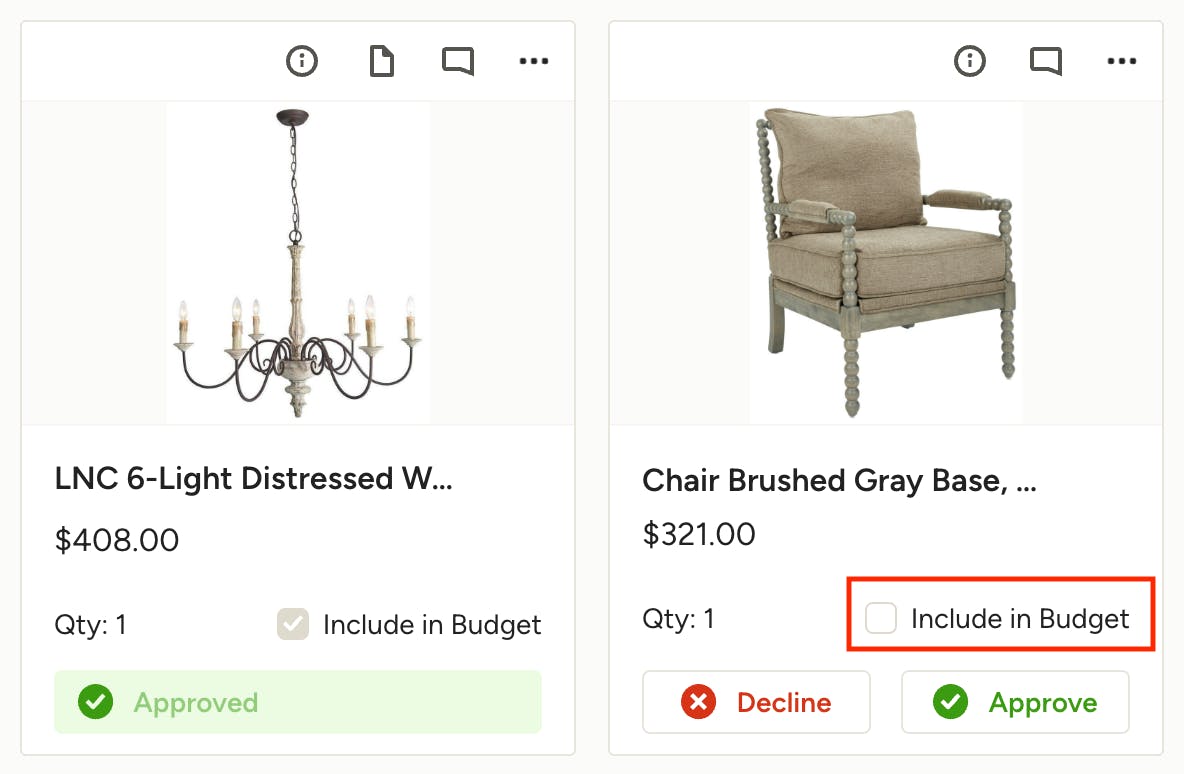
You can add items to the budget by checking the Include in Budget box. Items that have been approved will automatically be included in the budget.

Sharing Your Selections Board with the Client
You can send the selections board to your client so they can easily approve and decline items and/or leave feedback online. You’ll be automatically notified when your client approves or declines something, so you always stay updated. You can share it to the Client Dashboard, send via email, export it as a PDF, or download it as a spec sheet.
To share the selections board with your client(s), click the Preview & Share button in upper right-hand corner.
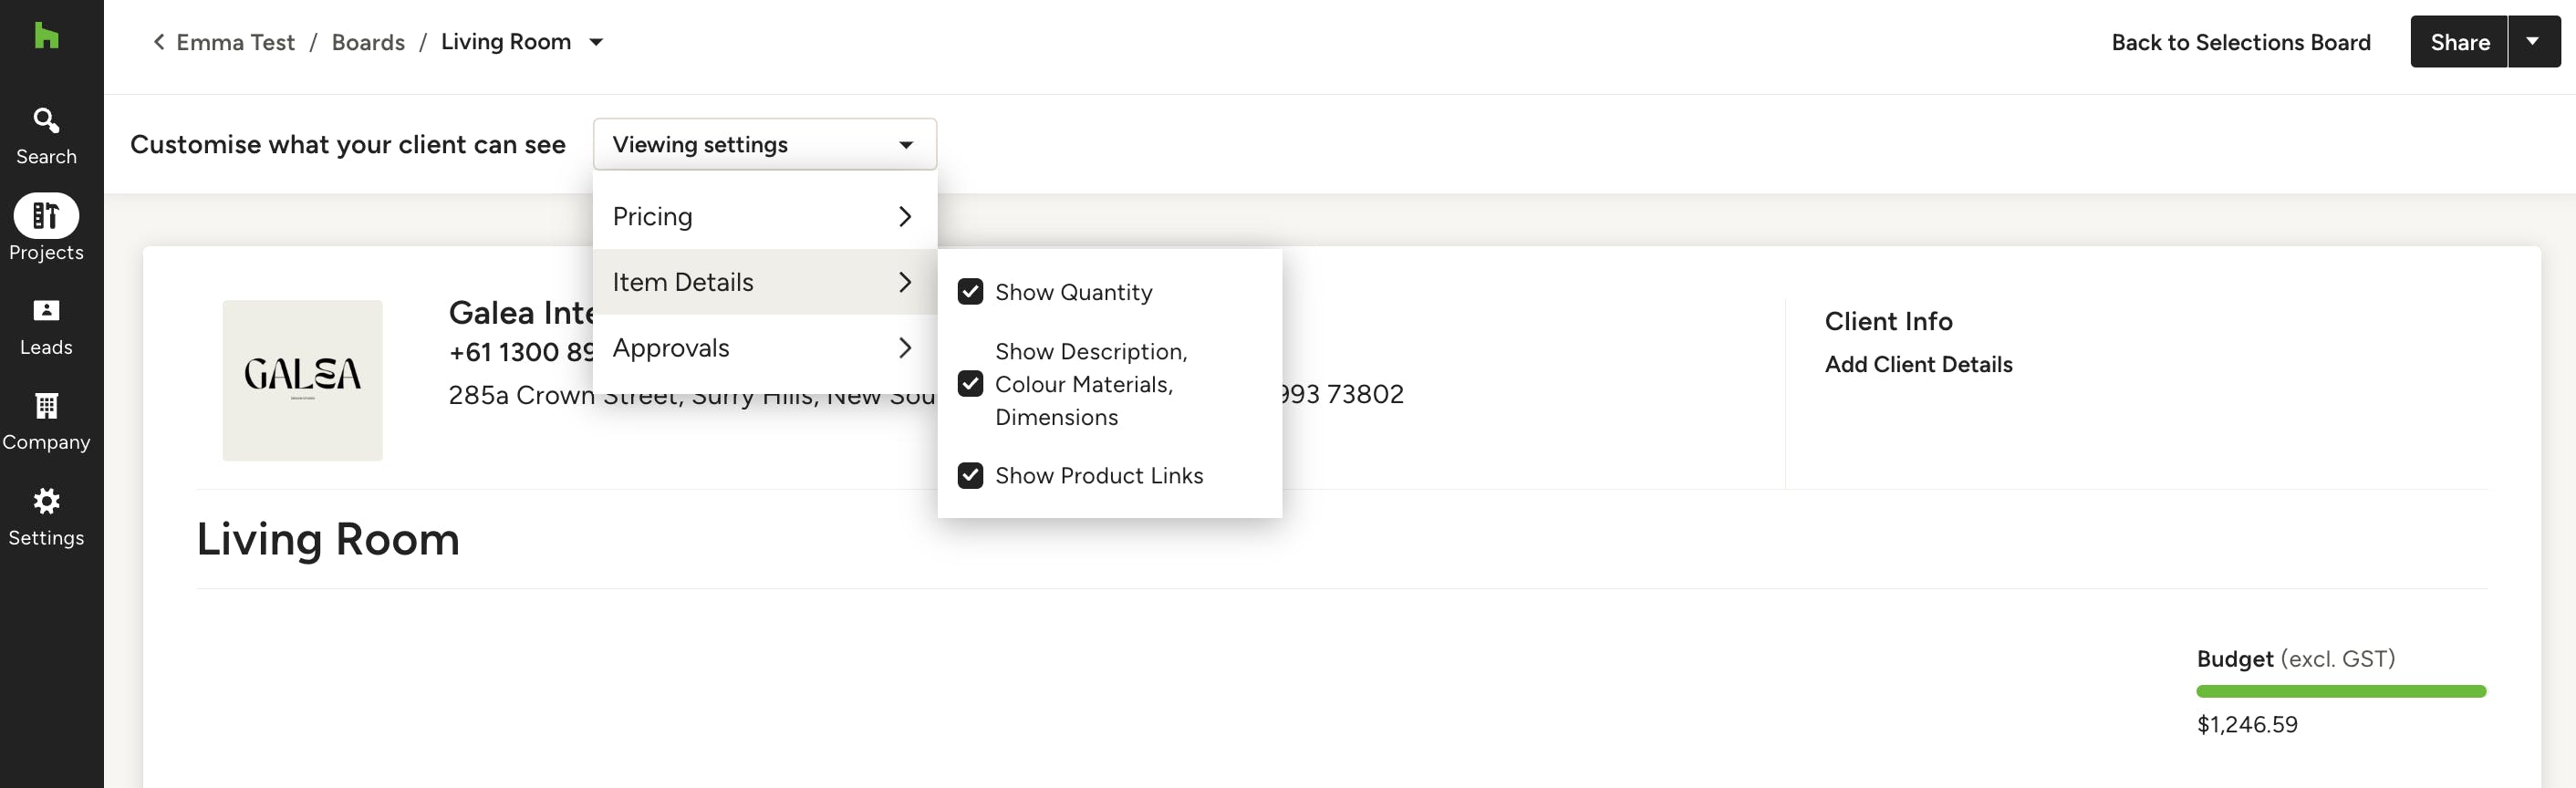
From here you can preview the exact view that your client will see. To control which details your client can see, customise the Viewing Settings at the top — you may not want to disclose certain sensitive information, such as pricing or an item's URL.
The viewing permissions are divided into three categories: Pricing, Item Details, and Approvals.
Pricing: Under "Pricing," you have the option to show or hide:
- Item Pricing: Selling price of an item
- Budget: How items will impact the overall project budget
Item Details: This section covers everything related to the items and their details. You can set preferences for:
- Quantity
- Description, Colour, Materials, Dimensions
- Product Links: If you wish to share an item's URL with your client for them to shop themselves, check this box, and the link will be visible for the relevant items.
Approvals: If you want your client to approve and decline items to make a final selection, navigate to this setting. The options are sorted by the type of item that can be added to a selections board:
- Products & Services: Check this box if you want your client to approve or decline products that you have added through your Library or Project Items.
- Mood Boards: Check this box if you want your client to approve or decline the Mood Boards you have created for them in Houzz Pro.
- Floor Plans: Check this box if you want your client to approve or decline the Floor Plans you have created for them in Houzz Pro with the 3D Floor Planner.
- Images & Files: Check this box if you want your client to approve or decline images and files that you have imported.
Once you have the view settings dialled in, you can click Share in the top right to send the selections board via email; you'll be able to add additional email addresses and customise the messaging in the modal that appears.
If you want to present it to your client in a different way, you can click the downward arrow next to the Share button to Export as PDF or Download Spec Sheet (when you select this option a modal will appear where you can choose the type of items you want to show on the spec sheet).

Converting Selections to a Proposal or Invoice
When you're ready to move forward with the client's selections, simply click the Convert button on the top right to turn the selections board into a professional proposal or invoice. You'll be able to select exactly which items to include on the document and the see the total for the items selected.
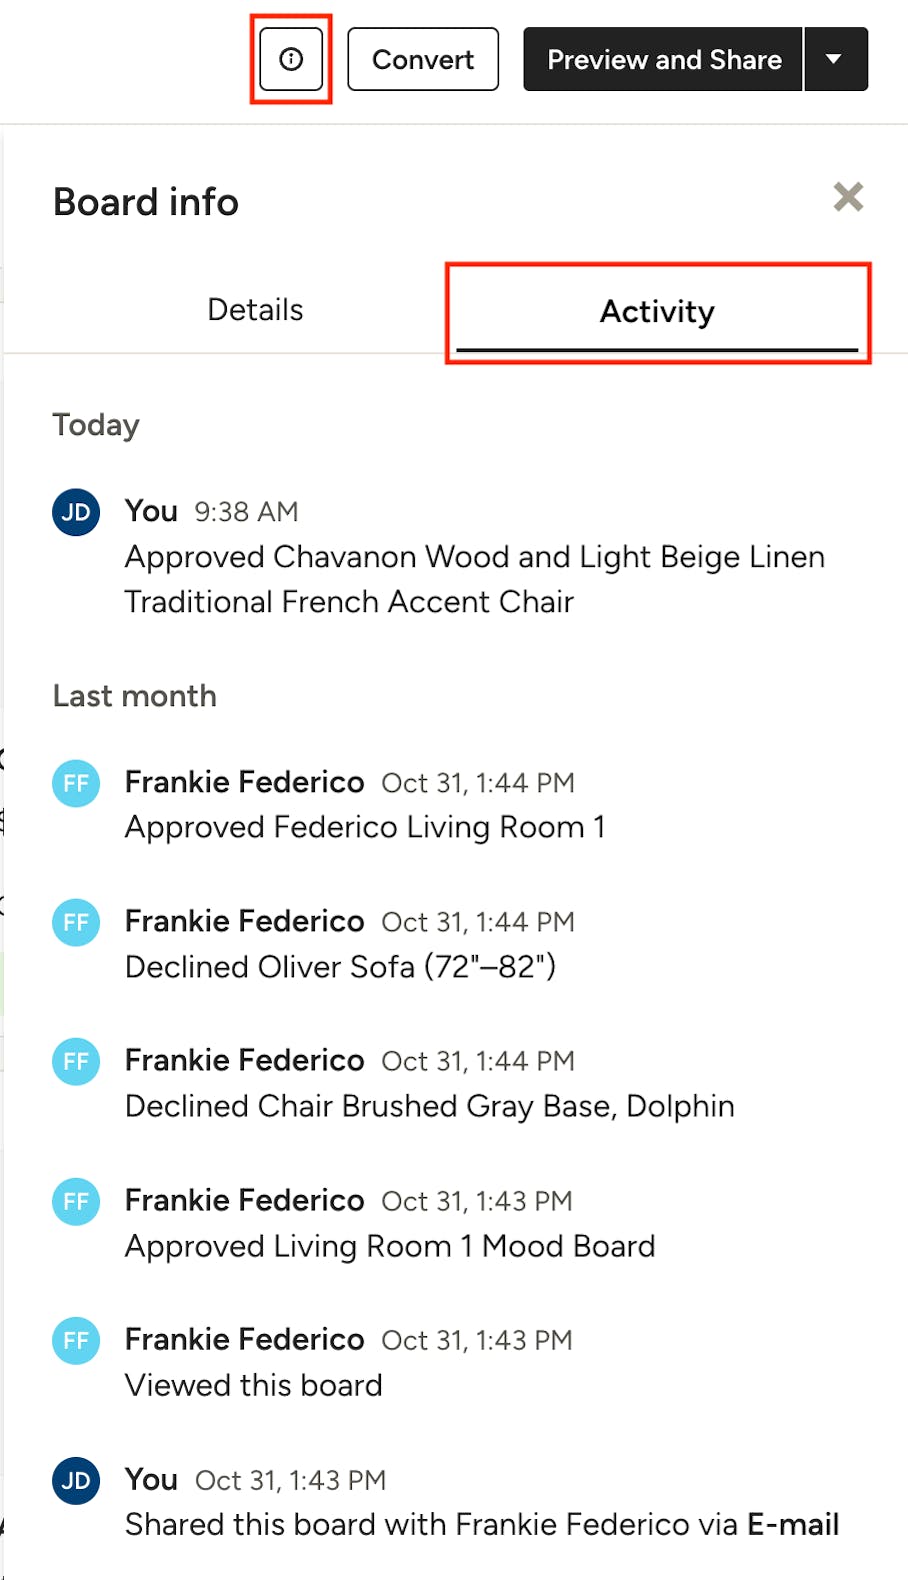
Keep Track of Changes
The Selections tool has an interactive record of all your communications on it with team members and clients, providing you with an activity stream of what’s been changed, approved, commented on, when your client viewed it, and so on. Access the activity stream by clicking the information (i) icon on the top and opening the Activity tab.