
How To Write an Interior Design Invoice
Creating and sending professional interior design invoices is an essential part of having a successful design business. In this Houzz Pro Learn guide, you’ll get a thorough overview of what interior design invoices are used for and their benefits, what should be included, how to create a freelance interior design invoice step-by-step and more. We’ve also included a sample interior design invoice template you can download for free to start invoicing clients today.
Click a link below to jump straight to a section and learn all about interior design invoicing:
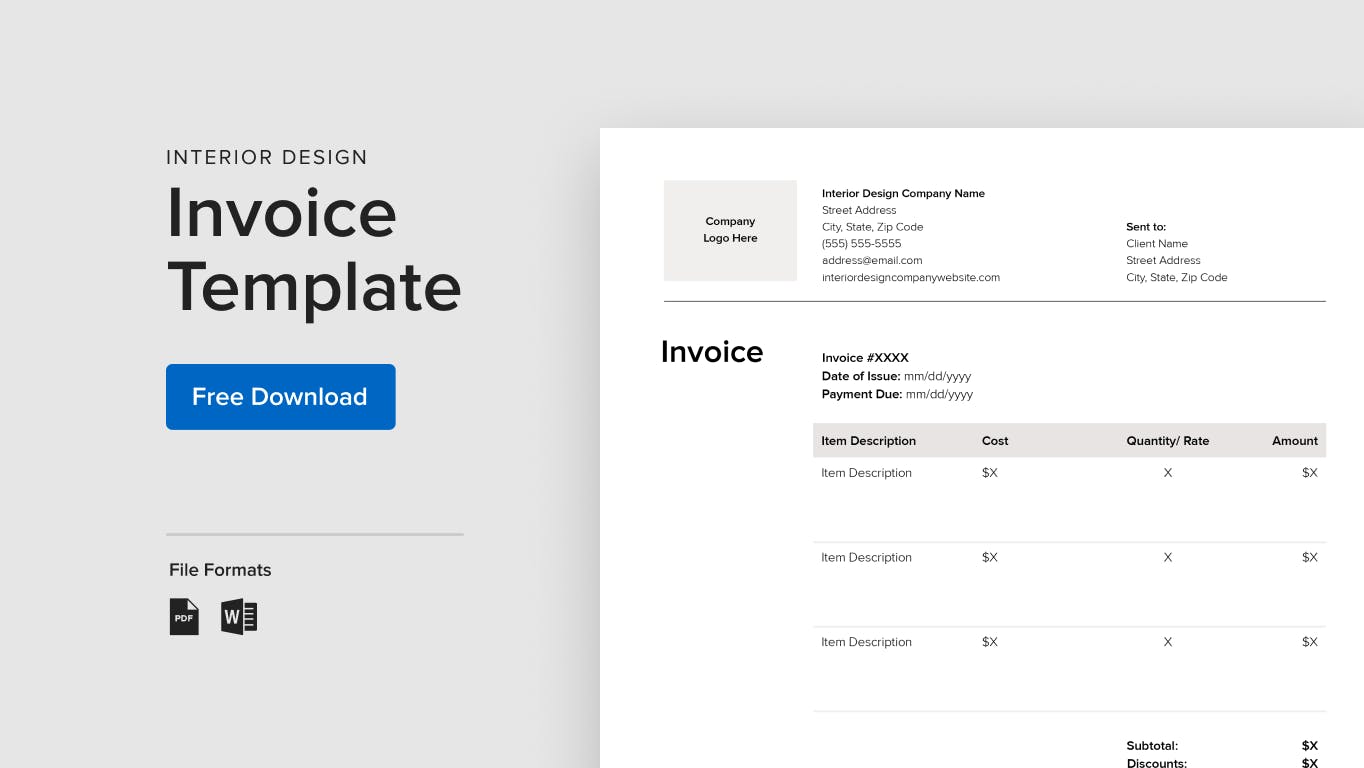
Download our Free Interior Design Invoice Template
Tip: Digital and Faster Alternatives to Interior Design Invoice Templates
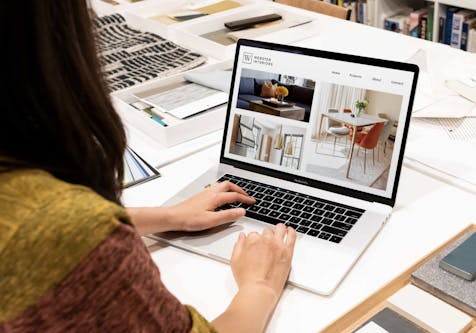
While creating your own interior design invoice template can be a great cost saver, it may not save you time in the long run. Having a more powerful software that incorporates seamlessly with your proposals, project management, and even your accounting program, like Xero, can help simplify and accelerate the invoicing process.
Houzz Pro invoicing software for interior designers can provide you with all of the above and more, so you can send faster invoices, get paid faster, and keep your business running smoothly.
What are Interior Design Invoices Used For?
Interior design invoices are legally binding documents you issue to your client listing the services provided and/or products purchased and their total, so your client knows exactly what to pay you (and what for), when payment is due and so that you also have a record for your own accounting.

Why Should Interior Designers Send Invoices?
Sending invoices to your interior design clients not only helps notify when payment is due, this necessary practice also has several benefits to your business.
Better branding
Your freelance interior design invoice is unique to your business. When creating your interior design invoice template, you’re able to customise it exactly how you want and in a way that reflects your brand identity. Sending branded, customised and professional-looking invoices helps leave a great mark for your business in the mind’s of your clients.
Faster payments
When you send timely, detailed invoices to your clients, you help ensure that you’ll get paid faster and on time. Including all the essential information in your interior design invoice helps answer any questions your client may have in advance, making it easier for them to pay you.
Clear communication with clients
Being both detailed and concise with your invoices, helps create clear communication with your clients so that they have a positive experience with your business. Your interior design invoice can also help simplify discounts, GST and instalment details so everything is easy to view and understand.
Staying organised
Issuing regular invoices also helps keep your business organised from an operations perspective. This helps “close the loop” in your project life cycle of your business, while also keeping important records on file. With your interior design invoices, you’ll be able to more easily keep track of past-due balances and keep your client information organised, so you can always have a documented and finalised reference for your completed work.
Easily accessible financial details
Itemising what your client owes you for products and/or services in an easy-to-read interior design invoice format makes it more convenient for you to access billing information for tax purposes. Now, you’ll always have a grasp on the “numbers” for your business when it comes time for tax season, saving you time and hassle.

When Do You Send an Interior Design Invoice?
Typically, invoices are sent to your clients when services are completed. However, for longer projects, you may need to send several invoices during the duration of your work. You can set up a payment schedule with your client in advance when you provide your estimate, so your client knows that payments will be due at various times and phases throughout your project.

What Should be Included in an Interior Design Invoice?
Document File Name
The document file name you choose for your interior design invoice should be in a logical format and easily able to be found in your digital filing system. We recommend titling your invoice with the date issued, invoice number, then client name. For example: “2022-04-30_000001_ClientXYZ”
Logo
Make sure to include a high-resolution version of your business logo prominently in your interior design invoice template for a professionally branded touch. The top left, top right, or bottom centred portions of your invoice are common areas to add your logo.
Invoice Number
Your invoice number should be ordered numerically for each invoice you issue and featured in the top left or right of your invoice so that it’s easy to view.
Date of Invoice
Like the invoice number, it’s best to have your invoice date—the date you issue your invoice—in the top section of your interior design invoice template. Keep the date format consistent for each invoice (e.g. 2022-04-30 or 30/04/2022) to make it easier to reference.
Your Contact Information
Add the contact information for your interior design business to either the top left, right or bottom centre areas of your template. Include the essential details: your name, company name, billing address, email and phone number.
Client’s Contact Information
It’s a common practice to format your client’s contact information in your invoice as you would a business letter. You can include a “To:” and then your client’s name, billing address, email and phone number, typically in the top left or right of your invoice.
Payment Due Date
The payment due date is usually included in the top or bottom section of your invoice. You can make this area more prominent by highlighting, underlining, or making it a larger font. The payment due date is an important aspect of the invoice so your client is aware of the deadline and so you can keep a healthy cash flow in your business.
Products or Services Being Invoiced
It’s important to include an itemised list of the services you provided your client and/or the products purchased for your design project in your interior design invoice. Make sure that these are clear and easy for your client to understand. Avoid jargon, abbreviations or simply listing product numbers.
Service or Product Descriptions
Here is where to get more detailed about your itemised services and/or products. You can include “sub”-details of what was included in the service (such as on-site measuring, product sourcing, client meetings, etc.), as well as accurate descriptions of any products purchased (size, colour, amount, product number, etc.). If you’ve provided your client both services and products, it may be best to itemise these in two separate columns of a table with services in one column and products in the other. Alternatively, you can create two separate tables for services and products.
Service or Product Prices
Next to each service or product, you will need to include the price your client will be paying. This price will reflect the final amount after markups.
Rates and/or Hours
If you charge your interior design clients by the hour, itemise the hours spent next to each service provided, then total those hours at the end of the list. Next to the total hours, add your hourly rate, then multiple the hours by your rate to create a subtotal for this line item.
Discounts, GST, Subtotal & Grand Total
You’ll now add up your services, products, and hourly rate total (if used in your business) into the main subtotal, which should be clearly marked “Subtotal.” Underneath this, you’ll include your designer discounts for any products sold, as well as GST. Make sure that each of these are listed separately. Lastly, add your subtotal, incorporate discounts, and GST for the grand total of your invoice. The grand total is the full amount your client will pay and should also be clearly marked, “Total” or “Grand Total.”
Additional Notes and/or Terms
In this final section of your interior design invoice, include the payment terms (e.g. Net 30 days for payment to be due 30 days after the invoice date), how your client can pay you (cheque, credit card, bank transfer, etc.) and any other important details (for example, if you’ll be accepting payments in instalments, you’ll want to include those terms).

How to Create an Interior Design Invoice Step-By-Step
1. Design your own template (or download our free interior design invoice template)
Now that you know what to include in your interior design template, you’re ready to start creating. Work with the word processing program of your choice (Word, Google Docs, etc.) and set up each section of your invoice with the items mentioned in the section above.
2. Customise your interior design invoice
As we discussed earlier, it’s important to make your invoice stand out and accurately reflect the brand of your interior design business. Incorporate your company’s colours, logo and font style so your invoice is as much an expression of your business as are your designs.
3. Add invoice number, date, business and client information
Make sure to prominently display your invoice number and date at the top of your interior design invoice. For your business information, you can choose where you’d like to add this in your invoice—the top section being the most common, though it’s also acceptable to incorporate at the bottom. Include your name, business name and essential contact information. Next, add your client’s details at the top of your invoice (underneath your business information, if you’ve included it at the top). This will include your client’s name, business name (if applicable) and their contact details.
4. Itemise the interior design services and/or products you provided
Clearly list each of the interior design services that you provided and any products you sold, as well as descriptions and prices for each item. As mentioned before, you can organise each of these into columns or into separate tables in your invoice.
5. Total your invoice and specify payment details
Now you’re ready to total your interior design invoice sample. Take your services and products total, and then add your hourly rate if used to create your subtotal. From there, you’ll include your discounts and GST to create your grand total amount for your client. You’ll also need to include when payment is due, your terms and the payment methods you accept.
6. Include policies and notes
The last main area of your invoice you’ll need to fill out will be your “Notes” section with your privacy policy, refund policy and any other policies required for your business, as well as additional notes you may want to include.
7. Save your interior design invoice and send
Make sure to save a copy of your invoice for your records (both an editable file and a PDF). Now you’re ready to send your completed invoice to your client. We recommend sending it as a PDF file, which can’t be edited, and also regularly backing up your computer (or saving to the cloud) so that your files are never lost.
Conclusion
You’re now ready to issue professional interior design invoices to your clients with clarity and ease. Visit How to Build an Interior Design Purchase Order + Template to continue reading and to keep learning.
Sign up for a free trial of Houzz Pro to explore our invoicing, online payment and e-signature features designed to help you get paid fast.