How to Use the Clipper Tool
The Houzz Pro Clipper lets you save products from any site and add them to your Houzz Pro library. In this article, we’ll cover how to use the Clipper to source products and add them to your estimate/proposals, selections boards and more.
To learn about how to correctly sign-in to the Clipper, see this article, and to learn about fixing other issues you may encounter with the Clipper, see this article.

Download the Clipper Extension
We highly recommend using Chrome as your browser for the best clipping experience.
1. In your Settings menu, click Clipper Tool under the Integrations section, then click Get The Clipper. You can also search "Houzz Pro Clipper" in your extension add-on (on Chrome, download the Clipper here).
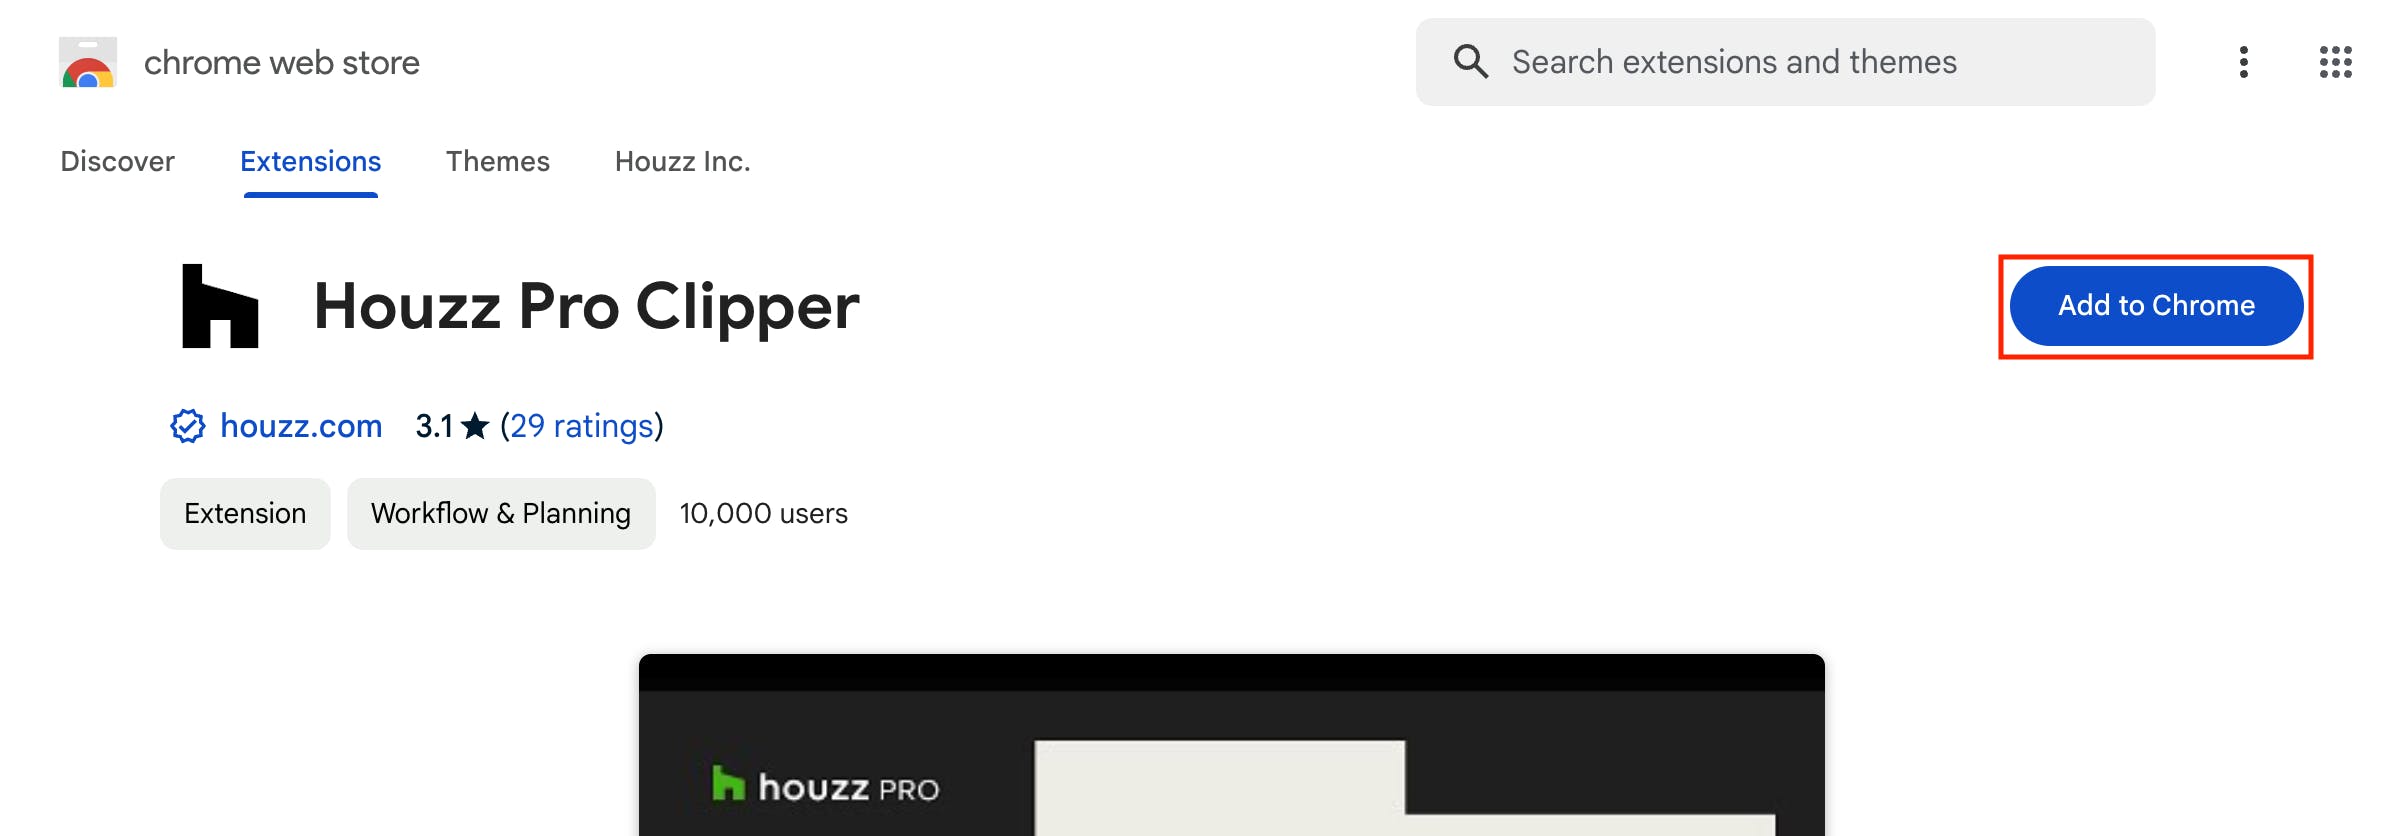
2. Click Add to Chrome.
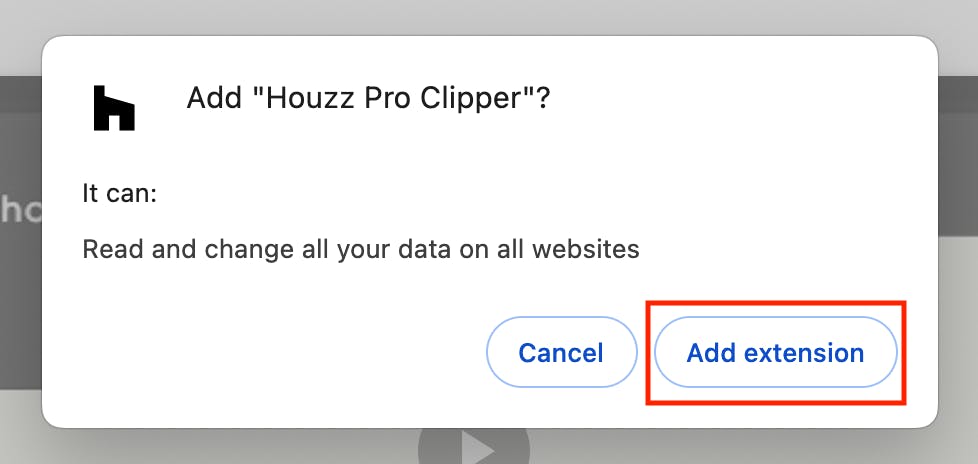
3. On the pop-up screen, click the Add Extension button.

4. Pin the Clipper extension to your toolbar for quick access. To do so, click on the puzzle icon on your Chrome toolbar, then click the pin icon next to the Clipper extension.
How to Clip a Product from a Website
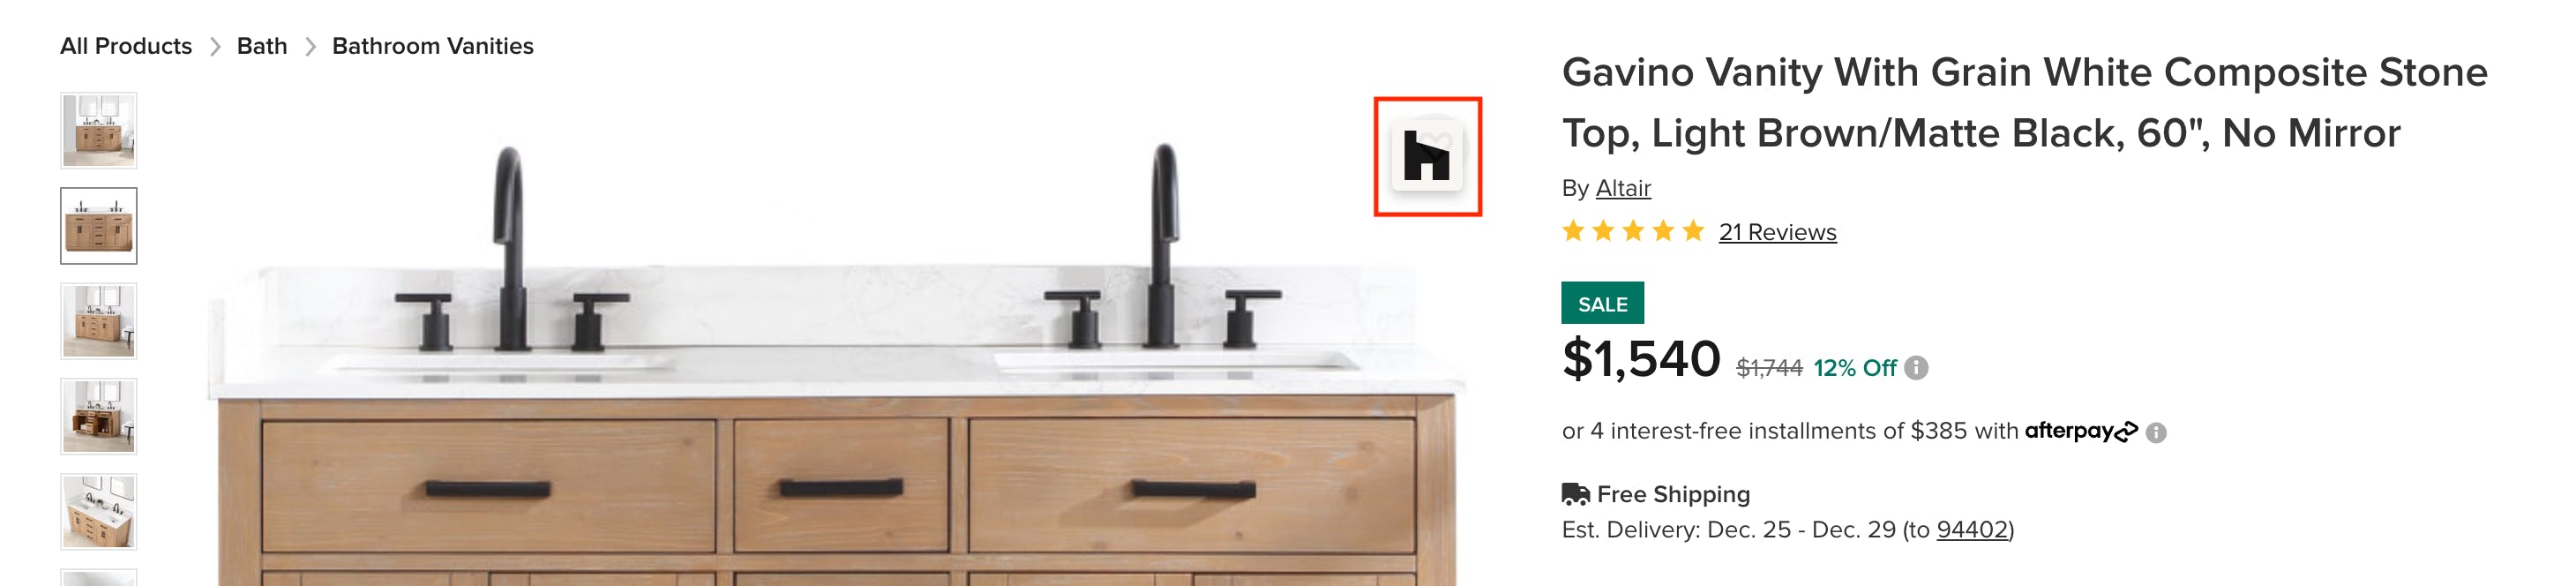
Once you've downloaded the Houzz Pro Clipper, you're ready to start clipping. While sourcing products online, simply click on the Clipper icon on the image you want to save, or click the pinned Clipper extension icon in your Chrome toolbar.
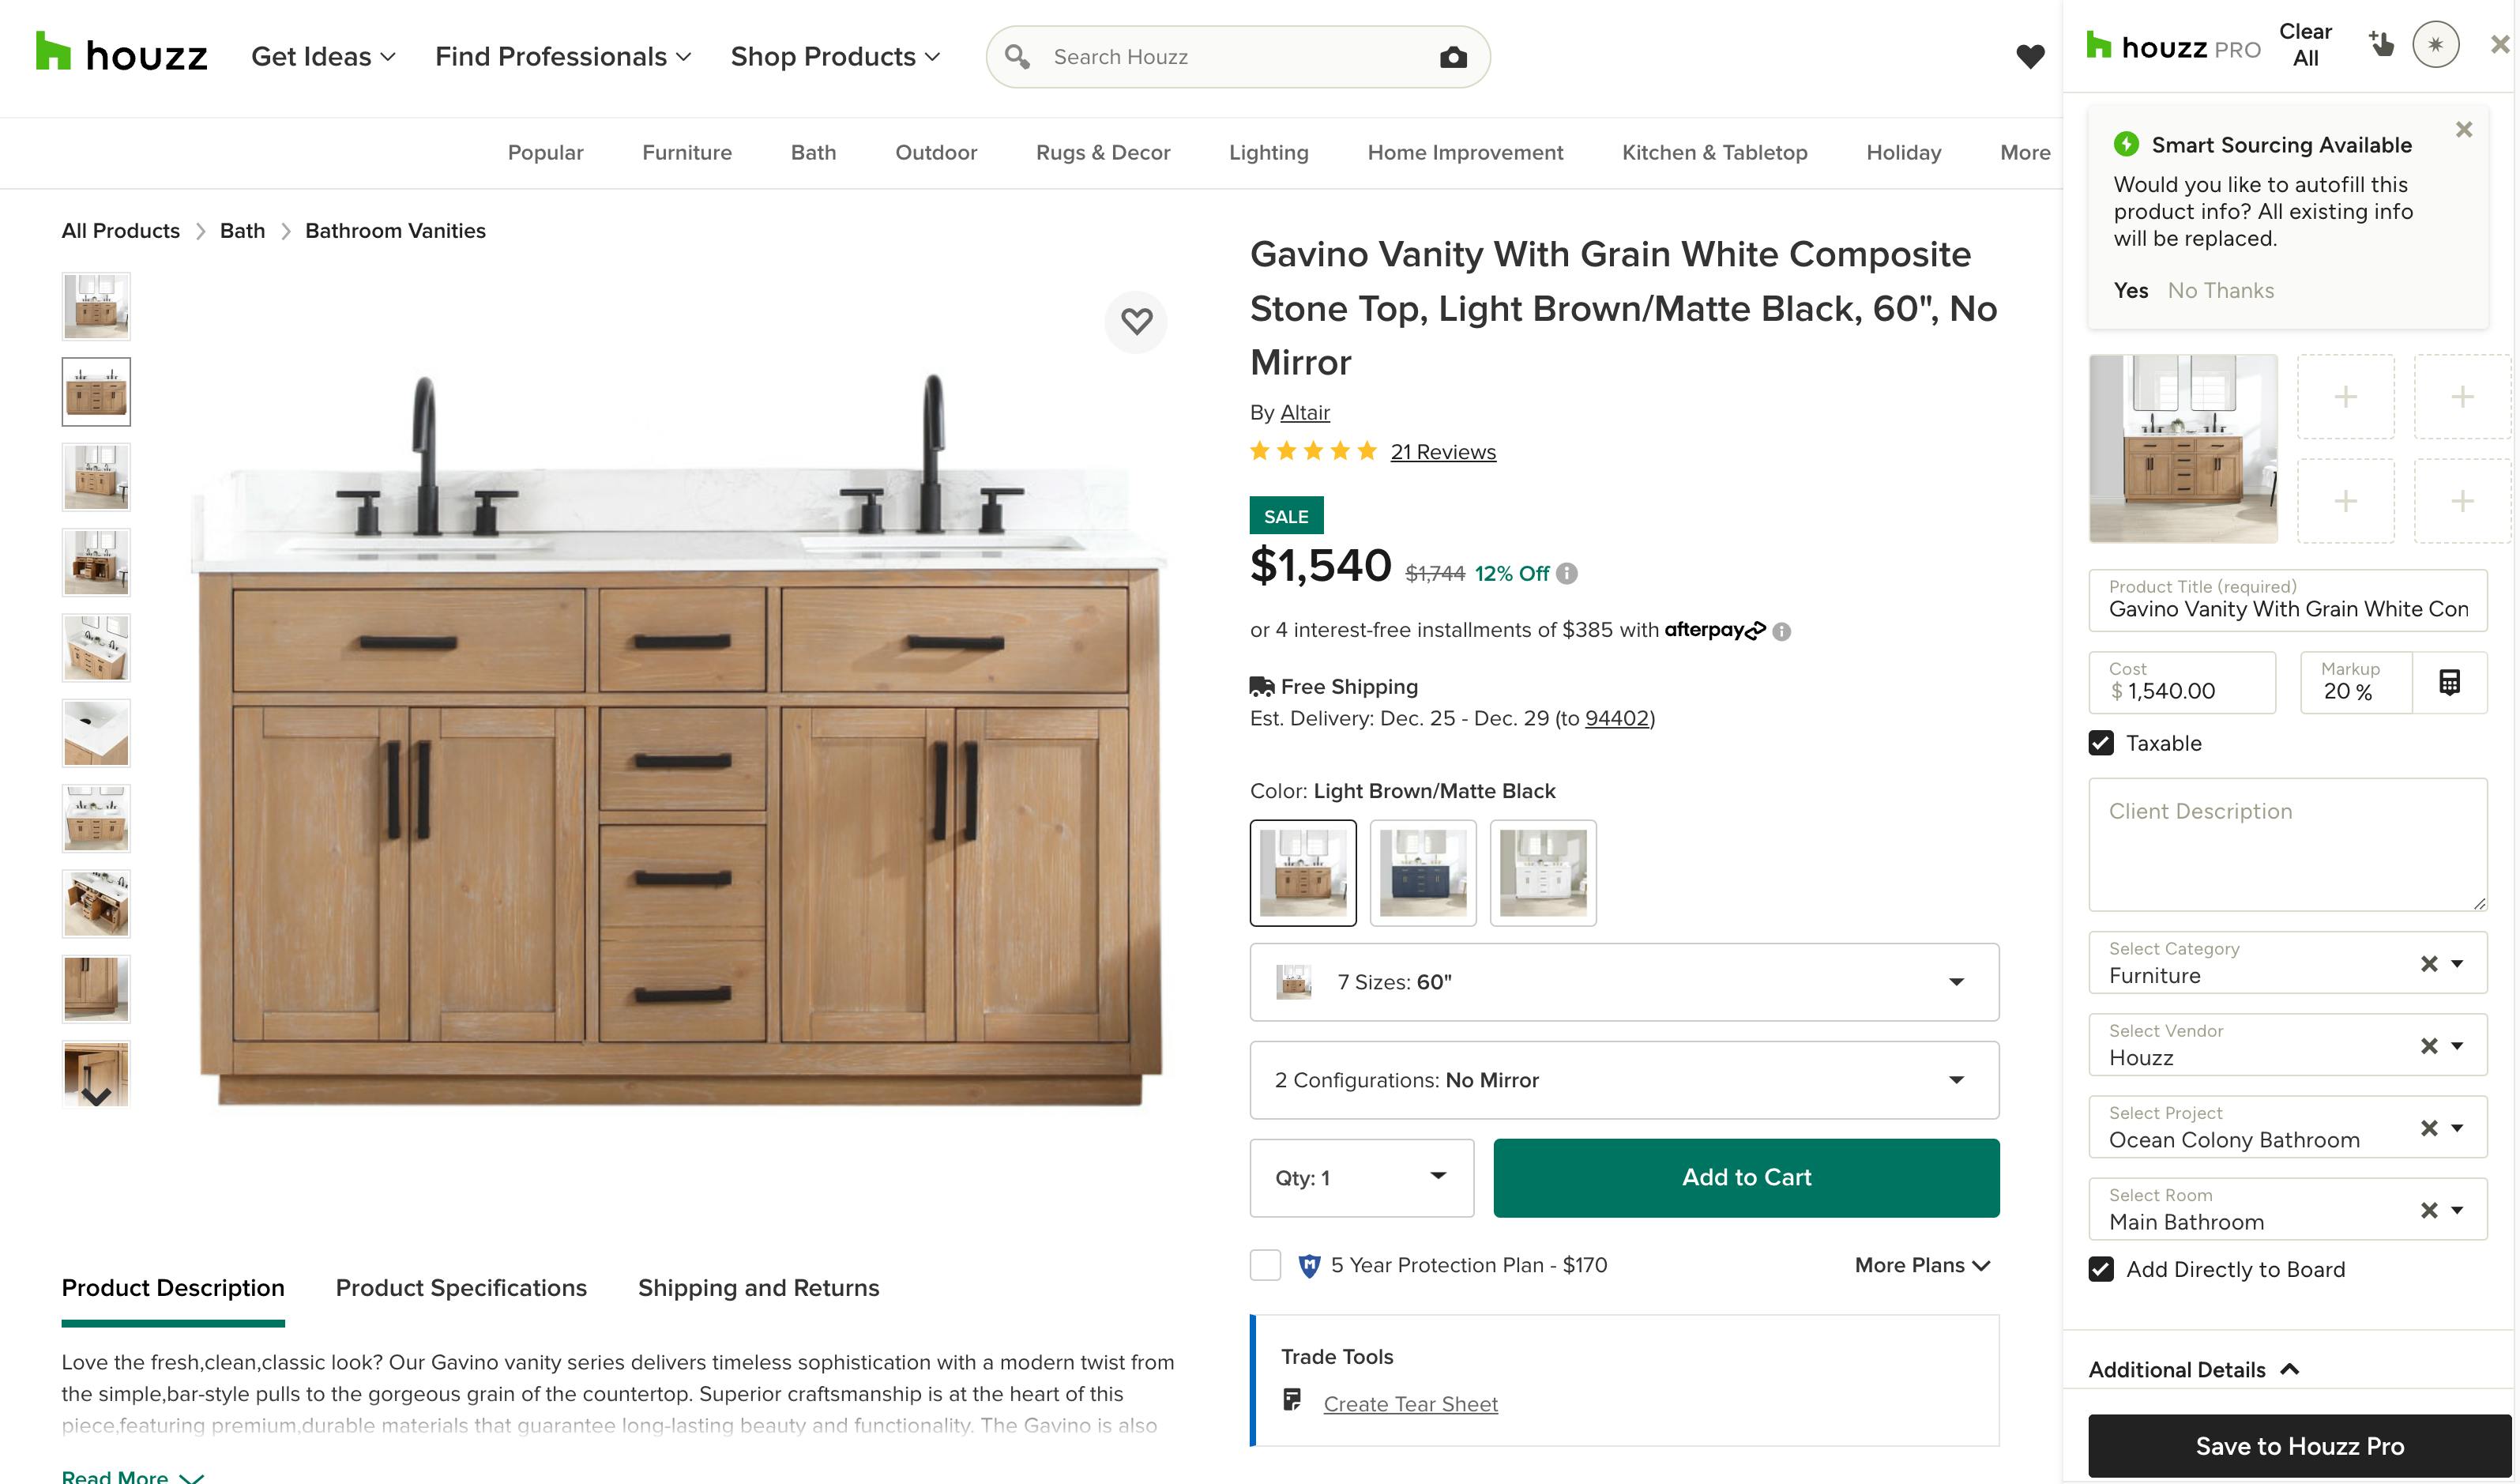
You will be prompted to sign into Houzz Pro in order to use the Clipper. Once signed in, go back to the website you want to clip from. With the Clipper open, you can start manually filling in details and information about the product you wish to clip, or turn on Smart Sourcing where available to automatically fill in details (learn more about Smart Sourcing below).

Pro tip: Click on the pointing hand icon at the top of the Clipper and mouse over product details to directly add them to relevant areas in the Clipper.

When you're done sourcing product details, click Save to Houzz Pro at the bottom of the Clipper. You can then choose to continue clipping additional products, or click to view the product in Houzz Pro.

Instant Image Clipping
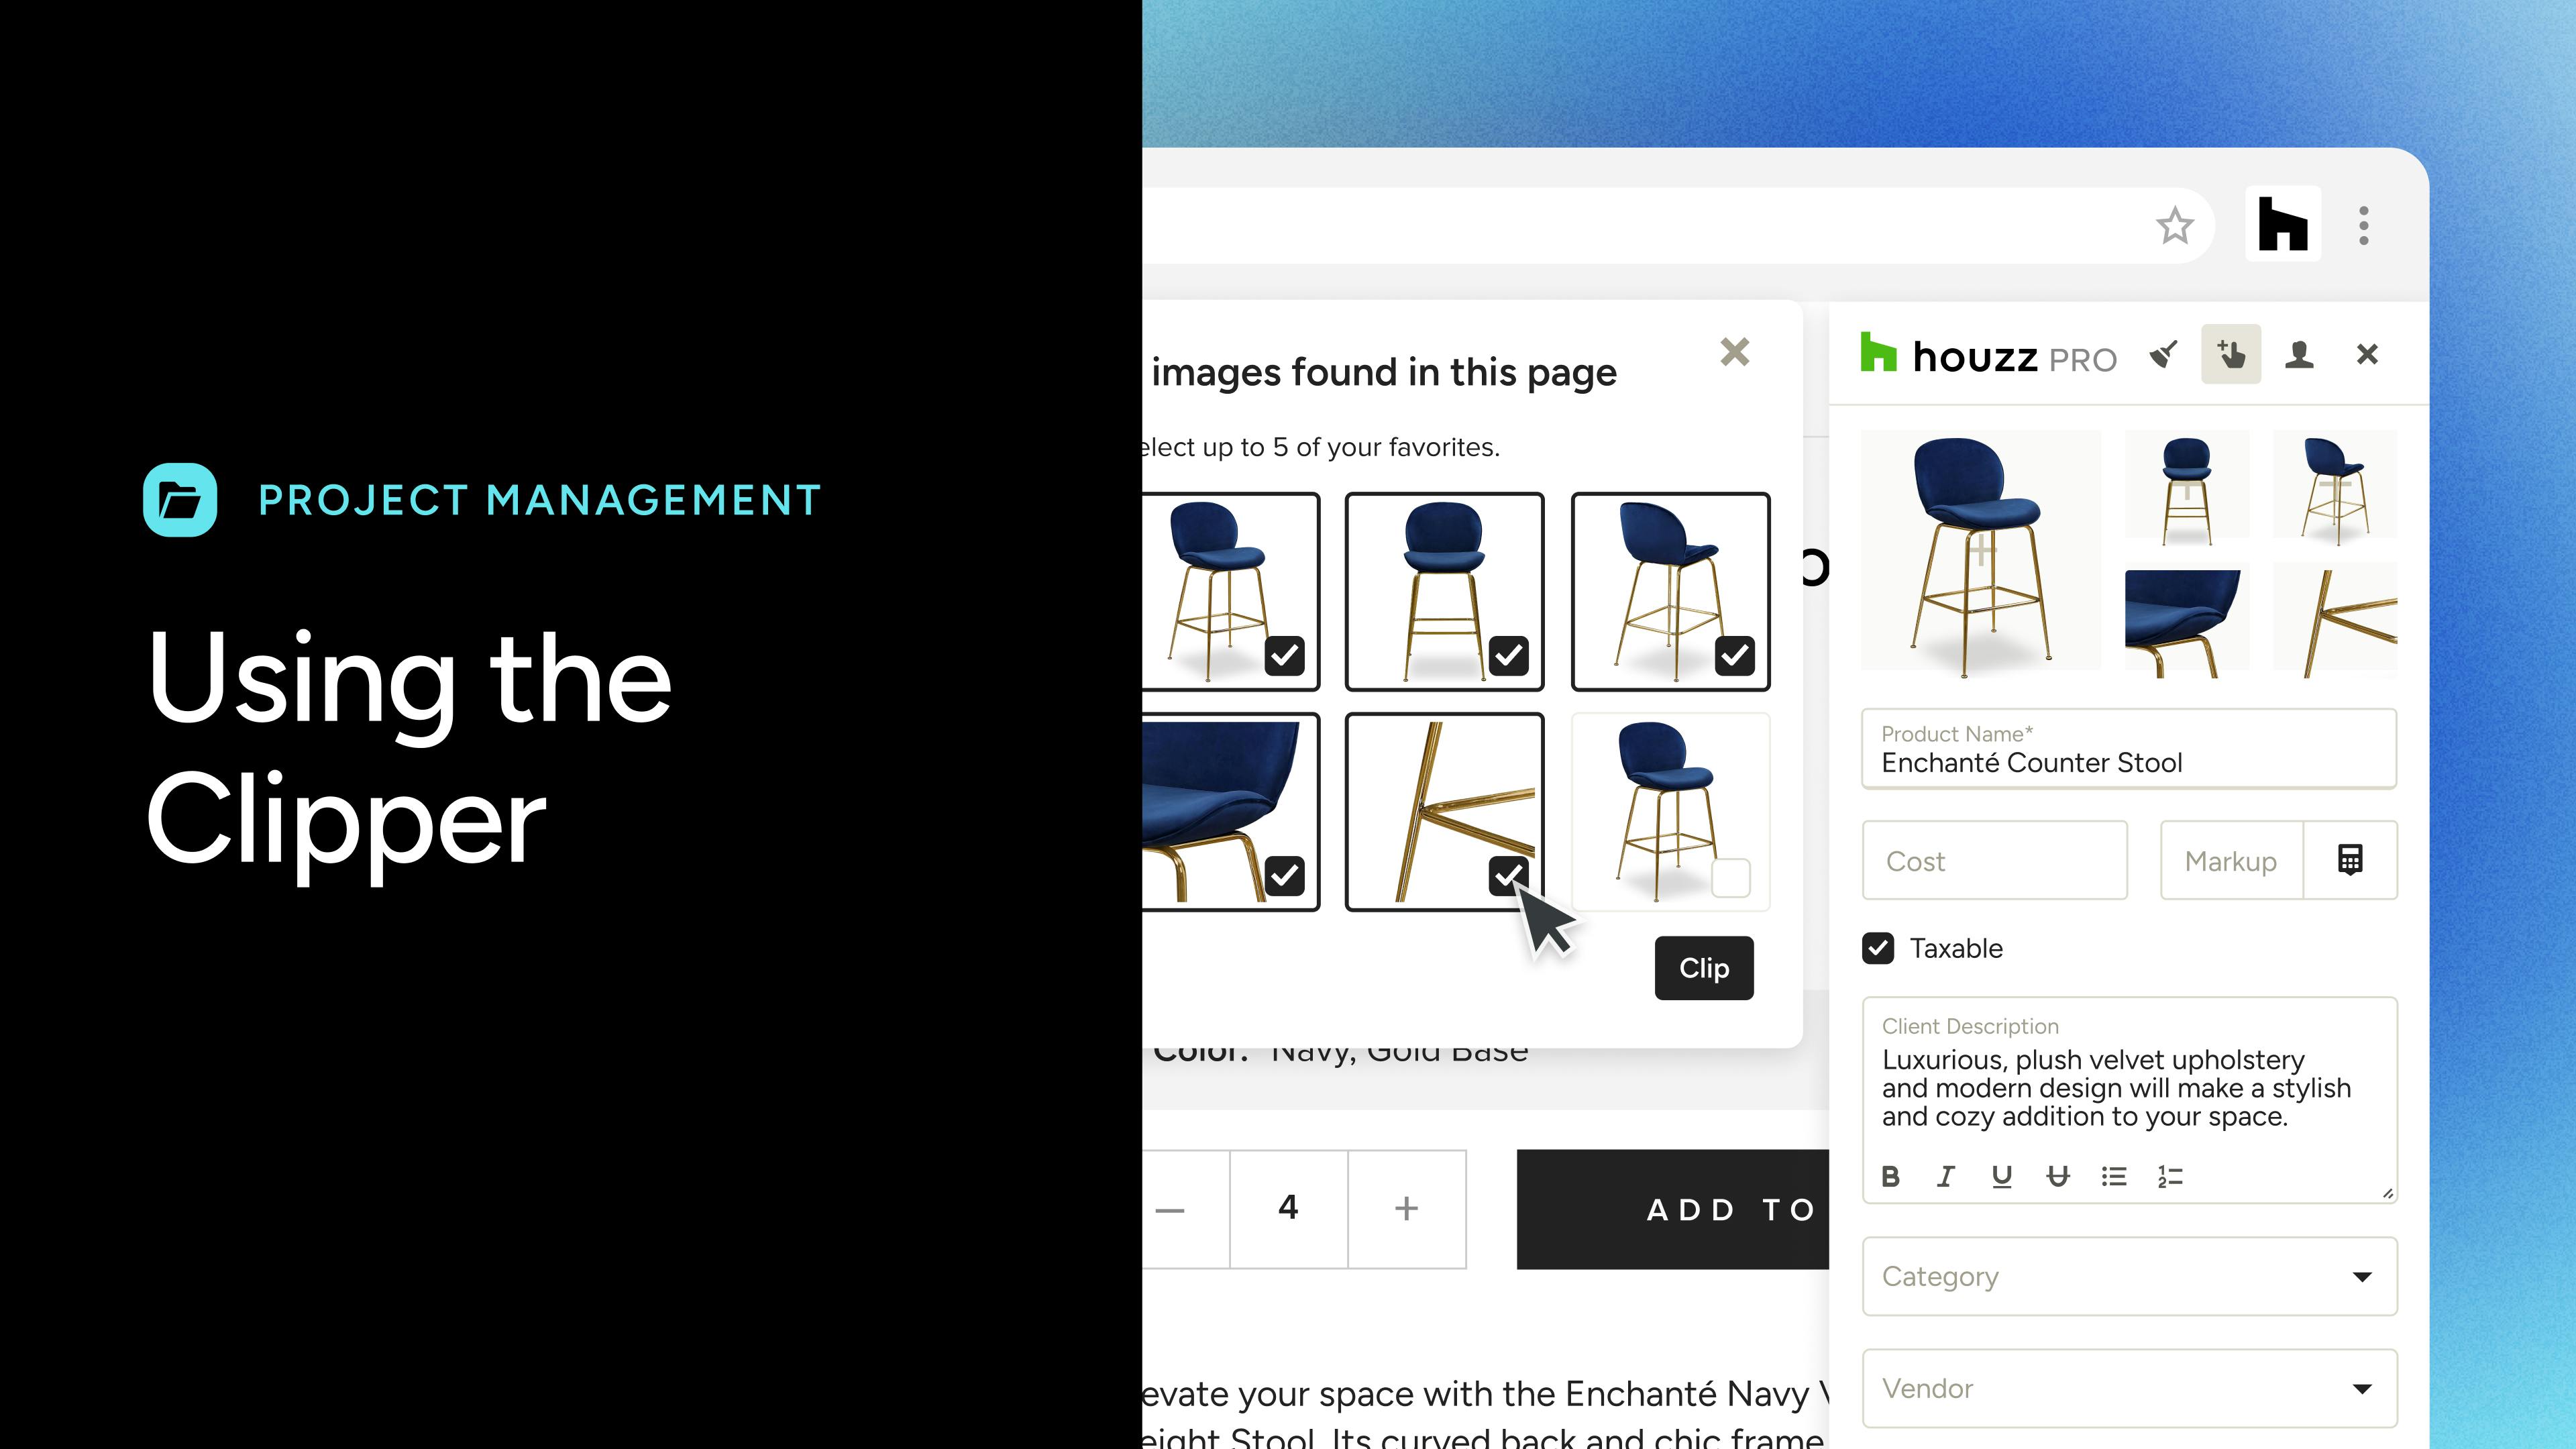
Want to instantly clip multiple images to the same product listing without going one-by-one? The Clipper will quickly find all relevant images on the current page so you can choose up to 5 to add to your listing in one shot.
Simply click Clip Product Images at the top of the Clipper (if no images have been clipped yet) or from the menu that appears when you click + next to any existing clipped images.
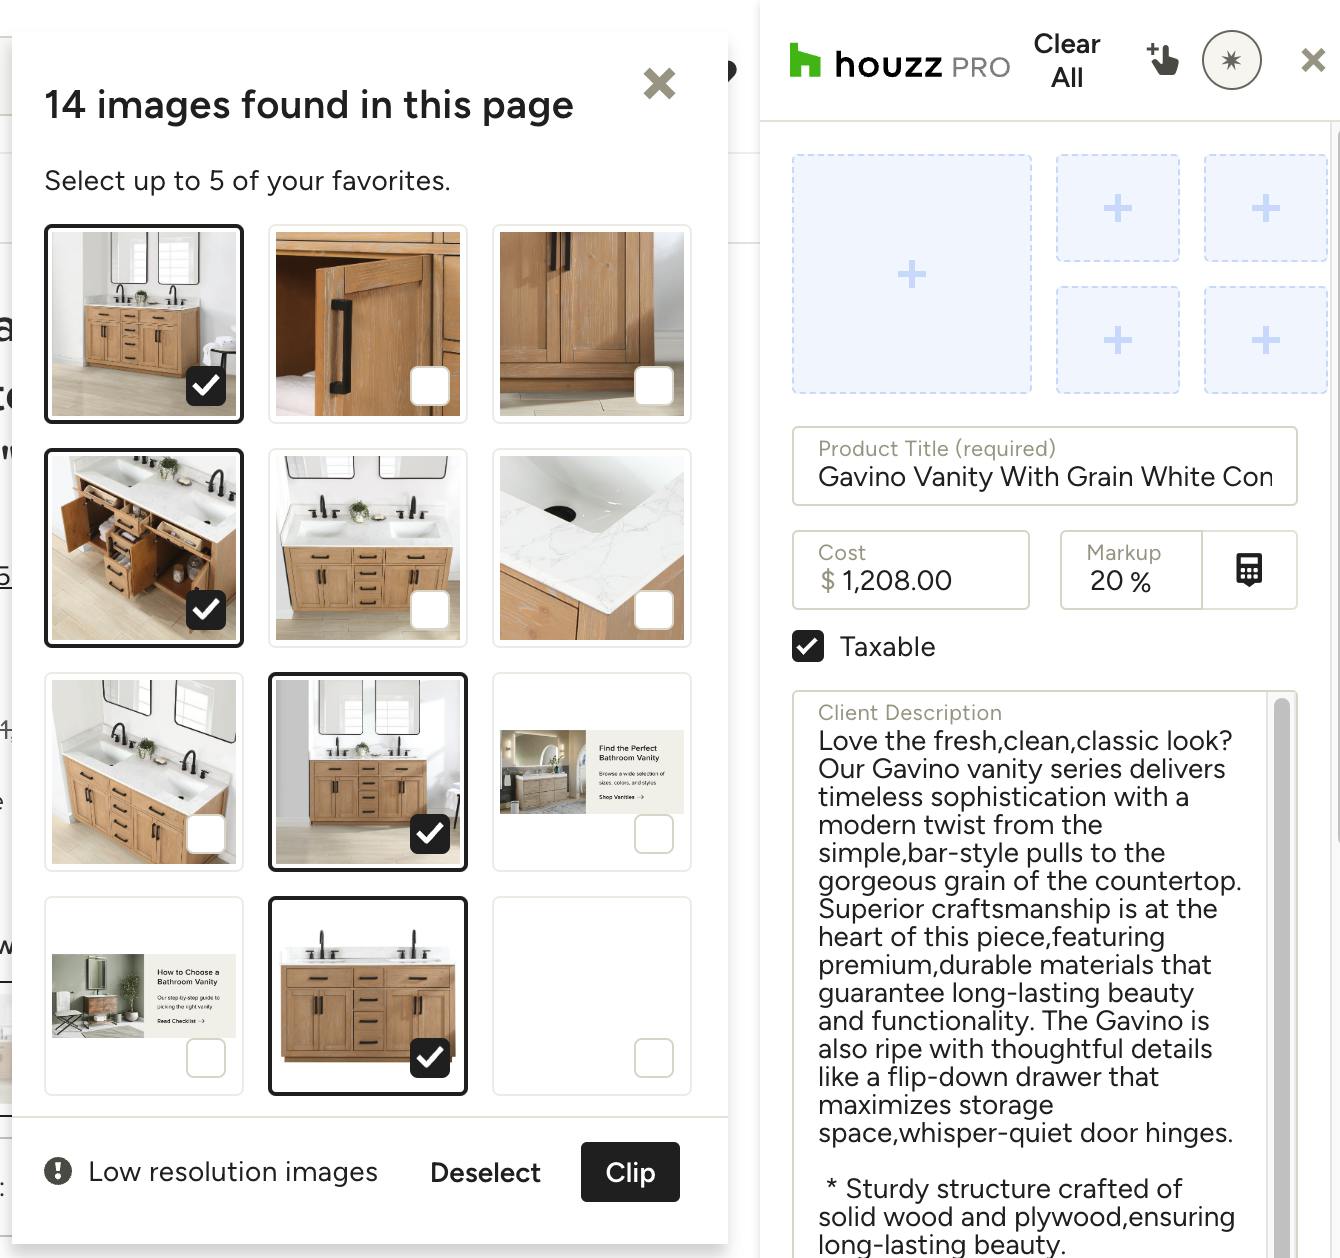
The Clipper will find all relevant, clippable images on the current page. Select up to 5 to clip to the same product listing and click Clip.
Low resolution images will have an '!' icon on them. Clipping these may result in poor quality images on Mood Boards, Selection Boards and documents.
If you're having trouble clipping a product image, check out How to Add an Image to the Clipper if You Can't Clip It for multiple options.
Smart Sourcing
With a touch of magic, the Clipper works with some of your favourite sites to save you even more time. How is it possible? Smart Sourcing automatically fills out the product details when you clip on select sites.
Smart Sourcing currently works with the following sites:

How to disable Smart Sourcing
If you don’t want the Clipper to pre-fill the product details for you, simply disable Smart Sourcing. Click the circular star icon at the top of the Clipper and select “Disable Smart Sourcing.”

Adding Clipped Products to Documents, Mood Boards and More
Adding your clipped products to various documents is simple. Let's start with Selections Boards and Mood Boards first.
From within any board, click on Project Items on the right panel. Here is where you will find all items that have been added to the specific project you're in, including clipped products. Click any item to add it to your board.
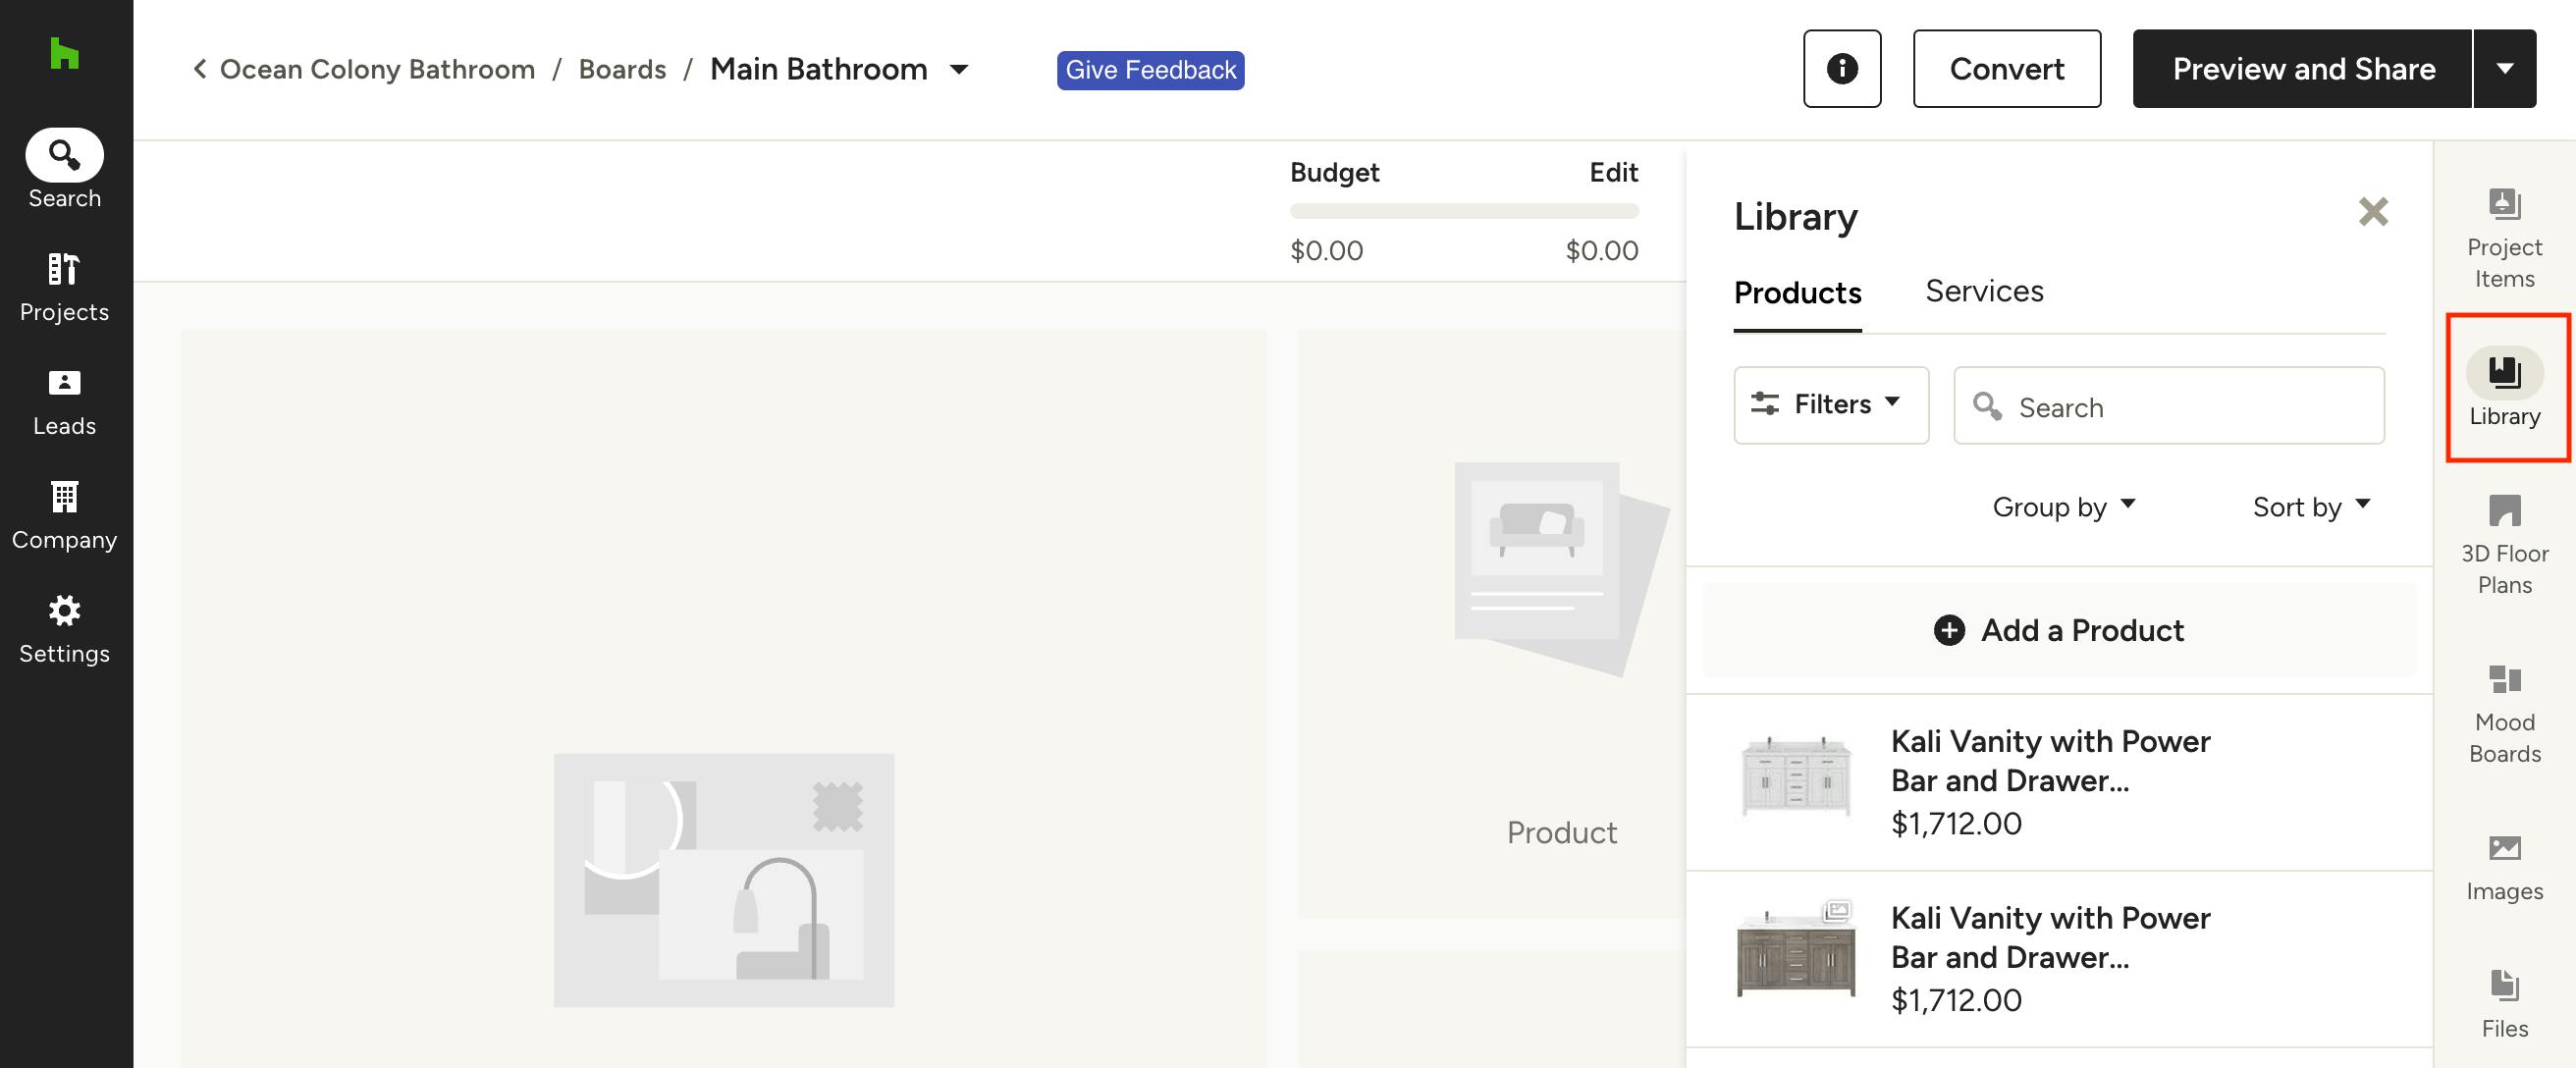
If you haven't yet added an item to your specific project, you can find all clipped items under the Library icon in the right panel. Use the filters and search bar to quickly find what you're looking for. Click the item to add it to your board.
Adding Clipped Items to Estimates/Proposals and Invoices
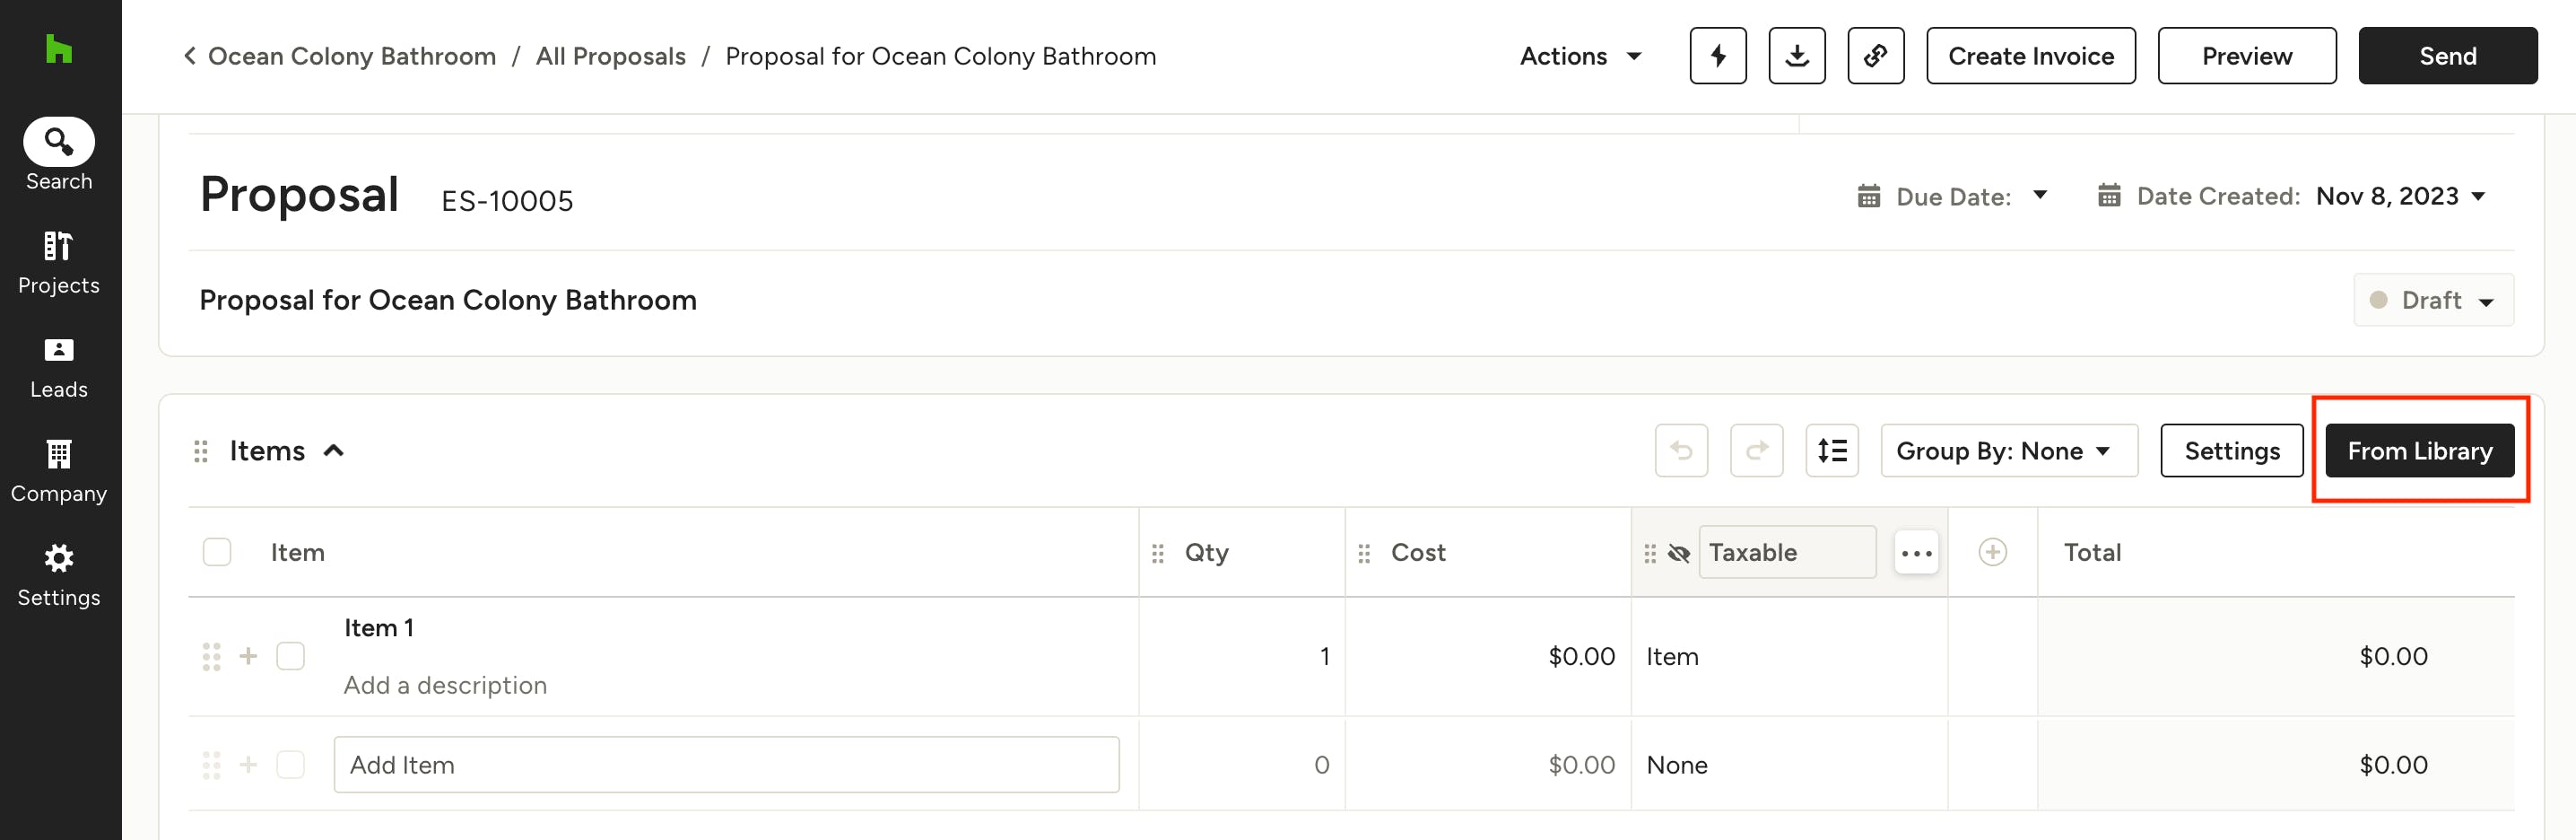
From within any estimate/proposal or invoice, click the From Library button on the right.

This will open a panel where you can select from your Project Items. Here is where you will find all items that have been added to the specific project you're in, including clipped products. Click any item to add it to your document.

If you haven't yet added an item to your specific project, you can find all clipped items under the Library icon (looks like two lamps). Use the filters and search bar to quickly find what you're looking for. Click the item to add it to your document.

How to Turn Off the Clipper When It Won't Go Away
Want to know how to turn off the Clipper when you're not working on sourcing products? The Clipper can easily be disabled so you don't have the icon following you around constantly.
To disable the Clipper, right-click the pinned Clipper extension icon in the upper right corner of your screen and select "Disable Clipper when menu is closed." If you don't have the extension pinned, click on the extension puzzle icon, locate Houzz Pro Clipper, and select "Disable Clipper when menu is closed" from the "More options" menu to the right (three dots). This will keep the Clipper as part of your extensions, but make it so the icon isn't always there while you're doing personal browsing or shopping.
To enable the Clipper again, just click on the icon and sign in to start clipping. It's that easy! If you want to turn on the icon on all images again, simply deselect "Disable Clipper when menu is closed".