
Step-by-Step Guide to Remote Gate Opener Installation
Installing a remote gate opener is a smart upgrade for homeowners and property managers looking to enhance convenience, security, and control. Whether you’re tired of manually opening your gate in the rain or want a modern solution to improve access control, remote gate systems offer a user-friendly and reliable alternative.
This step-by-step guide to remote gate opener installation walks you through the process from start to finish. We’ll cover everything from choosing the right model and preparing for installation to wiring the components and programming the gate opener remote.
Understanding Remote Gate Openers
A remote gate opener is an automated system that allows you to open and close your gate from a distance using a handheld remote or wireless device. These systems typically consist of:
Most systems are designed for swing gates or sliding gates, and some advanced models offer Wi-Fi or smartphone app integration alongside traditional gate opener remote controls.
Benefits of Installing a Remote Gate Opener
Before diving into installation, it’s worth understanding the key benefits:
Whether you're retrofitting an existing gate or installing a new one, adding remote functionality makes day-to-day life easier and safer.
Tools and Materials You’ll Need
Optional items:
Preparation Before Installation
Read the Manual
Before beginning the installation, carefully read the manufacturer’s manual included with your remote gate opener. Every model may have unique wiring instructions, mounting bracket requirements, and safety protocols.
Choose the Power Source
Most residential gate openers are powered by either:
Make sure your power source is stable, safe, and within reach of the control board.
Check Gate Condition
Inspect your existing gate for structural integrity. Ensure hinges, rollers, and the gate frame are secure and operational. A sagging or misaligned gate can reduce the efficiency of your opener and lead to mechanical failure.
Step-by-Step Guide to Remote Gate Opener Installation
Mount the Gate Opener Motor
Install the Control Box
Mount the control box on a nearby post or wall within reach of the motor's power cables. It should be elevated off the ground, protected from direct sun or rain, and close to your power source.
Connect the Wiring
Set the Limit Switches
Limit switches determine how far the gate should open and close.
Proper limit setting prevents over-travel, reducing motor stress and potential gate damage.
Programming the Gate Opener Remote
Your gate opener remote needs to be paired with the system's receiver to function properly.
Some modern systems allow remotes to be programmed via an app, offering additional features like:
Testing and Final Adjustments
Once everything is connected and programmed, it’s time to test your remote gate opener system.
Make adjustments as needed to the arm length, speed settings, or remote control sensitivity.
Maintenance Tips for Long-Term Performance
A properly installed remote gate opener should provide years of reliable service. Keep it in top condition with regular maintenance:
Proactive upkeep prevents expensive repairs and ensures consistent operation.
Common Mistakes to Avoid
Installing a remote gate opener can be straightforward with proper planning. Avoid these common errors:
Taking your time during installation ensures a smoother, more secure system.
Conclusion
Installing a remote gate opener transforms the way you access and protect your property. From initial preparation to final remote pairing, this step-by-step guide to remote gate opener installation provides all the key steps and considerations to ensure a successful project.
Whether you're a DIY enthusiast or a first-time homeowner looking to upgrade, following best practices and manufacturer guidelines will result in a reliable, efficient, and secure gate system. With proper setup and routine maintenance, your gate opener remote will give you seamless control and peace of mind for years to come.
This step-by-step guide to remote gate opener installation walks you through the process from start to finish. We’ll cover everything from choosing the right model and preparing for installation to wiring the components and programming the gate opener remote.
Understanding Remote Gate Openers
A remote gate opener is an automated system that allows you to open and close your gate from a distance using a handheld remote or wireless device. These systems typically consist of:
Control board or circuit system
Remote transmitters and receivers
Safety accessories (photo eyes, sensors, limit switches)
Most systems are designed for swing gates or sliding gates, and some advanced models offer Wi-Fi or smartphone app integration alongside traditional gate opener remote controls.
Benefits of Installing a Remote Gate Opener
Before diving into installation, it’s worth understanding the key benefits:
- Enhanced security: Keep your gate closed and locked when not in use
- Convenience: No need to exit your vehicle to open or close the gate
- Remote access: Operate your gate using a gate opener remote or app
- Increased property value and curb appeal
- Compatibility with home automation systems
Whether you're retrofitting an existing gate or installing a new one, adding remote functionality makes day-to-day life easier and safer.
Tools and Materials You’ll Need
- Remote gate opener kit (with all hardware, control box, motor, and remotes)
- Power drill with bits
- Wrenches and screwdrivers
- Measuring tape and level
- Wire strippers and connectors
- Weatherproof junction box (if needed)
- PVC conduit or protective casing for wires
- Safety glasses and gloves
Optional items:
- Multimeter for testing voltage
- Concrete mix and anchor bolts for permanent post mounting
- Trenching tools if you need to run underground wiring
Preparation Before Installation
Read the Manual
Before beginning the installation, carefully read the manufacturer’s manual included with your remote gate opener. Every model may have unique wiring instructions, mounting bracket requirements, and safety protocols.
Choose the Power Source
Most residential gate openers are powered by either:
- AC power: Ideal for homes with nearby electrical connections
- Solar power: Suitable for remote locations or off-grid setups
- Hybrid systems: Offer battery backup with AC or solar as the primary source
Make sure your power source is stable, safe, and within reach of the control board.
Check Gate Condition
Inspect your existing gate for structural integrity. Ensure hinges, rollers, and the gate frame are secure and operational. A sagging or misaligned gate can reduce the efficiency of your opener and lead to mechanical failure.
Step-by-Step Guide to Remote Gate Opener Installation
Mount the Gate Opener Motor
- Measure and Mark Mounting Points
Use the measurements provided in your manual to mark exact locations on the gate post and the gate arm for bracket installation. - Install the Post Bracket
Drill holes into your gate post and secure the bracket with lag bolts or anchor screws. Make sure it’s level and aligned with the gate. - Attach the Gate Arm Bracket
Mount the gate-side bracket where the motor arm will attach. Use a level to ensure horizontal alignment. - Connect the Motor Arm
Secure the motor to both brackets using provided pins and bolts. Test the arm's range of motion manually to ensure it moves freely and doesn’t bind.
Install the Control Box
Mount the control box on a nearby post or wall within reach of the motor's power cables. It should be elevated off the ground, protected from direct sun or rain, and close to your power source.
- Drill holes and mount the control box using screws
- Feed wires through watertight grommets
- Seal unused entry points with silicone to prevent moisture intrusion
Connect the Wiring
- Wire the motor to the control board
Follow the color-coded wiring diagram provided in your manual. Secure all connections with wire nuts or terminal clamps. - Connect the power source
- For AC: Use grounded wiring and install a circuit breaker if needed
- For solar: Connect the solar panel and battery to the designated inputs
- For hybrid: Plug in both AC and battery leads
- Install any optional safety accessories
Connect safety sensors (photo eyes), limit switches, or external keypads to the control board according to manufacturer instructions. - Use conduit for all exposed wiring to protect from weather and damage
Set the Limit Switches
Limit switches determine how far the gate should open and close.
- Power on the control board
- Manually open the gate to the desired maximum angle
- Set the open limit on the control board (either via physical switch or digital input)
- Repeat for the close position
Proper limit setting prevents over-travel, reducing motor stress and potential gate damage.
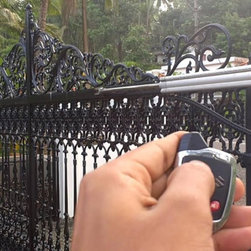
Programming the Gate Opener Remote
Your gate opener remote needs to be paired with the system's receiver to function properly.
- Press the Learn Button on the control board
This is often labeled “Learn” or “Program” depending on your model. - Press the Remote Button
Within 10 seconds of pressing Learn, press and hold the main button on the gate opener remote. - Wait for Confirmation
Most systems will flash an LED light or emit a beep to confirm pairing. - Test the Remote
Press the button to open or close the gate. If it responds correctly, repeat the process for additional remotes.
Some modern systems allow remotes to be programmed via an app, offering additional features like:
- Time-based access
- Temporary guest codes
- Activity logs
Testing and Final Adjustments
Once everything is connected and programmed, it’s time to test your remote gate opener system.
- Open and close the gate using the remote
- Check the motor response time and alignment
- Confirm safety sensors stop the gate if obstructed
- Ensure the gate fully opens and closes within set limits
- Listen for any unusual noises or strain from the motor
Make adjustments as needed to the arm length, speed settings, or remote control sensitivity.
Maintenance Tips for Long-Term Performance
A properly installed remote gate opener should provide years of reliable service. Keep it in top condition with regular maintenance:
- Lubricate moving parts such as hinges and arms every 6 months
- Clean and inspect sensors for dirt or obstruction
- Test your remotes monthly to ensure proper signal range
- Check battery backups or solar panels annually for performance
- Tighten all bolts and check alignment after heavy storms or impacts
Proactive upkeep prevents expensive repairs and ensures consistent operation.
Common Mistakes to Avoid
Installing a remote gate opener can be straightforward with proper planning. Avoid these common errors:
- Skipping the manual or not following the model-specific diagram
- Mounting brackets that are not level or misaligned
- Using incorrect gauge wiring for power runs
- Neglecting safety sensors, leading to operational hazards
- Over-tightening bolts that restrict arm movement
- Forgetting to test range or pair the gate opener remote correctly
Taking your time during installation ensures a smoother, more secure system.
Conclusion
Installing a remote gate opener transforms the way you access and protect your property. From initial preparation to final remote pairing, this step-by-step guide to remote gate opener installation provides all the key steps and considerations to ensure a successful project.
Whether you're a DIY enthusiast or a first-time homeowner looking to upgrade, following best practices and manufacturer guidelines will result in a reliable, efficient, and secure gate system. With proper setup and routine maintenance, your gate opener remote will give you seamless control and peace of mind for years to come.