How to Plant a Tree
Learn the right way and time to plant a tree to add beauty to your garden and benefit the environment

Trees are vital to our landscape, providing beauty and welcome shade. They also offer environmental benefits, such as cleaning the air, attracting wildlife and reducing energy costs when planted near our homes. Many trees have other bonuses, such as colourful flowers, delicious fruit and nuts, and in some cases acting as a natural playground for our children.
With the benefits trees provide, it may be time to add one to your landscape. However, before you set out to your local nursery, let’s look at the best time to plant a tree and how to do it the right way.
With the benefits trees provide, it may be time to add one to your landscape. However, before you set out to your local nursery, let’s look at the best time to plant a tree and how to do it the right way.
Trees offer environmental benefits:
- Trees clean the air by absorbing pollutants and carbon dioxide while producing oxygen.
- Trees provide shelter and food for wildlife.
- Trees can help save water by slowing evaporation from the plants growing in their shade.
How to choose the right tree
Once you’ve decided why you’re planting a tree, it’s time to figure out which species will best fulfil your needs. Consider which benefits you want from your tree.
Once you’ve decided why you’re planting a tree, it’s time to figure out which species will best fulfil your needs. Consider which benefits you want from your tree.
- Energy savings: Select a large deciduous tree, which will shade your home from spring through to autumn, while allowing the sun to shine through in winter once its leaves have fallen.
- Shade: Choose a tree with a broad canopy (one with a growth habit that’s wide and not columnar) to maximise the amount of shade it produces. If you want shade year-round, select an evergreen tree.
- Colour: Pick a tree with colourful foliage all year, such as a purple-leaf plum, or one that produces colourful flowers.
- Fruit: Fruit trees do double duty by adding beauty with their attractive foliage and pretty spring flowers, as well as providing delicious fruit.
- Tidiness: It’s important to note that some trees are messier than others. If you’re planting a tree near a pool, select one that won’t drop leaves or produce messy flowers or seedpods. If possible, plant an evergreen tree near a water feature, pool or any other area you want to keep clean.
Site checklist
Certain variables must be addressed before planting a tree in your garden or outdoor area.
Certain variables must be addressed before planting a tree in your garden or outdoor area.
- How much room do you have? This will make choosing a tree much easier, as it will eliminate species that are too large or small.
- Are there any potential obstacles? Avoid power lines, nearby structures or pipes running under the ground near the tree.
- Is there irrigation? Be sure that there’s a nearby water source, whether it’s an irrigation system or a hose.
When to buy and plant a tree
It’s best to plant trees when they’re dormant. This occurs in autumn after their leaves have dropped and in late winter or early spring just before the leaf buds begin to swell. Planting trees during this time gives their roots time to grow before warmer weather stimulates new top growth.
Of course, trees can be planted at any time of year, but extra care may be needed, such as making sure that they’re adequately watered during their first summer.
Timber boxes filled with palo brea trees (Parkinsonia praecox)
When visiting your local tree nursery, you may see trees in different types of containers or some with no containers at all. Trees can be contained in timber boxes or plastic nursery containers, or may be wrapped in hessian, another fabric or even wire. Bare-root trees have no container whatsoever.
The type of container doesn’t have much bearing on when to plant a tree except for bare-root trees, which should be planted only from late autumn to early spring.
How to plant a tree
1. Get the hole right
The hole’s size plays a major role in how quickly a tree establishes itself and grows. Studies have shown that digging the right-sized hole significantly increases a tree’s growth rate once planted.
The hole should be three times wider than the tree’s root ball and shaped like a saucer. This allows for good root growth and development, because the majority of a tree’s roots grow outward into the top portion of soil, where oxygen is at high levels.
The hole should be the same depth as the root ball, or even slightly shallower. Trees don’t like to be planted deeply because it decreases the amount of oxygen available to their roots. In addition, trees tend to settle a little lower after being planted.
If you use an auger to drill into the ground and create the planting hole, scrape the edges of the hole slightly to break up the ‘glazing’ that augers create, which can limit water movement and root penetration.
This image demonstrates a hole that is the wrong size for the tree. It’s too narrow and a little too deep. Although the tree in this hole has grown, its growth rate has been slow compared with nearby trees planted in larger holes.
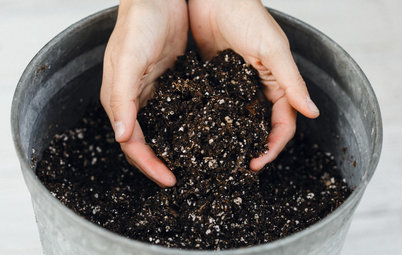
A Beginner’s Guide: How to Grow an Organic Garden
A Beginner’s Guide: How to Grow an Organic Garden
2. Position the tree properly
Gently remove any excess soil on top of the root ball until you can see where the main roots begin to flare. Trees often come with a five- to eight-centimetre layer of soil or mulch that covers the top of the root ball. This can limit the amount of oxygen available to the roots, especially after planting, because trees tend to settle a few centimetres.
How you plant the tree depends on the material encasing the tree roots. For wooden boxes, place the tree in the hole while still in the box, then remove the sides of the box. The bottom of the box should remain as it provides a solid base for the tree and won’t inhibit root growth, which occurs outward.
If your root ball is covered in hessian or other natural covering, place it in the hole before taking off the covering. Remove the covering two-thirds of the way down – it’s fine if the bottom is covered with the hessian. Synthetic coverings must be completely removed.
Measure the root ball and the hole to be sure the hole is the right size before you place the tree, then position the tree in the centre of the hole. The tree’s root flare, where the large roots begin to flare out from the trunk, should be above ground once it’s in the hole.
Trees in plastic nursery containers can be planted by cutting away the container. This is best done by first laying the tree sideways on the ground and cutting away the bottom of the container with hand pruners or a utility knife. Place the tree in the hole and cut along the sides of the container in two areas, which will allow you to remove the rest of the plastic container. Avoid pulling a tree out of its container, which can damage its roots.
Regardless of what type of container the tree came in, it’s important to examine its roots once placed in the hole. If the roots are circling the root ball, there can be future problems with girdling that need to be addressed before planting. Using a pruning saw, remove the outer inch of soil all the way around. This will help break up the circling roots and cause them to grow outward.
Regardless of what type of container the tree came in, it’s important to examine its roots once placed in the hole. If the roots are circling the root ball, there can be future problems with girdling that need to be addressed before planting. Using a pruning saw, remove the outer inch of soil all the way around. This will help break up the circling roots and cause them to grow outward.
3. Fill the hole
This step, called backfilling, is the easiest one and consists of filling the hole with the same soil that you dug out to create the hole. Add backfill to the hole around the tree, taking care to break apart any large chunks. After backfilling, create a small berm or raised lip of soil around the hole, which will create a basin that will hold water to help it permeate deeply around the tree. Water immediately after planting to help settle the soil and get rid of air pockets.
No amendments are needed during planting and are, in fact, often discouraged. Many studies have shown that adding anything besides native soil can slow tree growth. The roots of trees planted in amended soil tend to stay within the original hole without venturing outward, which can stunt the growth of the tree. Additionally, trees planted with amended soil tend to hold on to too much water and have undue settling as the organic amendments decompose and lose volume over time.
4. Water and mulch
New trees will need more water for the first year to help them get established – especially during the first few weeks after planting. Homeowners often overwater their new trees, causing the leaves to turn yellow and fall off. The frequency of watering can vary depending on your region, which the nursery where you bought your tree the best resource for a recommended watering schedule. Keep in mind any local watering restrictions too.
Add a five- to 10-centimetre layer of mulch, such as shredded bark, compost or wood chips, around your new tree, covering the entire planting area. Keep the mulch 15 centimetres away from the trunk to prevent problems with fungal diseases or insects. Adding mulch will help moderate soil temperatures, prevent weeds and retain soil moisture. In addition, as the mulch breaks down, it improves the soil.
Plenty of research suggests fertiliser should not be added to your tree for the first year. Fertiliser can burn young tree roots and stimulate excess leaf growth before the tree has enough roots to support it.
Read more:
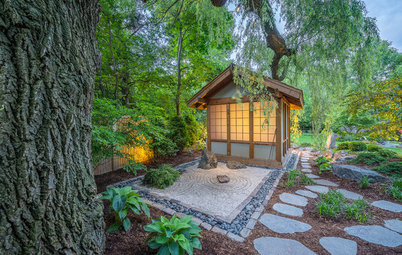
A Beginner’s Guide to the Japanese Tea Garden
7 Rules for Designing a Small Garden
Tell us:
Did you find this story helpful? Tell us in the Comments and share your tree-planting tips, save the images and join the conversation.
New trees will need more water for the first year to help them get established – especially during the first few weeks after planting. Homeowners often overwater their new trees, causing the leaves to turn yellow and fall off. The frequency of watering can vary depending on your region, which the nursery where you bought your tree the best resource for a recommended watering schedule. Keep in mind any local watering restrictions too.
Add a five- to 10-centimetre layer of mulch, such as shredded bark, compost or wood chips, around your new tree, covering the entire planting area. Keep the mulch 15 centimetres away from the trunk to prevent problems with fungal diseases or insects. Adding mulch will help moderate soil temperatures, prevent weeds and retain soil moisture. In addition, as the mulch breaks down, it improves the soil.
Plenty of research suggests fertiliser should not be added to your tree for the first year. Fertiliser can burn young tree roots and stimulate excess leaf growth before the tree has enough roots to support it.
Read more:
A Beginner’s Guide to the Japanese Tea Garden
7 Rules for Designing a Small Garden
Tell us:
Did you find this story helpful? Tell us in the Comments and share your tree-planting tips, save the images and join the conversation.


We know that trees are great for boosting curb appeal, but there are other ways to use them in the home landscape. A tree can provide shade for a window, deck or patio that receives hot afternoon sun, which in turn can help lower your energy bills.Planting a tree with colourful flowers or foliage is also a great way to add interest to a landscape in need of colour. And a tree can screen an unattractive view and muffle noise on a busy street.