


Houzz TV: How to Make a Worm Bin for Composting
A worm-powered compost bin turns food scraps into a nutrient booster for your garden. Here’s how to make one
Annie Thornton
6 April 2017
Houzz Editorial Staff
Gardening with worms, you say? Exactly. Vermicomposting, the process of composting with worms, not only creates a nutrient-rich amendment for your soil and plants, but also saves you from throwing out your fruit and vegetable scraps. And you don’t need a backyard to do it – under the kitchen sink can work.
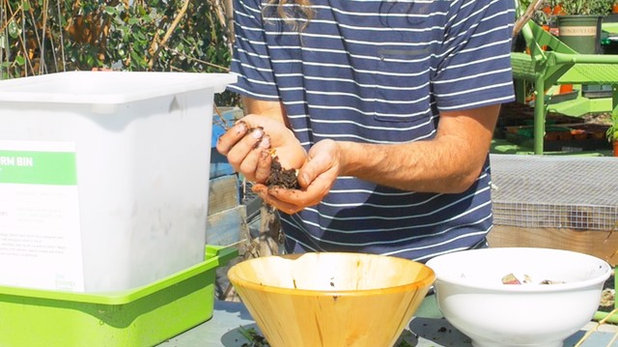
Evan Marks, founder and executive director of The Ecology Center in California, USA, shows how to assemble and maintain your own worm-powered compost factory bin.
Evan Marks, founder and executive director of The Ecology Center in California, USA, shows how to assemble and maintain your own worm-powered compost factory bin.
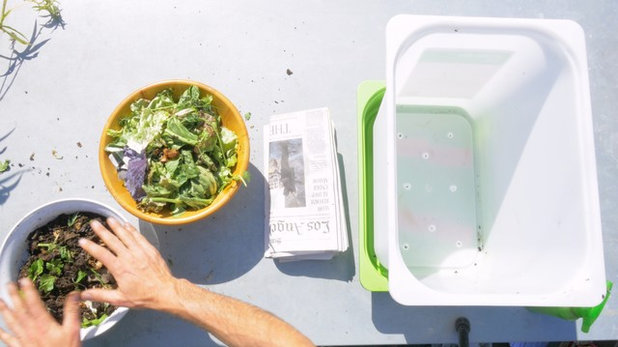
Worm bin tools and materials
- A tub large enough to accommodate a 55- to 75-litre plastic bin
- A couple of wood blocks or bricks
- A lidded 55- to 75-litre plastic bin drilled with several 6-millimetre holes in the bottom for drainage and smaller holes on the sides for ventilation
- Shredded newspaper (a non-toxic and absorbent bedding material)
- Spray bottle
- Food scraps (leaf lettuce, cabbage, carrot tops and other uncooked leafy greens)
- A couple of handfuls of soil to help start the decomposition process
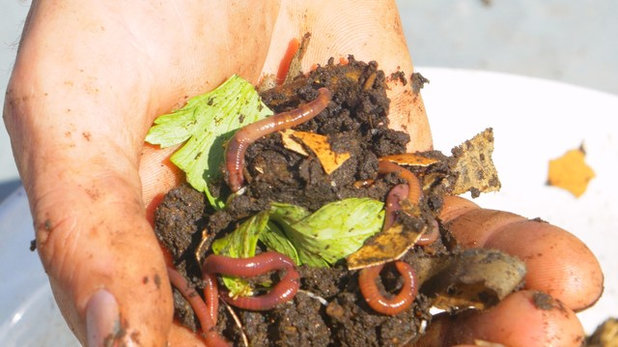
- 500 grams of red worms (they like to eat food scraps and paper)
Making your worm bin
In the tub, lay down the blocks and set the plastic bin on top.
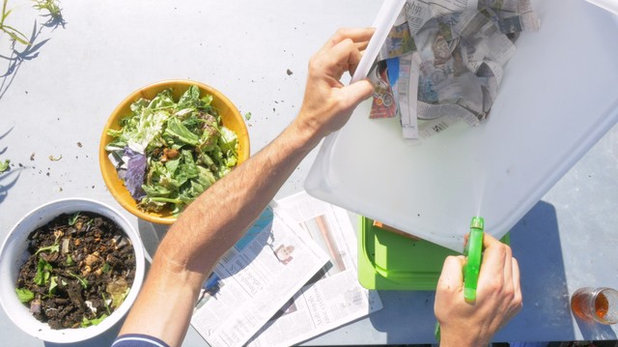
Layer the plastic bin like a lasagne, starting with the newspaper. First, put about four to six centimetres of ripped newspaper in the bottom of the bin; you want good air circulation, so don’t pack it down. Use a water-filled spray bottle to moisten the newspaper until it feels as wet as a wrung-out sponge.
Next, put a layer of food scraps a four to six centimetres deep on top of the newspaper. It’s best to start with leaf lettuce, cabbage and other easily digestible vegies; later, you can add denser compost items.
Add soil and worms. The soil adds micro-organisms to the bin and helps with the worms’ digestion when they’re starting out in the bin.
Top with another layer of newspaper, making sure to completely cover the worms and food scraps. Moisten the newspaper with a few squirts of water and secure the lid on the bin.
Storing your bin
Store your bin in a cool, dry place that’s convenient and close to the kitchen. If you plan to keep your worm bin outside, make sure the top is secured so animals can’t get into it and put it in a protected area that doesn’t experience extreme temperature swings. Your worm bin shouldn’t smell, so you can store it under the kitchen sink if you’d like.
In the tub, lay down the blocks and set the plastic bin on top.
Layer the plastic bin like a lasagne, starting with the newspaper. First, put about four to six centimetres of ripped newspaper in the bottom of the bin; you want good air circulation, so don’t pack it down. Use a water-filled spray bottle to moisten the newspaper until it feels as wet as a wrung-out sponge.
Next, put a layer of food scraps a four to six centimetres deep on top of the newspaper. It’s best to start with leaf lettuce, cabbage and other easily digestible vegies; later, you can add denser compost items.
Add soil and worms. The soil adds micro-organisms to the bin and helps with the worms’ digestion when they’re starting out in the bin.
Top with another layer of newspaper, making sure to completely cover the worms and food scraps. Moisten the newspaper with a few squirts of water and secure the lid on the bin.
Storing your bin
Store your bin in a cool, dry place that’s convenient and close to the kitchen. If you plan to keep your worm bin outside, make sure the top is secured so animals can’t get into it and put it in a protected area that doesn’t experience extreme temperature swings. Your worm bin shouldn’t smell, so you can store it under the kitchen sink if you’d like.
Maintaining your worm bin and harvesting worm castings
Marks adds scraps to his bin once or twice a week, but it may take a couple of months for the decomposition to get going. Chopped fruit and vegetable waste, coffee grounds, tea leaves and crushed eggshells can be added to the bin. Don’t use meat, bones, fat or dairy. Add a four- to six-centimetre layer of moist newspaper bedding every time you add scraps to the bin.
Continue to check on your worm bin once or twice a week to add more scraps and monitor the moisture level, maintaining that feeling of a wrung-out sponge. Mist it with water when necessary. If your bin is too dry, nothing will break down. If your bin is too wet, it can become anaerobic. Loosen it up with a trowel and add dry shredded newspaper to balance out the moisture.
A black substance called worm castings should appear at the bottom of the bin in a couple of months. Use this nutrient-rich amendment on all your plants, making sure to leave the worms and food that hasn’t broken down in the bin. Layer a tablespoon or so on indoor plants and a handful or so on outdoor plants as a top dressing. Worm castings not only benefit your plants, they also add structure to the soil.
More wormy goodness
Although you don’t want too much moisture in the worm bin, you’re likely to have liquid drain out the bottom. This nutrient-rich liquid (called leachate) can also be used as an organic plant fertiliser. It’s very concentrated, so you should dilute it to 1 part leachate to at least 10 parts water, then use it as a fertiliser on houseplants and outdoor plants.
Watch on Houzz TV: Make your own worm bin


Related Stories

Houzz Around The World
London Houzz: Tour a Contemporary Loft in an Old Victorian School
Watch and read how a design firm updated this light and airy apartment in an old block with sleek style and warm touches
Full Story

Houzz TV
Tour a Spacious Contemporary Coastal Home in Australia
A designer shares how she created elegant spaces with clean lines, custom details and glass walls that frame ocean views
Full Story

Kitchens
Houzz TV: Tour a Classic Blue-and-White Mosman Kitchen
By Houzz AU
First we published the story, now we offer a video tour of the classic makeover of this dated Sydney kitchen
Full Story
Projects Born on Houzz
Houzz TV: An Elegant London Apartment Makeover in 40 Days!
In this video, a designer found on Houzz gives a peek into a luxe sanctuary created remotely in 40 days
Full Story

Houzz Around The World
Tour a Light-filled London Home With a Soothing Coastal Palette
Watch and read how a designer found on Houzz updated a Modernist home with warm finishes and colours that evoke the sea
Full Story

Houzz Around The World
Take a Look Inside a Light & Airy Home in White, Wood & Black
Watch and read how a designer created a new home for a couple using wide-open spaces with casual but refined style
Full Story

Houzz Around The World
Tour a Victorian Home in the UK, Updated for Modern Life
Watch and read how a major renovation gave a narrow home a more open feel and a fresh, contemporary style
Full Story

Houzz Around The World
Visit a US Interior Designer’s Beautiful Long Beach Island House
Watch and read how Karen Wolf created a relaxing family getaway with a durable coastal style
Full Story

Houzz TV
Visit an Open and Airy Southern California Home With Ocean Views
In this video, see how a couple worked with an architect found on Houzz to build a stylish custom home fit for the beach
Full Story

Houzz TV
Peek Inside The Stylish Forever Home of an Empty Nester Couple
See and read how a designer renovated a kitchen and bathroom for US clients seeking to age in place
Full Story
We have a hamster... could you put his used bedding materials (sawdust) into a vermicomposter?