

DIY Project: Monkey Fist Key Ring
Learn how to master the monkey fist decorative knot with this beginner's tutorial, and never lose your keys again

Find your keys fast with this eye-catching key ring while also learning a practical knot, called ‘the monkey fist’. Traditionally made with a weighted ball in the centre, our take uses the end of the rope to keep the finished product light.
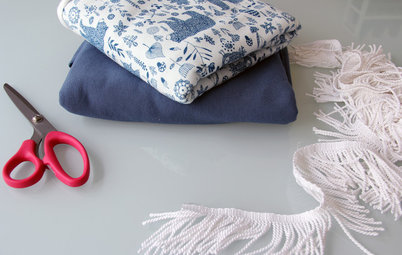
What you’ll need:
- 1 metre length of nylon cord
- Scissors
- Lighter
- Key ring and chain
Step 1: Make a loop
With the cord, create one loop. I’ve chosen white but you could use any colour you like.
With the cord, create one loop. I’ve chosen white but you could use any colour you like.
Step 2: Tie a knot
Holding the loop, tie a figure eight knot and pull tight, trying to get the smallest loop possible.
Holding the loop, tie a figure eight knot and pull tight, trying to get the smallest loop possible.
Step 3: Cut off tail
Trim off the excess rope and carefully seal the end with a lighter. Be careful with the flame – only lightly pass it over the rope end to seal it. You don’t want to start a fire here.
Trim off the excess rope and carefully seal the end with a lighter. Be careful with the flame – only lightly pass it over the rope end to seal it. You don’t want to start a fire here.
Step 4: Hold the knot
Hold the knot between the index and the middle finger as shown.
Hold the knot between the index and the middle finger as shown.
Step 5: Wrap around
Wrap the working end of the rope around your first three fingers three times.
Wrap the working end of the rope around your first three fingers three times.
Step 6: Tie around the middle
Push the working end through the gap in your fingers between the pointer and the middle fingers. Wrap the rope around the centre, perpendicular to the three loops you created in step 5. Repeat so you have three loops.
Push the working end through the gap in your fingers between the pointer and the middle fingers. Wrap the rope around the centre, perpendicular to the three loops you created in step 5. Repeat so you have three loops.
On the last loop, pass the working end through the middle. This sets up the working end for the next set of loops.
Step 7: Lift off
Slip the knot off your fingers, being careful to keep all the lines stacked on top of each other.
Slip the knot off your fingers, being careful to keep all the lines stacked on top of each other.
Step 8: Wrap the centre
Make three more loops now going around the last set made in step 6.
Make three more loops now going around the last set made in step 6.
Step 9: Cinch tight
Find the original knot (in the middle) and start cinching in the rope gently and patiently, one bit at a time, tightening and pulling until it comes together.
Find the original knot (in the middle) and start cinching in the rope gently and patiently, one bit at a time, tightening and pulling until it comes together.
Keep going until you have pulled it all together.
Step 10: Tie to a key ring chain
Push the working end through the end of a key ring chain, and secure using another figure eight knot.
Push the working end through the end of a key ring chain, and secure using another figure eight knot.
Step 11: Trim tail
Trim cord and seal the end with the lighter to stop the end fraying, and there you have it!
Trim cord and seal the end with the lighter to stop the end fraying, and there you have it!


Sponsored

Sponsored