


Odour-Free Composting Made Easy
Think composting is too smelly and unappealing? Think again. Here are some tips for simple, odour-free composting

If you saw the excellent documentary War on Waste that aired on the ABC recently, you’ll be aware that as a nation we produce an astonishing 52 million tonnes of waste a year. That’s about two million tonnes per person, and the figure is growing. While about 60 per cent of this rubbish does get recycled, too much of it is still going to landfill, where it leaches toxins into the surrounding land, waterways and groundwater.
The good news is that we all have the power to help reverse this problem. All we need to do is send our organic waste back into the ground from whence it came, rather than letting it ‘disappear’ into landfill. How? By composting! While a lot of people are turned off by the idea of keeping decomposing waste in their home or garden, it’s actually a lot easier, cleaner and more satisfying than many imagine. Here’s how to get started.
The good news is that we all have the power to help reverse this problem. All we need to do is send our organic waste back into the ground from whence it came, rather than letting it ‘disappear’ into landfill. How? By composting! While a lot of people are turned off by the idea of keeping decomposing waste in their home or garden, it’s actually a lot easier, cleaner and more satisfying than many imagine. Here’s how to get started.
All about convenience
Apart from the ‘big picture’ benefits, composting has other advantages: the total volume of your household rubbish will decrease dramatically, so the wheelie bin will be much lighter come bin night. The kitchen bin becomes decidedly more hygienic and pleasant without vast quantities of decomposing vegetable matter, and takes much longer to fill.
Apart from the ‘big picture’ benefits, composting has other advantages: the total volume of your household rubbish will decrease dramatically, so the wheelie bin will be much lighter come bin night. The kitchen bin becomes decidedly more hygienic and pleasant without vast quantities of decomposing vegetable matter, and takes much longer to fill.
A healthy garden
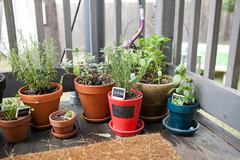
And then there’s the dramatic difference compost can make to the health of your garden. It’s like free fertiliser: adding sufficiently broken-down compost to the soil introduces vital nutrients, and improves the structure of the soil and its water-retention properties. The result? Healthier, more beautiful and more productive plants.
Kick-start your vegie garden
So what can go in the compost bin?
There are three main ways to compost: using a compost bin or heap, a worm farm, or the Bokashi method. Each system is capable of taking a slightly different range of organic matter.
We’ll take a closer look at the specific dos and don’ts of each a little later in the story, but essentially you can collect:
- fruit and vegetable peelings, skins, cores and pips
- egg shells (crush them first)
- leftovers and scraps such as stale biscuits, pasta, rice etc
- coffee grounds, tea bags and tea leaves
Start in the kitchen
Successful composting begins in the kitchen. If adding to the compost is just as simple and painless as throwing rubbish into the bin, you’re more likely to stick with it. And there’s no need to have an ugly container of vegie scraps spoiling the look of your kitchen anymore; there are plenty of nifty ideas for concealing the compost bin, or you can buy an attractive, purpose-designed, caddy that you’ll be proud to show off.
First, let’s take a look at some convenient, odour-free kitchen collection methods.
In-bench bin
Aesthetically, this is the compost collector of your dreams: a lidded stainless-steel pail that’s set into the benchtop, so all you have to do is slide the vegie cuttings across the bench and into the bin below. The lid sits flush with the benchtop and the whole thing looks very neat.
Good to know: This style is easy to include when building a new kitchen or renovating. A carpenter might retrofit one into an existing kitchen if you have a timber or laminate benchtop, but it’s a no-go if you have a stone-topped bench.
Look out for: While it’s visually unobtrusive, this may not be the most practical option. If the collection bucket is hard to remove from its slot in the bench, you’ll be less inclined to use it. Also, because the bucket isn’t ventilated, it may start to smell quicker than some other compost collector styles. Lining the container with paper towel or shredded scrap paper can help increase the air flow and prevent smells building up.
Pull-out bin
Another style that’s easy to incorporate during the planning stages of a new kitchen. A dedicated pull-out drawer fitted with a plastic collection bucket in the prep zone means peelings and scraps can be swiped straight from the chopping board into the compost. This bucket style will hold a decent amount of scraps, meaning you can go a few days before having to empty it outside.
Look out for: The bucket pictured here doesn’t have a lid, which, after a couple of days, could mean a kitchen full of fruit flies.
See more kitchen waste and storage ideas
Chopping board cutaway
Take this idea one step further by incorporating a strategically positioned ‘cut-out’ in your benchtop, and scraps can simply be dropped through to the bin below. Because the bucket is mounted inside a drawer, it’s accessible when you need to add dinner scraps, and easy to take out and empty. Genius.
Take this idea one step further by incorporating a strategically positioned ‘cut-out’ in your benchtop, and scraps can simply be dropped through to the bin below. Because the bucket is mounted inside a drawer, it’s accessible when you need to add dinner scraps, and easy to take out and empty. Genius.
Bin with compostable liner
Some people choose to line their compost bucket with biodegradable plastic bags. This makes carrying out the compost a breeze, keeps the bucket clean and stops it from absorbing nasty odours. There are many types on the market to choose from. However, finding a compostable, plastic-free bag that actually breaks down in your compost heap can be a challenge, and some people say that putting compost into a bag like this can make it decompose into a mushy mess before it has the chance to turn into healthy compost. A good (and cheaper) option could be to line your bucket with old paper bags.
Good to know: Don’t use compostable liners if your ‘outside’ compost system is a worm farm or Bokashi bucket. The worms won’t eat them and the bag will prevent the special Bokashi powder from doing its job. (Learn all about Bokashi below.)
Beside the bin
What could be easier? A pull-out garbage centre with space for recycling, compost, and general waste. Again, be sure to fit the bin with a compost bucket that seals properly and is easily removed.
Tip: Whatever collection method you use, cut your scraps into small pieces before dropping them into the compost bucket. This will help it to break down faster when added to the outdoor composting system.
How to waste less at home
Caddy with an aerated lid
Choosing a compost bin with an aerated lid will assist with air flow and stop your scraps from spoiling in the bucket. There are many purpose-designed, aerated compost collector bins on the market to choose from, and they come in a variety of different materials such as plastic, ceramic and stainless steel, as pictured here. Many come with replaceable charcoal filters so the compost can breathe without releasing offensive odours.
Look out for: A caddy with integrated drainage will help to keep the compost fresh and extend time between emptyings.
Benchtop caddy
If you’d prefer to keep your compost collector readily accessible on the bench, there are plenty of ‘designer’ caddies available – many with integrated aeration and drainage. A benchtop caddy will generally be smaller than an under-bench version (you don’t want it taking up all your work space), and the most functional versions will have a removable pail with a handle so it’s easy to carry outside and rinse clean between uses.
If you’d prefer to keep your compost collector readily accessible on the bench, there are plenty of ‘designer’ caddies available – many with integrated aeration and drainage. A benchtop caddy will generally be smaller than an under-bench version (you don’t want it taking up all your work space), and the most functional versions will have a removable pail with a handle so it’s easy to carry outside and rinse clean between uses.
Composting station
You may prefer the flexibility of having a dedicated composting station pull-out in your kitchen. Here you can store the compost caddy of your choice. It’s neatly hidden away, but you still have the freedom of being able to move it around the kitchen and out into the garden as required. Alongside you could have a spot for your compostable bags (if using) or piles of shredded scrap paper to line the bin with. If you are using the Bokashi method, there’s also convenient storage for your Bokashi powder or spray.
Tip: Don’t put glossy magazine paper in the compost – it won’t break down.
Plastic container in the fridge
Collecting compost doesn’t have to be complicated. If you don’t want to splurge on a ‘special’ collection unit, any large-ish, lidded plastic container will do. Keep it out on the bench during food prep, and pop it in the fridge or freezer to keep the contents fresh and un-smelly until it’s full and ready for emptying. Easy.
Tip: Old plastic ice cream containers are ideal.
Composting methods
Now that you’ve got a workable collection system happening in the kitchen, it’s time to decide what kind of outdoor composting system to use. The method you choose will depend on how much space you have, how much time you’re willing to commit, and what you want to achieve with your compost.
Now that you’ve got a workable collection system happening in the kitchen, it’s time to decide what kind of outdoor composting system to use. The method you choose will depend on how much space you have, how much time you’re willing to commit, and what you want to achieve with your compost.
Compost bin or heap
This is the most common, tried and true method of composting – a big bin in the garden where you toss all you kitchen scraps, lawn clippings, garden waste, raked-up leaves and twigs. They’re great for keeping the place neat and tidy while generating lots of lovely nutrient-rich compost.
What you can put in: Almost any organic matter, except for:
Cons: Must be turned and aerated regularly. Can attract rats and mice. Will get smelly if it gets too wet or doesn’t have enough air.
Create a sustainable garden
This is the most common, tried and true method of composting – a big bin in the garden where you toss all you kitchen scraps, lawn clippings, garden waste, raked-up leaves and twigs. They’re great for keeping the place neat and tidy while generating lots of lovely nutrient-rich compost.
What you can put in: Almost any organic matter, except for:
- Dairy products
- Meat, seafood and bones
- Oils and fats
- Diseased plants
- Weeds that have seeds or underground stems.
Cons: Must be turned and aerated regularly. Can attract rats and mice. Will get smelly if it gets too wet or doesn’t have enough air.
Create a sustainable garden
Tip: If you don’t want to purchase a large plastic bin, you could use a garbage bin or create an open compost heap, as pictured here. The keys to successfully composting this way are to create good drainage so it doesn’t become a soggy mess, and to balance the content – when you add kitchen scraps, be sure to mix in some drier product such as autumn leaves or garden clippings (sawdust, vacuum cleaner dust and dampened newspaper can also be tossed in).
Become a champion composter
Become a champion composter
Worm farm
The perfect solution for apartment-dwellers or those with small gardens. You toss your scraps in, the worms eat them up, and (ahem) poo them out. The worm poo can be sprinkled on pot plants and around the garden to add nutrients to the soil. See the tap? That’s to drain out the worm ‘juice’ – a nutrient-rich by-product – which can be diluted and watered into the garden.
What you can put in: Despite their voracious appetites, worms are slightly fussy eaters. They don’t like:
Cons: You’re dealing with living creatures here so a certain level of commitment and maintenance is required. The amount of scraps you can put in will depend on the temperature, the life-cycle stage of your worms, and a number of other factors. Not for the squeamish!
Inspired? Watch this video: How to make a worm bin for composting
The perfect solution for apartment-dwellers or those with small gardens. You toss your scraps in, the worms eat them up, and (ahem) poo them out. The worm poo can be sprinkled on pot plants and around the garden to add nutrients to the soil. See the tap? That’s to drain out the worm ‘juice’ – a nutrient-rich by-product – which can be diluted and watered into the garden.
What you can put in: Despite their voracious appetites, worms are slightly fussy eaters. They don’t like:
- Onion, garlic, chilli
- Dairy
- Citrus fruit (lemons, limes or oranges)
- Meat, seafood, bones
- Oils and fats
Cons: You’re dealing with living creatures here so a certain level of commitment and maintenance is required. The amount of scraps you can put in will depend on the temperature, the life-cycle stage of your worms, and a number of other factors. Not for the squeamish!
Inspired? Watch this video: How to make a worm bin for composting
Bokashi composting
This is my personal favourite – it’s a super-easy, set-and-forget method of composting that’s ideal for beginners. Toss your scraps in, sprinkle on a spoonful of ‘Bokashi bran’, and shut the lid. No mess, no fuss.
The compost sits on a perforated plate and Bokashi ‘juice’ drains into the bottom of the bucket. This can be extracted via a small tap. Like the worm juice, this stuff is liquid gold for pot plants and garden plants alike. The bran ‘pickles’ all the food scraps, and once you’ve filled the bin, you tip it all into a big hole in the garden and bury it. (You could also add it to a regular compost bin.) The enzymes in the bran make the matter break down very quickly once buried – in about four weeks, it’s broken down into the soil.
What you can put in: This is where Bokashi really shines. It takes all your kitchen scraps except bones and liquids. You can put cheese, fish, meat scraps – all the ‘no-nos’ of other composting systems are allowed to go in Bokashi. This is because the bran ‘pickles’ it and stops it from decomposing.
Pros: It’s compact. You can toss just about all your kitchen scraps in. It’s simple and (until you empty it into the garden) completely odour free. It does not attract rodents. You can keep the bucket indoors or outdoors. Diluted juice can be used as liquid fertiliser.
Cons: You do have to buy the Bokashi bran or spray – the system won’t work without it. You’ll also need to get out the spade every few weeks and dig holes in the garden.
Tell us
If you enjoyed this story, like it, bookmark it, save the photos and share your thoughts about your own composting experiences below. Join the conversation!
More
Read more about living green
Organic waste – that is, biodegradable material such as food, paper, cardboard, lawn clippings and other garden waste – is particularly bad news in landfill. Why? Because when it breaks down, it releases large amounts of the greenhouse gases carbon dioxide and methane. According to the Australian Department of the Environment and Energy, a massive 14 million tonnes of organic waste was generated in Australia in 2010-11. Almost half of this ended up in landfill, releasing an estimated 6.8 million tonnes of carbon dioxide into our environment. Thankfully, composting is a simple way to mitigate production of greenhouse gases, and return much-needed nutrients to the earth.
I hear your hesitation. You’re thinking: “Composting is too much hassle/too gross/attracts flies and rats. It’s easier just to dump those scraps into the bin and let the rubbish man take it all away in his truck once a week.” But composting doesn’t have to be difficult or smelly. In fact when managed properly, composting is fun, rewarding and (it’s true!) incredibly satisfying.