Houzz Logo Print
kerri_bishop2201005

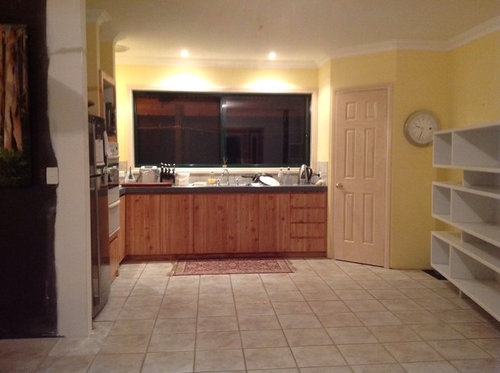
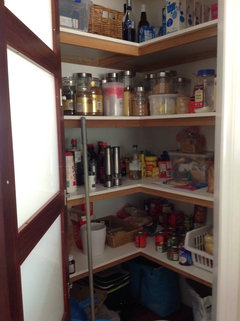
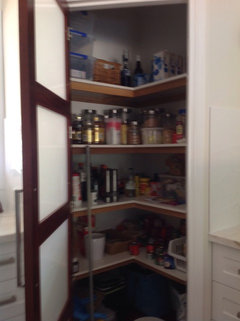
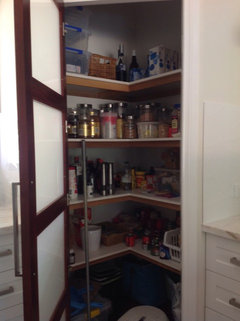
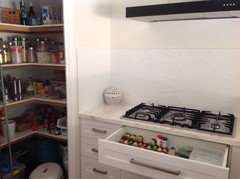
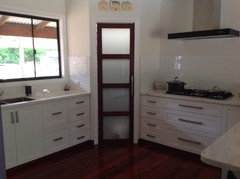
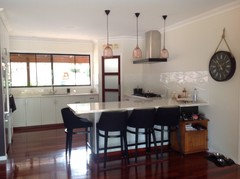
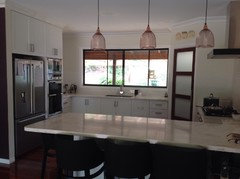
My kitchen......before and after

Kerri Bishop
8 years ago
last modified: 6 years ago

Shaker cupboard doors, jarrah flooring, copper lighting BEFORE

AFTER


Comments (26)

  • flufftop
    8 years ago

    very nice

  • Gioenne Rapisarda
    8 years ago

    Love the pantry door! Can you tell us a bit more, how long this took, how much it cost, etc?

  • mazpt
    8 years ago
    Looks great. I'd love to see some more pics, please.
  • Kerri Bishop
    Original Author
    8 years ago
    Destined buy = designed by
  • Kerri Bishop
    Original Author
    8 years ago
    The cost e clouding floor but including all new appliances approx 22,000
  • Kerri Bishop
    Original Author
    8 years ago
    E clouding = excluding
  • Neryl Hollingsworth
    8 years ago

    How truly wonderful!

  • Jenny
    8 years ago

    I love the floor. Could you please let me know the type & thickness etc ?

  • Kerri Bishop
    Original Author
    8 years ago
    This floor is a "feature jarrah" floor, 13 mm thick, with a 60 gloss finish, costs $120.00 sq. meter to supply, lay and finish
  • Gioenne Rapisarda
    8 years ago

    Great job - thanks for telling us a bit more!!

  • Sarah Dewar
    8 years ago
    Looks great - thanks for sharing info & pics. Well done on great design!
  • Carolyn
    8 years ago

    Looks fantastic, how do you find the corner pantry? We are undecided to put one (only 1m by 1m) in our new kitchen or go for something else in the corner.

  • Kerri Bishop
    Original Author
    8 years ago
    The corner pantry is great, as in this instance it's situated right next to the stove top and it allows me to cook without stepping too far for the pantry. We also changed the way the door opened to accommodate this. Also we have a spice draw directly under the stove top.
  • Deb Xuereb
    8 years ago
    What does the interior of the corner pantry look like? Pic?
  • Kerri Bishop
    Original Author
    8 years ago
    Here are some snaps of the corner pantry and the spice draw below, which is one of the best inclusions in this kitchen.
  • Kerri Bishop
    Original Author
    8 years ago
    Here are some pics of the pantry insides and the spice draw under the cooktop which was the best inclusion into this kitchen.
  • Carolyn
    8 years ago

    Fantastic to see those photos, Kerri. I think that will be the way we are going with our design of the new kitchen, but it is interesting- the kitchen companies (two for quotes) are trying to talk us out of it and put in those fancy corner under-bench pullouts instead, costing more $$$.

  • Carolyn
    8 years ago
    last modified: 8 years ago

    I also meant to say that I really liked the exposed 'feet' to your cabinets, rather than kickboards. They look good.

  • Kerri Bishop
    Original Author
    8 years ago
    We have since installed jarrah kick boards since the first photos.......here are the finished kitchen photos.....the pantry door looks good at night with the light on, it's a bit of a feature . Although these photos are daytime photos you can get the drift with the light on. I thought it was a nice effect. The pull out draws are VERy expensive (although the very modern) I still prefer the pantry cupboard concept, I think it's nicer and more practicable. Good luck, it's not easy making those final kitchen design I decisions.
  • Kerri Bishop
    Original Author
    8 years ago
    The pull outs are very modern but also VERY expensive,.......I prefer the traditional pantry cupboard I think it's more practical, especially if it's placed next to the cooktop. We have installed glass into the door of the pantry and a light inside which is a bit of a feature at night. Although these event photos are at daytime you can still see the effect of the light. We have since installed jarrah Kickboards into the kitchen and these latest photos are of the kitchen finished. Good luck with your kitchen, it's not easily making those last final design decisions.
  • Carolyn
    8 years ago

    Absolutely stunning and the jarrah kickboards finish it beautifully.

  • Jen
    8 years ago

    Kerri - how did you paint the window? I want to do that here and have seen a few methods on youtube. Love to know how you guys did it!

  • Kerri Bishop
    Original Author
    8 years ago

    Hi Jen - I would definitely recommend doing it - I found that the key to successfully painting a window frame is in your prep and taping off. we spent a lot of time ensuring the tape was right on the edge etc. once we had finished taping off, I went to Bunnings and asked for a spray can paint suitable for repainting aluminium window frames. We came home and painted it with 1 spray can. when we peeled off the tape etc. it turned out really well. the paint has not scratched and you cannot tell that it has been painted. this was the first time that we had attempted to repaint a window frame and it turned out well providing you put the effort into masking and taping off correctly letting it dry before removing the tape and sliding the window

  • Jen
    8 years ago

    Thanks Kerri - I'm looking forward to doing this! :)

  • Linda Curry
    7 years ago
    I love your pantry door! I'm not quite ready to spend the money on replacing my Tassie Oak cupboards (although very '90s) but the cedar pantry door my husband painted white could be replaced with one like yours, maybe in Tassie Oak.