How to make a custom wardrobe
You need a wardrobe, but not just any, but one that adapts to specific sizes and formats. Sometimes it is difficult to find in the market that article that we need and that suits our needs.
In this sense, if you like crafts and want to invest a little time, you can do it yourself. We only have simple and common tools and nonexpansive materials. Let's see how to do it step by step and without complications.
What do you need to do it?
Making a custom wardrobe can be a very rewarding experience if you like to make objects. However, you should first consider what you will need to make it. Also, for the style you want, think of a simple model, such as a built-in wardrobe, which will give you great practicality.
Here, you must take the measurements in relation to the place where you will build the closet. We can always seek professional advice from a skilled carpenter or property service provider in Melbourne, Sydney.
Planning
Planning is the keyword when carrying out this type of work. Therefore, it is important to make a schematic drawing and write the measurements on it. Do the same for the doors, considering the type you'll be using. The amount of material you will need to buy will depend on this.
Materials and tools
- To make a built-in wardrobe you will need:
- Guides for cabinet doors, come in a kit.
- Wood in slats.
- Melanin or wood as sheets.
- Metal and plastic studs.
- Jigsaw.
- Router.
- Measuring tape.
- Leveling tool.
- Drill and screwdrivers.
- Rule.
Steps to build your custom wardrobe
Let's see how to build a wardrobe step by step with your own hands. Follow the next steps
Make a drawing on the wall indicating the location of the exterior and interior walls of the closet. Take the height, width, and depth measurements. For this, you can use a level, ruler, and tape measure.
Now you must drill the support woods keeping intervals of about 50 cm or a little less.
Present the strips to make sure they have the right measurements, now drill the wall in the same places. Use a wick according to the wood and the plug that you will use to fix it. Screw to ensure a good fixation. Repeat for each separation.
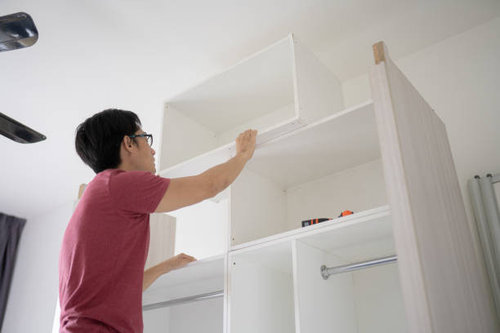
It is time to place the door kit using the plugs that protrude from the wall. Also, place the melanin planks to generate the division.
Arrange the shelves, screw them together by placing them face to face and two by two. The leveling holes must face each other so that the shelves are completely straight.
Cut the shelves with a jigsaw so they are to size and fit perfectly.
It is important to consolidate the structure, for this place a shelf in the central part.
Steps to place the sliding door
Once you have the structure, it is time to install the sliding door
.
The first thing is to place it on the sliding rail, leaving about 2 cm between the outer and upper panel.
You must drill the railing with consecutive holes to place the plastic plugs, then insert them with a hammer.
The screws must not come out of the rail, you must screw the rail firmly.
Screw the doors to the top or roof.
Place the sliding doors, test that they slide correctly.
The construction of cabinets for your home allows you to take advantage of those spaces that we have at home. Do you dare to try? This is a very practical DIY that will save you a lot of money. If you have any questions about custom cabinets or built-in cabinets, do not hesitate to call our carpenters.


Related Discussions
Does anyone make custom wooden rangehoods in Australia?
Q
How can I better use that wasted space at the top of our wardrobes?!
Q
How can I update these wardrobes?
Q
hinged wardrobe questions for internal drawer size
Q